Continued from a few years ago … VueScan is a great scanning app but it has a UI that only an engineer could love. Once you know how to do something, it’s efficient. But it can be hard to figure it out the first time. Multi-Crop is a feature that scans several things at once on the scanner deck and saves each as a separate file. I use this to scan 35mm film negatives, since my scanner can load 12 frames at a time. While this feature is very useful, it took me a while to figure out how it works.
Here, I describe how I use this feature with VueScan 9.7 and my Epson V600. The process should be similar with other scanners.
First, load your media in the scanner. For this, I use the 35mm film negative tray and load 2 parallel strips each having 6 photos. Getting them lined up perfectly is tedious and requires cutting the negative strips with sharp scissors, but essential for good results. I also recommend cleaning the negatives (I use Pec Pads and Pec-12) before mounting them in the tray.
When loading the film, read the fine print along its edge to get the vendor, brand and type. You will set this below, on the Color tab.
Next, turn on the scanner, then start VueScan, and make the right settings:
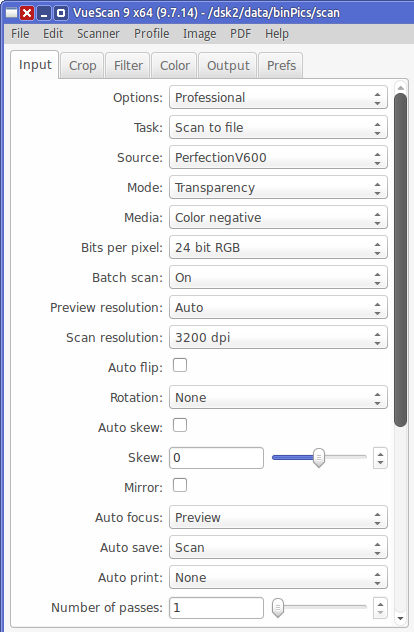
Settings: Input
Important settings:
- Mode: Transparency
- Media: Color Negative
- Bits per pixel: 24 bit RGB
- Batch scan: On
- This will make it scan each cropped sub-image and save as a separate file
- Scan resolution: 3200 dpi
- anything higher is overkill for most film negatives
Snapshot:
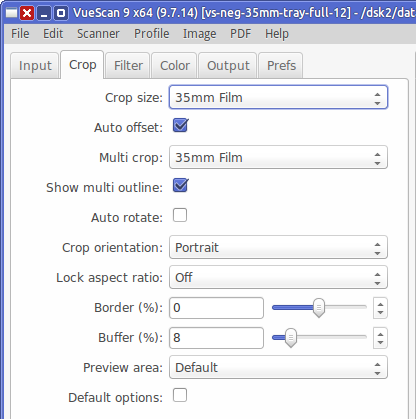
Settings: Crop
Important settings:
- Crop size: 35mm Film
- Auto offset: check
- Multi crop: 35mm Film
- Show multi outline: check
Snapshot:
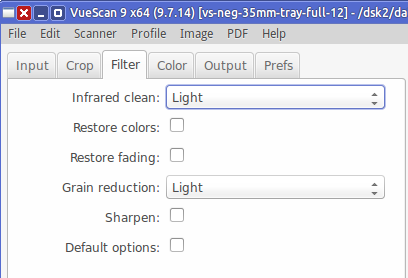
Settings: Filter
All settings to taste or as needed. You can set these for the individual slides in the batch, so whatever you set here are just defaults. I typically use:
- Infrared clean: Light
- Grain reduction: Light
Snapshot:
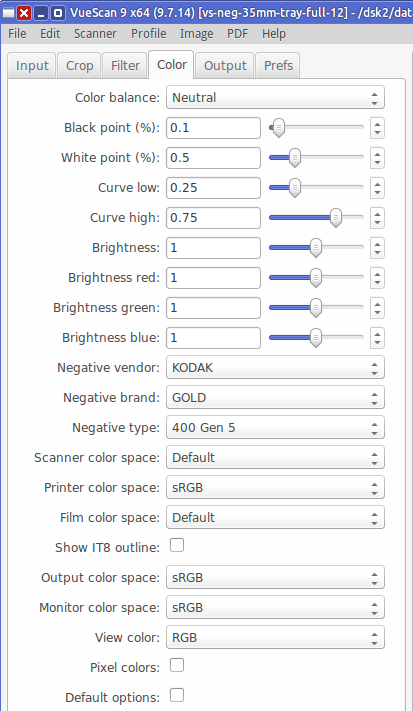
Settings: Color
Like the Filter tab, these are defaults and you can change them for individual slides. I typically use:
- Color balance: Neutral
- Black point: 0.1%
- White point: 0.5%
- Curve low: 0.25
- Curve high: 0.75
- Brightness: 1
- negative vendor: from actual film type
- negative brand: from actual film type
- negative type: from actual film type
Screenshot:
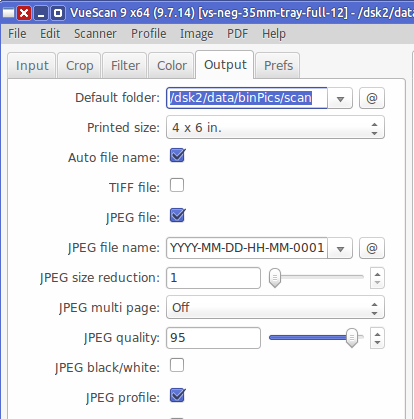
Settings: Output
Important settings:
- Default folder: make sure it exists
- Else VueScan won’t save the pictures and it won’t give you any error message.
- Auto file name: check
- JPEG, quality 95
- anything higher is overkill for most film negatives
Screenshot:
Settings Complete!
Now you’re done with setup. Select File/Save options and save these settings. Give them a name like “35mNegBatch”. In the future, load these settings and skip all the above steps.
Start Scanning
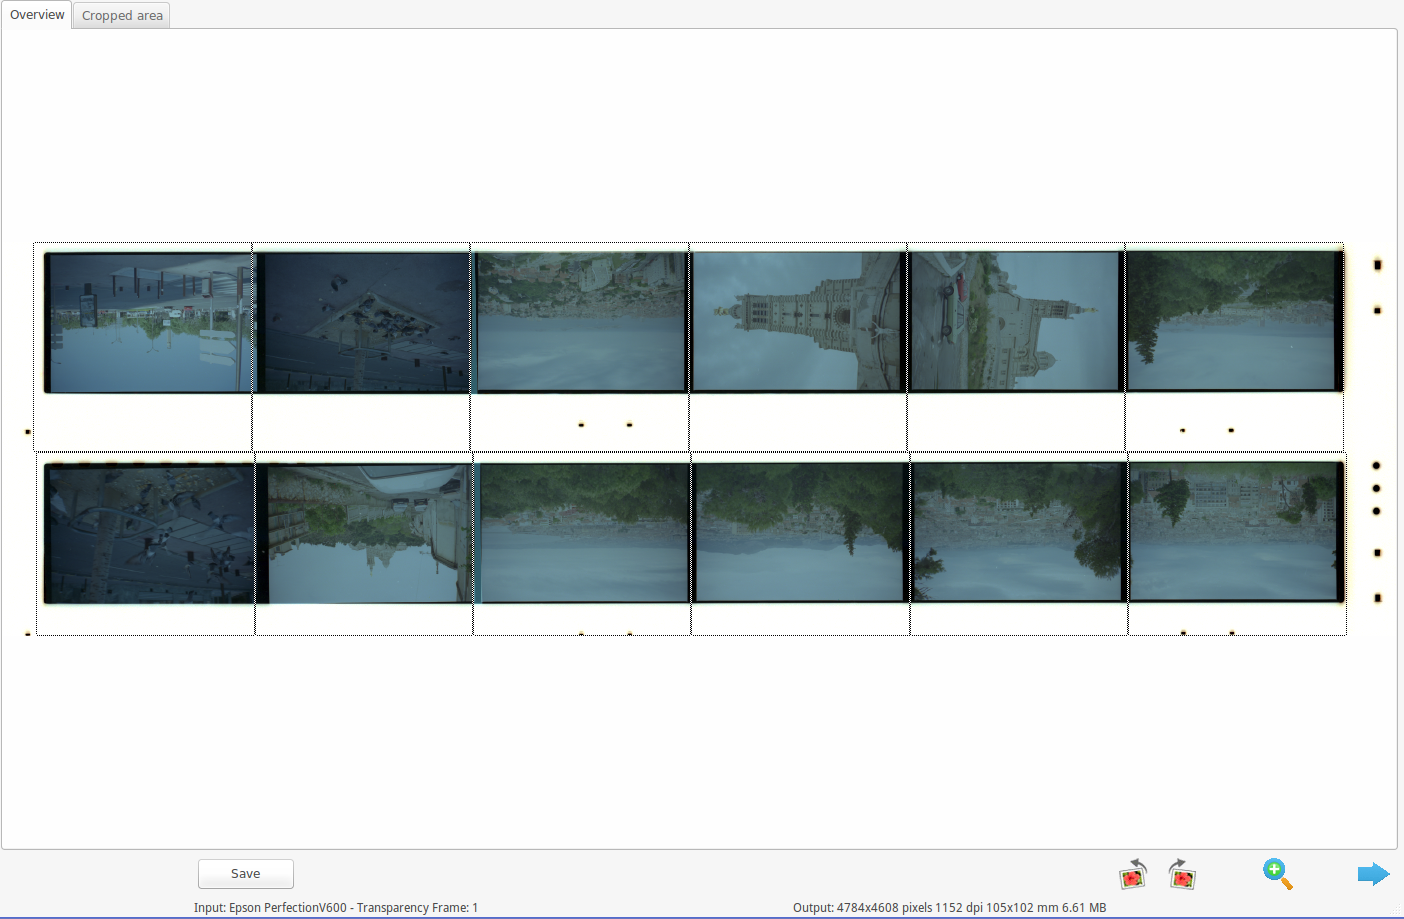
Hit the Preview button (lower left area of the screen). VueScan will scan, then a grid will appear in the scan overview area. It shows a dotted line rectangle over each of the slides. It won’t be perfectly lined up, but as long as it’s reasonably close it’s OK because you’ll fix that next.
You’ll see something like this:
Note: if it’s not even close, or if you haven’t filled the entire tray and you don’t want to waste time scanning blanks, you can go to the Crop tab and select Multi crop: Custom. Then do your own layout (rows, columns, sizes). That’s a different topic I might cover some other time.
Now back to the grid of scanned slides…
- Note the blue <- and -> arrows at the bottom right of the screen
- Located to the right of the image zoom magnifying glass buttons
- These move the focus forward and back across the different images of the multi-crop.
- Click the left <- button until it disappears; this moves to the 1st image.
- When focused on each image, VueScan remembers the settings you make for that image.
Repeat the following steps for each image:
- It’s not always clear which of the 12 pictures has the current focus, but zooming in and out will show you. So…
- Click the magnifying + and – buttons (lower right of UI) repeatedly to center the current image.
- After doing this, you see something like this:

- In the image preview, click inside the image near a corner, then drag a rectangle to mark the crop area to contain the image.
- As you do this, the image colors will change as VueScan applies the Color settings to the portion of the image that is being captured inside the crop rectangle.
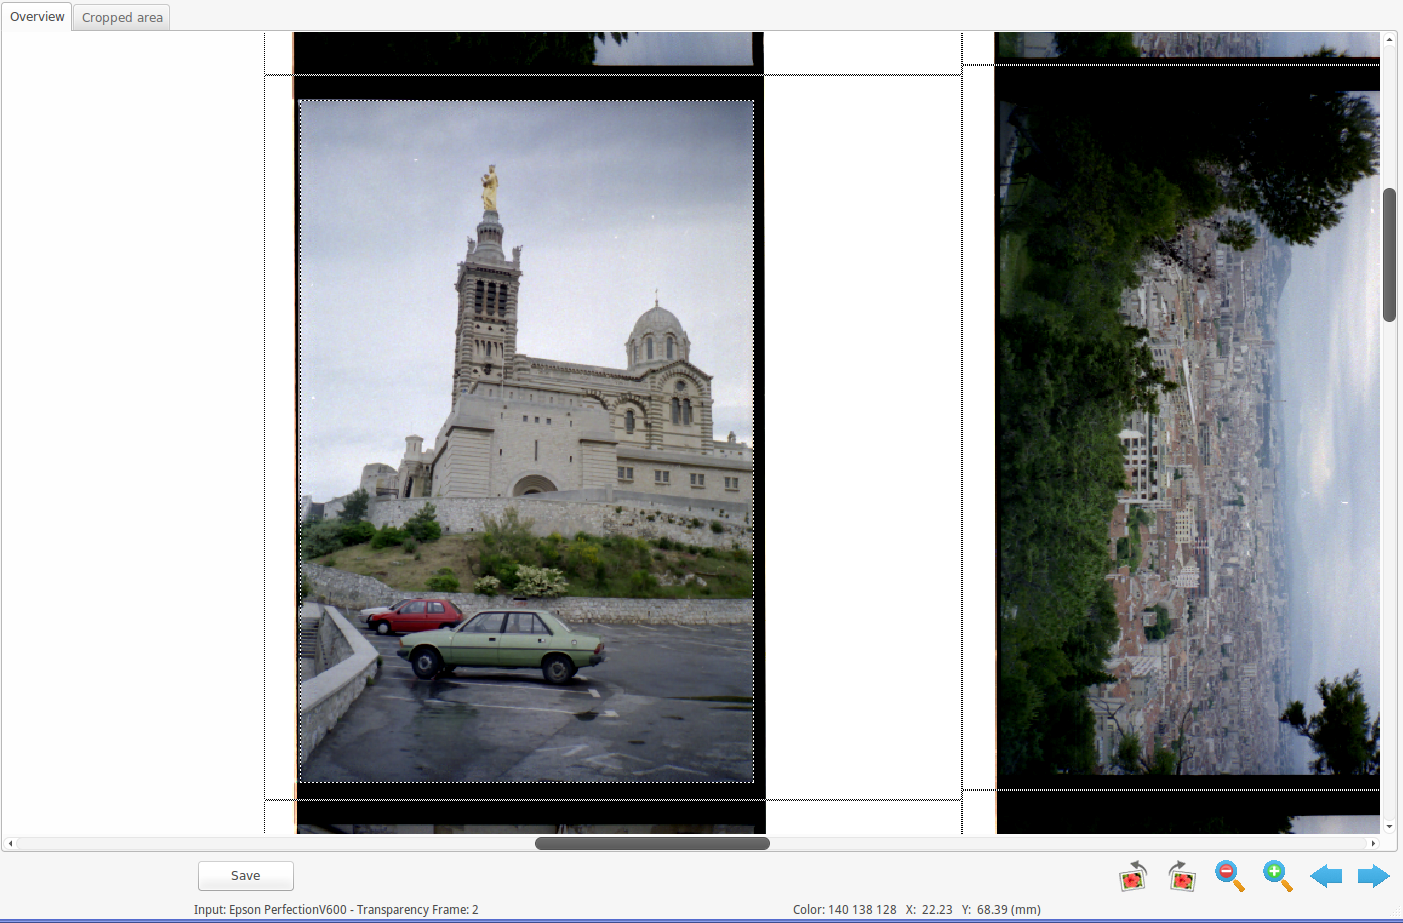
- Now the screen looks something like this. You can see the dotted line rectangle around the image, and that the colors have improved (but they’re still washed out).
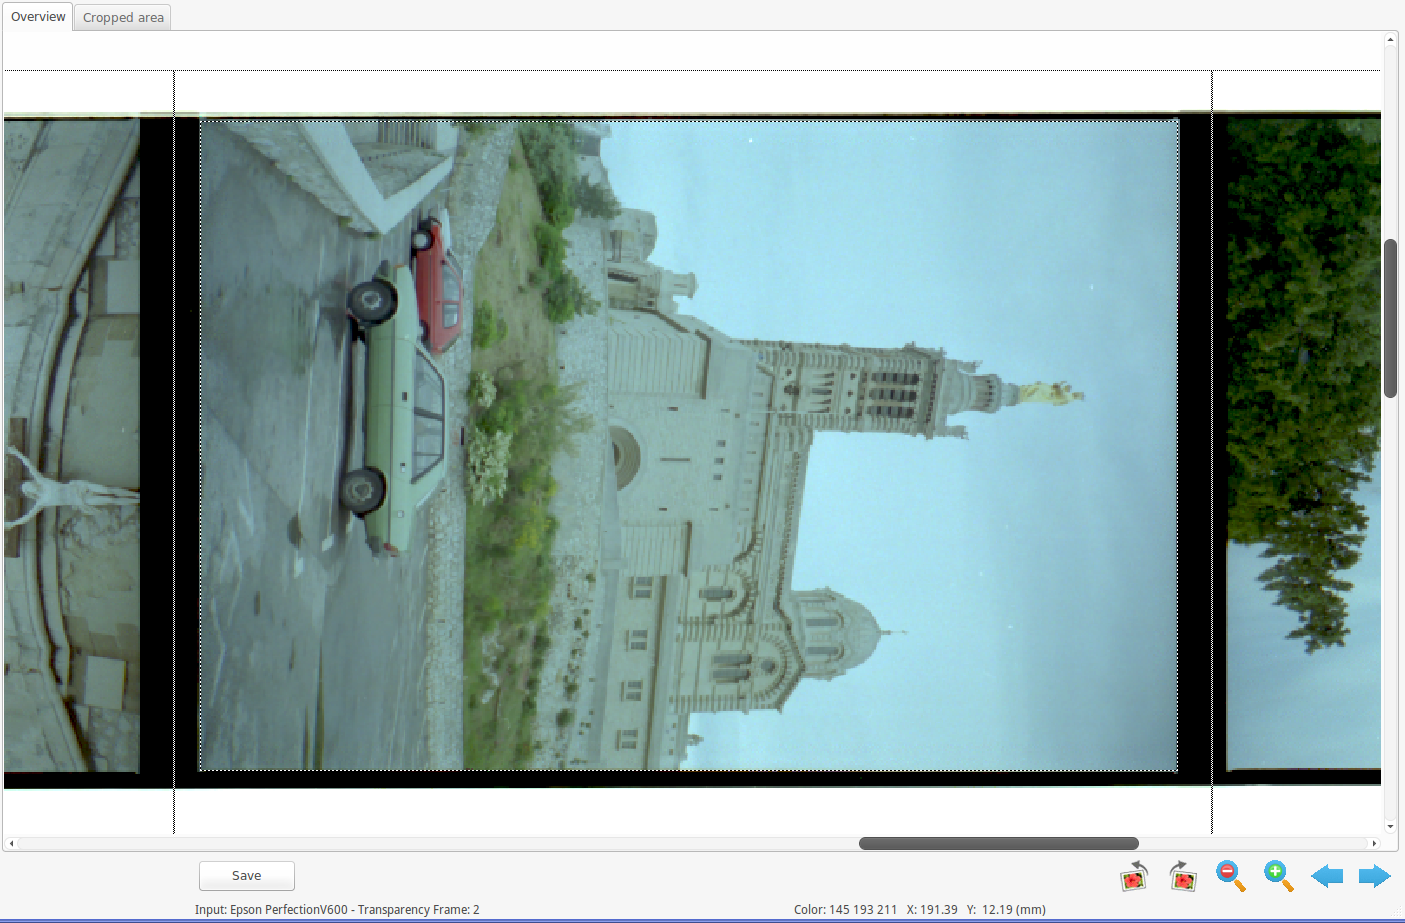
- If needed, click the rotate buttons (lower right of UI) or Image|Mirror (menu item) to ensure the image is oriented correctly.
- Now the screen looks like this:
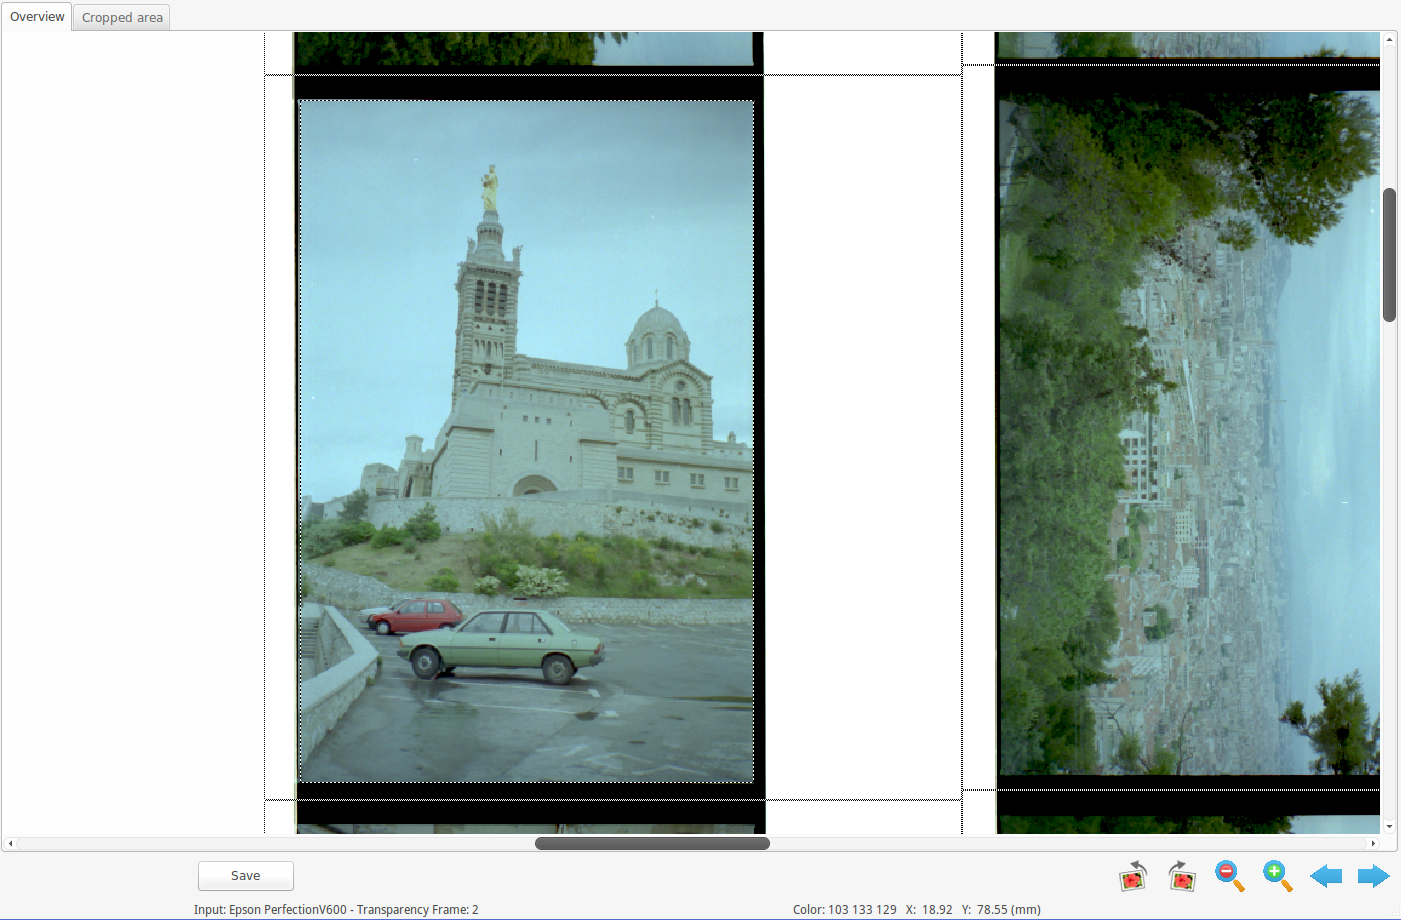
- Images on old film (like this one) often look washed out. To fix this, go to the Filter tab and check either Restore colors, or Restore fading (whichever looks better).
- Now the screen looks like this:
- Go to the Color tab to fine-tune the picture’s exposure.
- This is optional; if you’re happy with how the picture looks, skip this step.
- The key controls for this are:
- Color balance: Neutral, Landscape, etc.
- Black point: what % of the pixels are mapped to black (lowest intensity).
- White point: what % of the pixels are mapped to white (highest intensity).
- Curve low & high: set the shape of the contrast curve
- Low and high are the 25th and 75th percentiles
- If you set them to .25 and .75, you get a 1:1 linear mapping
- To increase mid-intensity contrast, at the expense of losing detail in the darkest and lightest parts of the image: increase the low, decrease the high
- After the image looks good, click the blue next -> arrow to focus on the next image.
When you’re done, click the previous <- arrow to review each of the images. VueScan will show each picture with its individual settings, so you can ensure they are all correct.
Now click the “Scan” button at the bottom left of the screen. VueScan will scan each image, which (with my Epson GT-X820 / V600) can take about 3 minutes per image (over 30 minutes for a deck of 12). This is fully automatic so you can walk away and come back later to check the results.
With the above settings, with my scanner, for each photo, VueScan produces a JPG file having approximately 4500×3000 resolution, about 2-4 MB in size (about 13-14 megapixels). This is plenty of resolution for typical 35mm film photos. But you may want to increase that if your photos came from professional equipment.