Cessna 172 Rear Seat Removal

Why?

Removing the rear seat significantly increases the cargo space, which opens up new mission possibilities. For example, I can normally fit 1 bicycle in the back of the plane, but with the rear seat removed I can fit 2 bicycles. This makes it possible to take a friend and make cross-country trips to explore some of the best bicycling across the pacific northwest.

Regulations

For my 1980 172 (built in 1979), the POH equipment list does not mark the rear seat as required, so the airplane is airworthy with, or without, the rear seat. But can a pilot remove the rear seat himself? FAA regulations part 91 section 43 governs the maintenance pilots can perform. Appendix A, (c) says:

(c) Preventive maintenance. Preventive maintenance is limited to the following work, provided it does not involve complex assembly operations: 
...
(15) Replacing seats or seat parts with replacement parts approved for the aircraft, not involving disassembly of any primary structure or operating system.

The rear seat comes out with 4 simple bolts and nothing has to be disassembled. To get the rear seat out of the airplane one of the front seats has to be removed, then reinstalled. This can be done without any tools at all.

Conclusion: it is legal to fly the airplane without the rear seat, and it is legal for a pilot to remove and install it.

Of course, this changes the weight & balance. So the pilot removing/replacing the seat must note the removal/replacement in the airframe logs, citing the above paragraph as his authority and the maintenance manual as his reference. Also use the weight/arm info from the equipment list to make appropriate modifications to the empty weight/arm of the aircraft in his W&B computations for flights with the seat removed. And, of course, the pilot would have to be sure that at most only two people were in the plane when it is being operated.

How-To

So now that we know it’s legal, how do we actually do it? It turns out to be quick and easy.

Before you start it looks like this:

Step 1: remove one of the front seats

This makes room to remove the rear seat from the airplane, and you can reinstall it afterward. I removed the right / co-pilot seat.


Review: JDS Labs Subjective 3 Equalizer Kit

Summary

No Jedi’s training is complete until he constructs his own light saber. Audiophiles can benefit from this advice, as building audio gear is fun and educational, and improves our understanding and appreciation of this hobby. When it comes to building I’m very much an amateur, but I have some experience, having designed & built a passive attenuator and constructed a phono head amp in years past.

JDS Labs has a simple 3-band EQ they call the Subjective 3; they sell it as a product, and as a kit. The kit saves you $20 and gives you the fun & satisfaction of building it yourself. I couldn’t resist. Here’s a review.

My System

My desktop audio system is decent but not SOTA. My desktop PC (Ubuntu 18) is the player; it has an ESI Juli@ sound card, whose coax digital output goes to an SMSL SU-6 DAC, whose analog output goes to a JDS Atom amp. I listen on my 20+ year old Sennheiser HD580s, sometimes on Audeze LCD-2F.

Why not use DSP EQ like PulseEffects? I do in fact use this software. But sometimes I am capturing the audio stream to a file and want a bit-perfect copy without PulseEffects messing with it (resampling, applying DSP). And while the PulseEffects multi band parametric EQ is a precision tool for accommodating the response to rooms and headphones, sometimes all you need to do is tame an overly bright or dull recording, in which case a simple old fashioned 2 or 3 knob equalizer is simpler & easier to use.

JDS Subjective 3 Kit

I ordered the kit and it arrived in 2 days (that was the cheapest shipping available). JDS says it is simple and a good first kit for those who want to dip their toe in the DIY water. I agree with this assessment, with caveats that I’ll mention below.

Here’s how the kit arrives:It includes all parts including the power supply (not shown), and the parts are of high quality: Alps RK09 potentiometers, Vishay and WIMA capacitors.

Installing the Parts
Soldering

Assembly is straight-forward. The instructions simply say, “insert all capacitors, solder and trim”. This may sound daunting for noobs, but each part is bagged with a part number that is also printed on the circuit board where it plugs in. Find each number on the board and plug in the corresponding part.

The key here is to use a soldering iron with a very fine tip and relatively low power (12 W). Avoid cold solder joints. That is, heat up the parts to be joined until the solder melts when touching those parts — not the soldering iron tip itself. Use just enough solder to sink and seep through the hole, but not so much that it makes a glob.

Here’s what it looks like after installing the capacitors and power switch:

Position and Fit

Some of the parts soldered to the board must match holes in the case when assembled: knobs and switches. If they ride too high or low on the board, the case won’t fit. When I was checking this alignment, I noticed that the case is asymmetric. It looks symmetric at a glance and the asymmetry is subtle, so this would be worth mentioning in the instructions. A picture’s worth 1,000 words, and I reversed the faceplate and case to highlight the difference:

At first, I didn’t notice this and when I checked alignment, it looked like I needed to solder the power switch and potentiometers in a position slightly above resting flat on the board, in order for them to line up with the holes in the case. But it turns out this is not necessary. Solder them flat to the board and use the faceplate as your clue that the “long” distance is the bottom of the case.

Installation: Complete

Here’s the board with installation complete: two views of the top and one of the bottom:

The above photo shows 2 important things: fine soldering, and grounding.

Fine Soldering

Each potentiometer has 8 contacts, 6 of which are in a tight grid. Soldering these can be tricky for those wielding an iron for the first time. Start with the middle contacts and work your way outward. Hold the iron near vertical so it doesn’t accidentally contact other stuff on the board. Be careful to use just enough solder to fill the hole without forming a glob that could touch the nearby pins.

Grounding

In the above left you can see that one (but not both) of the signal grounds is wired to the frame. This is something I discovered years ago through trial & error troubleshooting pesky ground loops when I was building a passive attenuator, and also on a phono head amp that I built. If neither signal ground is connected to frame, you can get a ground loop causing a “hum”. Also, if both are connected to frame. But if only 1 is connected to frame and the other is not, it helps break ground loops.

Assembly: Complete

Here’s what the completed kit looks like up close, with my JDS Atom amp:It’s quite small, even smaller than the JDS Atom which itself is a small amp. Here’s what it looks like with the headphones (you can see the wooden headphone stand I made years ago):

Listening

I powered it up, no smoke — great! I played some music with the tone knobs in the center detent, switching back and forth between “EQ” and “Bypass”. There should be no difference in the sound. Indeed they were almost identical. But there seemed to be a very slight difference. In Bypass mode I heard just a hint of “grain” or “edge”, especially in the upper mids / lower treble where our hearing perception is most sensitive. This was the opposite of my expectation, which was that if there was any difference at all, bypass mode would be more transparent. I was playing a very high quality recording of 5 voice ensemble, which highlights midrange purity, revealing distortion quite well.

Our hearing perception is not reliable enough to trust, but it’s not wrong often enough to ignore. So I put the EQ in a loop with my Juli@ card and used REW to take some measurements. Maybe I’m just hearing things, it’s not really there. Or maybe I made a mistake in the build. Either way, measurements would give a helpful baseline.

Measurements
Baseline

My Juli@ card is the baseline and it is not perfect, so let’s look at its FR and distortion. I played 48 kHz sweeps in REW at digital -1 dB for this:Frequency response is flat with << 0.1 dB variation. The bump above 20 kHz seems to be an REW anomaly. It has a slight channel imbalance which at < 0.05 dB is immaterial. Distortion and noise are mostly -90 to -100 dB, which is the limit for 16-bit.

Subjective 3 EQ: Bypass

Against this baseline, let’s see what the Subjective 3 looks like. First, bypass mode:Frequency response is perfect, no difference from the loopback. But we have quite a bit of distortion and noise! At about -60 dB it is likely inaudible, but it is approaching thresholds where it might become audible under ideal worst-case conditions.

Subjective 3 EQ: Frequency Response

Now let’s flip the switch the EQ mode with all the knobs in their center detents.

Here are 3 measurements of the L channel. In between measurements, I rotated each of the tone control knobs several times through its full range then re-centered it to the detent for the measurement. This reveals how consistent it is.

Note: the Y scale is 0.5 dB per division in order to reveal small differences. Red is left, Green is right, just like a boat or airplane.Here are 3 measurements of the R channel, taken the same way:Each shows variations around 0.25 dB. I’m pretty happy with that, it’s about as good as analog potentiometers get. These differences in consistency should be inaudible. Here are the average responses of each, shown together.Channel balance is essentially perfect below 2 kHz, at which point it gradually increases to a max of about 0.25 dB at 20 kHz with the L being slightly stronger.

So the consistency of the knobs, and the L-R channel balance, are each within about 0.25 dB.

Subjective 3 EQ: THD+Noise

Now let’s see if that increased noise we measured in bypass mode, is also there with EQ enabled:Nope! That’s good news. In EQ mode, it doesn’t add any distortion or noise. Of course, no device is perfect. But whatever it does add is below the levels of my sound card and thus masked and inaudible. JDS Labs publishes a THD+N specification of .0022% which is about -93 dB. We have at least that here.

Subjective 3 EQ: Response Curves

Now let’s see what the tone control knobs actually do to frequency response. I measured each knob at its half-way positions, negative and positive. This is approximate, as I can only eyeball the half-way position. So in the graph below, the curves + and – variations aren’t quite the same, but the important thing is the shape of the curve which shows the frequencies each of the knobs changes:

Obviously, blue is bass, green is midrange, and red is treble. And of course I had to zoom out the Y-axis, which is now 2 dB per division in order to keep the curves on-scale. These curves match nicely to the documentation.

Conclusion

The JDS Labs Subjective 3 EQ is a nice little kit. It is inexpensive, uses high quality parts and is easy to build with clear instructions. It sounds and measures clean and transparent in EQ mode. It has good consistency and channel balance. The knobs have a lot of range; just turning from 12:00 (center detent) only “1 hour” to 11:00 or 1:00 makes a noticeable difference. This makes the knobs quite sensitive and the full range is far more than I’ll ever use.

The only real drawback is that bypass mode introduces a fair bit of distortion. At -60 dB it’s close to thresholds of inaudibility, but may become perceptible on certain kinds of well engineered recordings on very high quality playback gear. That said, this issue is unique to bypass mode; the S3 EQ is consistent and clean enough to simply leave powered on in EQ mode all the time.

Note: I contacted JDS Labs in case the distortion in bypass mode was due to a mistake I made in building or measuring this device. They confirmed that it is known, and they’re revising the board to fix this. As I write this update it is Feb 2022 and they just sent me the revised board and parts so I can build another one. I’ll report back soon…

The problem is fixed. The S3 in standby mode now measures the same as a loopback connector, as it should. No more added distortion. In active mode (turned on) it is the same as before. JDS will be shipping this revised version soon.

Here’s the new board. I couldn’t simply solder the 2nd relay into the board, because 2 pairs of pins had to be reversed. So I wired it individually in order to cross pins 4-5 and 8-9. That was tricky for someone with only moderate soldering skills like myself. In production boards, this relay can be soldered directly into the board just like the one next to it, much easier.

Headphones: HD580 vs. LCD-2F

I’ve been listening to headphones for decades. Over the years I’ve tried many different ones. The Sennheiser HD580 and Audeze LCD-2F are my favorites. I own a pair of each and use them daily. This is a direct comparison.

Sennheiser HD580

I bought my pair in 1999. Over the years I’ve replaced the pads and cable several times, and kept the drivers clean. They still work like new.

They aren’t made anymore, but three models currently made are almost the same:

  • Sennheiser HD600
  • Massdrop 58x
  • Massdrop 6xx

Audeze LCD-2F (Fazor)

I bought mine in 2014 with the original Fazor drivers. Then in 2016 I sent it to Audeze to replace the drivers with the lastest/revised version.

Fit & Comfort

The HD580 are smaller, lighter, and better ventilated. They stay in place as I move my head around. I can wear them all day without any discomfort.

The LCD-2F are bigger, heavier, and less ventilated. They stay in place as long as my head is upright but if I bend my head forward & down, they try to fall off. They are comfortable, but after 2-3 hours the weight (especially on the headband) begins to drag.

In this category the HD580 wins.

Efficiency and Impedance

The HD580 are rated at 330 ohms, but their impedance ranges from 300 through most frequencies, rising to a peak of 600 ohms at 100 Hz. Voltage sensitivity is on the low side at 0.17 V for 90 dB SPL. A phone can’t drive them properly, you’ll need a headphone amp. And if that headphone amp (or phone) has a high output impedance, it will boost tones near the impedance peak (around 100 Hz) making the headphones sound warmer.

The LCD-2F are 70 ohms at all frequencies; being planar magnetic, their impedance vs. frequency curve is flat. Voltage sensitivity is a bit higher than the HD580 at 0.11 V for 90 dB SPL. They play 3-4 dB louder than the HD580 at the same volume setting (voltage). A phone can almost but not quite drive them properly, you’ll need a headphone amp. The frequency response of these headphones will not be affected by the amp’s (or phone’s) output impedance.

Overall, the LCD-2F are easier to drive than the HD580, and you may get acceptable results driving them from a phone, but you’ll need a headphone amp to get the most out of either.

Sound Quality

HD580

  • Bass: rolled off below 100 Hz
  • Midrange: smooth and linear
  • Treble: rolled off above 10 kHz
  • Distortion very low, but high (5%) in the bass
  • Voicing: a slight brassy/boxy coloration

LCD-2F

  • Bass: smooth and linear to subsonic
  • Midrange: smooth and linear
  • Treble: dip at 4 kHz
  • Distortion very low throughout (even in the bass)
  • Voicing: open, transparent uncolored

Summary

The LCD-2F has near-perfect ruler flat response from subsonic through the upper mids (to around 2 kHz). In the treble, it has the Audeze “house sound” with a dip around 4 kHz, though compared with the rest of the LCD models it has the smallest dip and is the most neutral. If you don’t EQ this dip, the sound is a bit soft — yet not dark, as the treble from 7 kHz on up is not attenuated.

The HD580 has a more linear, neutral response through the treble, though it rolls off both the lowest bass and the highest treble. The HD580 also needs EQ to lift the bass below 100 Hz, but when you do, the bass sounds wooly or soft as distortion becomes audible.

Overall, these are 2 of the best headphones money can buy in terms of sound quality. Of course you can spend a lot more, but you can’t really get much better sound. Without EQ, I prefer the HD580, yet with EQ, I prefer the LCD-2F.

That said, the differences are small enough that you need really good recordings and a quiet listening environment to hear it. And the HD580 is less expensive, more comfortable, and has less need of EQ. So it is the value king: 90% of the sound quality for 20% of the price.

Mazda 3 Suspension

Summary

The Mazda 3 is a popular car and here I’ll describe a suspension setup that really transforms and improves its handling.

Background

I like to tweak things, but I also believe in “if it ain’t broke, don’t fix it”. Last year I installed a stiffer rear swaybar in my 2014 Mazda 3 (3rd generation) to reduce understeer and improve handling. It works nicely. Later, when replacing the tires I discovered the left rear wheel well had a film of greasy oil. This often indicates the shock has failed and is spewing its internal oil. That was all the excuse I needed to replace the shocks & springs

Research

The Mazda 3 has lots of suspension options: shocks, springs, coilovers and sway bars. Many of them are not focused on performance, but appearance — e.g. lowering. For example, the Eibach springs sold by Tire Rack are actually softer than OEM! I wanted the car to be firmer than stock. By that I mean less body roll, and to a lesser extent, less squat and dive. But I did not want to change the car’s front to rear balance. I already had a stiffer rear sway bar that effectively reduced oversteer. If the car ended up a bit lower, that is OK if the difference is an inch or less, but lowering is not my goal.

Springs & Shocks

Racing Beat has a set of springs that +20% stiffer than OEM, front and rear. From what I gather, the OEM spring rates are about 138 in-lb. front and 174 in-lb. rear. The Racing Beat springs are 162 front and 211 rear. And they are bright red in color. That may be a pro or con, depending on your perspective.

I opted for Koni Yellow shocks, which are adjustable. The fronts can be adjusted with a simple knob turn while installed. To adjust the rears, they must be removed from the car, fully compressed and rotated. The softest setting on these shocks is firmer than OEM. I set them “blind” at 1/3 of the way up from the softest setting, so just below the halfway point. This turned out to be perfect.

The car sits about 1/2 inch lower in the rear, 3/4 inch lower in the front. Not a big difference, but you can see it if you look for it.

Installation

The job took all day but it wasn’t hard. The only special tool you need is a spring compressor. These aftermarket parts fit perfectly like OEM, and their quality was OEM or better. After completing it, I took the car in for an alignment check. It was still perfect – swapping the shocks and springs did not change the alignment.

Test Drive

I quickly realized that the car was transformed. It wasn’t as stiff as the RX-7 and Panoz Roadster that I used to race in SCCA. At high speed, like cruising down the freeway at 80 mph, the car feels as solid as a brick house, like a Lexus or Mercedes sedan. In the corners, it’s a precise steering flat-tracker with eager quick turn-in. Typical of FWD cars, it has throttle-off oversteer and throttle-on understeer. It’s very street-able yet with more responsive handling.

I set the adjustable rear swaybar back to its stiff setting (3x the stock rate), and it was even better. With the OEM shocks & springs, this gave the car an unsettled dartiness so I kept the swaybar on the soft setting (2x the stock rate). But with the new suspension this was completely gone and the car is absolutely perfect on the stiff setting.

Conclusion

If you have a Mazda 3 this is a great suspension setup for performance.

Aviation, Lycoming, Mixture, Efficiency, Cruise Flight

Flying my Lycoming O-360-A4M powered Cessna 172-N, I learned through experience something that should be in the POH, but is not. It’s about fuel efficiency during cruise.

These engines are conservatively rated (180 HP from 360 cubic inch displacement), designed to operate continuously at or near full power, and their 2700 RPM redline is a prop limitation, not an engine limitation. Also, at cruise altitude full power is a smaller fraction of their rated power; for example, at 10,000′ the air is so thin, a normally aspirated engine can only produce about 70% power. All this is to say, when cruising above 5,000′ MSL, you can run the engine at WOT. This is considered normal operation; the POH cruise tables support this configuration. It is not hard on the engine, in fact, these engines are designed to run best at or near WOT properly leaned.

However, you shouldn’t run it at WOT, but slightly less. Here’s why, based on 2 reasons:

The carburetor for this engine (and for the O-320-D2J it had before) has an enrichment circuit that mechanically engages at WOT. This adds a margin of safety against detonation, with a minimal loss of power since the power vs. mixture curve is asymmetric, tapering slowly on the rich side, steeply on the lean side.

The intake manifold for this engine is immediately downstream of (fed from) the carburetor. On any engine having a single carb upstream from an intake manifold, the A/F ratio to each of the cylinders will never be exactly the same. There will always be one cylinder that is slightly richer or another slightly leaner, than the others. This A/F balance across the cylinders is “mostly even” but exactly how even varies depending on the throttle position & mixture.

These 2 factors combine to form an important aspect of engine operation that should be (but isn’t in) in the POH. The carburetor’s WOT enrichment circuit impairs the distribution of mixture to the cylinders. When it engages, it increases the difference between the richest & leanest cylinder. This means, in order to avoid roughness (the leanest cylinder running rough), you must set the mixture richer than it otherwise would be when this circuit is not engaged.

You might wonder, why not apply WOT, then lean the mixture to compensate for the enrichment circuit? You certainly can do this. The problem is, the mixture setting will be richer than it would be, if the enrichment circuit weren’t engaged.

Put differently: when you pull the throttle back from WOT just enough to disengage the enrichment circuit, the mixture distribution across the cylinder is more even. There is less of a difference between the richest and leanest cylinder. Thus, the mixture setting for any equivalent power level (peak, 50 RPM below peak, or whatever) is leaner.

The difference is significant: about 15%. That is, if you fly at WOT and lean the engine properly, you will burn about 15% more fuel than if you pull the throttle back from WOT just enough to disengage the enrichment circuit. The POH tables reflect non-WOT operation, so at WOT you will burn 15% more fuel than the POH indicates. That is, if the POH says 8 gph, you will actually burn about 9 gph.

Procedure: High Speed High Altitude Cruise

So what is the best procedure for high speed high altitude (above 5,000′) cruise?

  1. Apply WOT.
  2. Gradually lean until slightly rough.
  3. Very slowly pull the throttle back.
  4. Since the engine is already lean, when the enrichment circuit disengages the engine will suddenly get much leaner, and you will get a sudden drop in RPM and increase in roughness.
  5. Leave the throttle in this position, then enrich mixture to desired setting, typically peak RPM, or 50 RPM below peak.

Typically, step (4) happens about 1/2″ back from WOT.

Maxxix Rambler Review & Road Test

Read here for background. I love my MTB, it is a fantastic bike with great knobby tires for rough technical riding. But for long gravel rides I needed a tire that is lighter with less rolling resistance. The Schwalbe G-One allrounds did not work, having multiple failures that made me walk back from rides. So I tried the Maxxis Rambler.

It comes in 2 styles: EXO/TR with 120 TPI, and Silkshield with 60 TPI. The latter is a bit heavier and more rugged. I opted for the former. They are size 650-47, which fits 27.5″ wheels. They have a directional tread pattern, but the directional arrows on the sidewalls are subtle and could be easily overlooked. They weigh 550 and 551 grams on my scale, which is a bit heavier than their specification. By comparison, the DHR/DHR weigh 900 / 820 grams respectively, and the G-One allrounds weighed 626 grams each. The 47mm width means you’ll probably have the widest tires of anyone showing up for that gravel ride. But it’s perfect for typical MTB rims; any narrower may cause problems with fit or tire shape. And for light weight and minimum rolling resistance, you don’t need it any wider.

They mounted easily on my Reynolds AR carbon wheels. I used 2.5 oz of Stan’s in each tire, and I also apply the sealant between the tire bead & rim. But they didn’t want to seat, not only requiring a compressor, but also removing the valve stem core to increase airflow volume. Once seated, fit & seal were perfect.

I rode them a couple of hundred miles, a mix of pavement & gravel. No flats or other problems, and I could feel that they were a bit lighter and faster than the knobby tires. I tried a few different pressures and ended up with 37 rear, 30 front being about ideal. After this initial success, due to their generous 47mm width, I wanted to test them on more rugged terrain, so I rode them on Tiger Mountain. That turned out to be a mistake!

Tiger is a steep, rugged, network of trails for intermediate & advanced riders. My route is only 13.5 miles, but it’s over 2,000′ of climbing. For the first half, things were going well. The Ramblers did great on the uphill, including 25%+ grades where lesser tires might have slipped. They lost traction a few times in downhill turns and obstacles where the knobbies would have gripped. But they were predictable and controllable, no crashes. About 9 miles into the ride, I heard the dreaded shwoosh of a tubeless tire going flat.

I stopped and inspected the rear tire. It had a gash over an inch long, on the sidewall running radially from the bead to the tread. The sealant spewed out within seconds. The tire was too damaged to remove the valve core and put a tube inside. It was destroyed. So I walked the last 4.5 miles, pushing my bike.

Lesson learned: Maxxis Ramblers are good for converting your MTB into a gravel bike. But don’t let their width & tread fool you into thinking they can be used on rugged MTB terrain. OTOH, perhaps the heavier Silkshield version would have held up.

Schwalbe G-One Allround Tire Review & Road Test (Garbage!)

In early 2020 I was preparing to ride the Oregon Trail Gravel Grinder, a 5-day stage ride based in Sisters, OR. My road bike won’t make that gravel ride, and with 7 bikes in the garage I did not want yet another bike. So I decided to ride it on my mountain bike. However, the heavy knobby tires that work so well on rough terrain are not optimal for gravel. They are just not efficient enough, especially for doing 350 miles in 5 days.

Note: these are tubeless wheels, Reynolds Carbon AR, size 27.5″ / 650 / 584.

Gravel rides are a “thing” now, so there are lots of tire options. After reading a bunch of reviews I opted for Schwalbe G-One Allround tires. They make 2 sizes for my bike: 40-584 and 57-584 (note: 584, 650 and 27.5″ are all the same wheel size, just different ways of measuring it). One seemed a bit too skinny (40mm = 1.6″), the other a bit too fat (57mm = 2.24″). I wasn’t sure which would be best so I ordered a set of each.

First, I installed the wide ones. They installed and sealed neatly without the need for my compressor. Rode them around the block, pumped them up to 5 PSI below max. They held pressure overnight and I rode them the next day on a gravel road (John Wayne Trail from Rattlesnake Lake toward Snoqualmie Tunnel). Ran about 35 PSI rear, 30 PSI front. They did fine and I could feel how much lighter and faster they were.

Failure the First

Next ride, I hit the Snoqualmie Valley Trail. About 40 miles in, I could hear the rear wheel losing air. It had a puncture with sealant spraying out. The sealant eventually did its job and I finished the ride (10 more miles) and made it home. I inspected the tire from the outside, there was no obvious damage, so I removed the valve stem and added another ounce of sealant to replace what it had lost.

Failure the Second

The OTGG was cancelled due to COVID, so I flew out to Moab to meet Stefan for some biking. On day 1, riding the easy Bar M Loop Trail, the front tire flatted. Sealant spewed out, then after a long moment it did its job. I used my hand pump to replace some of the lost pressure and we finished the ride.

Failure the Third

Now it was 2021 and I was preparing to ride the Cascade Gorge Grinder that had been cancelled the prior year. So I installed the skinny G-One Allround tires. At least, I tried to. After completing the first and inflating it to 5 PSI below max pressure, I set it aside to work do the second. About 10 minutes later, BANG! The tire I had set aside blew off the rim. Upon inspection, the bead had ruptured internally without any exterior evidence of cuts or damage. I use only smooth plastic tire “irons”. Chalk it up to manufacturing defect.

So I reinstalled the fat ones.

Failure the Fourth

Next ride, I went out on the same pavement that I ride my road bike. After a few miles I heard the familiar dreaded sound of the rear tire losing pressure and spewing sealant. This time, it never sealed. I stopped and rotated the rear wheel so the puncture was at the bottom so the sealant could gather there. All the sealant (I use 2 full ounces) spewed out and it went completely flat. I had to walk home.

Conclusion

Schwalbe’s G-One Allround tires are so fragile they repeatedly puncture, even on paved roads that my road bike can handle with 700×23 tires. They seem to impair sealant from doing its job, and I also encountered a manufacturing defect that caused one to blow off the rim even when seated and sealed, and below its max recommended pressure.

Needless to say, I’m never buying Schwalbe tires again. I’ve never had these problems with Maxxis tires (knock on wood!).

Note: I’m now using Maxxis Ramblers size 47-584 on this bike, for gravel rides. Fingers crossed!

For knobbies I’ve used Maxxis Ardents, and now use the DHF / DHR combo. Both have been great; good traction, easy installation and no flats. Of course, they’re heavy with higher rolling resistance. But when you need rugged knobbies, those aspects are less important and these are great tires.

Firefox and Audio Streaming

I use my desktop computer as an audio source for music listening. Listening to high quality (lossless) music over the browser, I’ve explored different browsers and how they deal with audio. This is on Ubuntu 18 Linux with Pulseaudio. I’ve set up the audio to avoid resampling as much as possible.

I tried about 10 different browsers on Ubuntu. Every one but Firefox resamples audio to some fixed rate, either 44.1 or 48 kbps. Firefox is the only one that passes audio through unmolested. Or, at least it used to. Primephonic is a classical music streaming service that passes audio uncompressed at whatever rate the albums were recorded (from 44.1 to 192 kHz).  I could listen to different albums and watch Pulseaudio change the sampling rate to match whatever rate each was recorded. At least until some time in Feb 2021, when Firefox’s behavior changed.

Here’s a summary of the changes:

Firefox now ignores the audio stream’s native rate and attempts to stream it at the highest rate the system will support. This means it will resample the audio rather than play it at its native rate.

If Pulseaudio’s avoid-resampling is set to true, then that rate will always be the highest rate the system supports. For example, with my Juli@ sound card it is 192 kHz. Otherwise (avoid-resampling set to false) that rate is the highest rate Pulseaudio is configured to use. That is either default-sample-rate or alternate-sample-rate, whichever is higher.

So in order to listen to music on Firefox without resampling, you must:

  • Set both of Pulseaudio’s rates to the native rate of the stream you are playing.
  • Set Pulseaudio avoid-resampling to false.

Essentially, you are forcing the system to play all audio at a single rate that exactly matches the audio you are playing.

And indeed, the irony is that in order to avoid resampling, you must set avoid-resampling to false!

Incidentally, why the irony? I can only speculate. Cubeb, the audio engine in Firefox, asks Pulseaudio what is its highest sampling rate. If Pulseaudio is avoiding resampling, then it reports its highest rate to be the highest rate the audio card supports. But if Pulseaudio is resampling, then it reports its highest rate as whatever rate it is resampling everything into. Seems logical. But it ironically leads the reverse of the intended behavior. The root of the problem is cubeb. It should pass audio to the system at its native rate, and let the system deal with it. Cubeb is being too smart by half, trying to deal with that itself.

High Res Audio on Ubuntu: Part 3

Once we’ve got it all set up, we want to test it while playing audio. It’s the only way to know for sure it is working as expected. To do this, we’ll be using the Linux Pulseaudio command-line tool pacmd.

If you jumped directly to this page, you may want to read part 1 and part 2.

Once you’ve tested your setup, possibly made adjustments, and confirmed they are working, you may want to read about streaming audio from a browser.

Basic Audio Device Info

To start, enter this command:

pacmd list-sinks

A “sink” is an audio output device. Even if you only have 1 sound card in your system, it may support multiple sinks. And you may have multiple cards. So you may see a lot of output here.

Let’s use grep to shrink the output to only the fields most useful to us:

pacmd list-sinks | grep -e 'sample spec:' -e 'channel' -e 'buffer' -e 'latency:' -e 'name:' -e 'alsa\.card'

On my system, it returns this:

name: <alsa_output.pci-0000_04_02.0.analog-stereo>
current latency: 0.00 ms
sample spec: s32le 2ch 176400Hz
channel map: front-left,front-right
fixed latency: 185.76 ms
alsa.card = "1"
alsa.card_name = "ESI Juli@"
device.buffering.buffer_size = "262144"
device.buffering.fragment_size = "70560"

This tells you I have an ESI Juli@ sound card that is currently set to 176.4 kHz sampling and 32-bit signed. My Pulseaudio configuration uses sample rates of 176400 and 192000, so this is the default sample rate. This is 4x oversampled for normal CD quality (44.1 kHz) and 4x oversampled for normal DVD quality (48 kHz).

Now I play an audio file that happens to be sampled at 96 kHz. While it’s playing I run the above command again and it returns this:

name: <alsa_output.pci-0000_04_02.0.analog-stereo>
current latency: 170.65 ms
sample spec: s32le 2ch 192000Hz
channel map: front-left,front-right
fixed latency: 185.76 ms
alsa.card = "1"
alsa.card_name = "ESI Juli@"
device.buffering.buffer_size = "262144"
device.buffering.fragment_size = "70560"

You can see that Pulseaudio has changed the sample rate to 192 kHz. Why? I have “avoid resampling” enabled, so it should play at the audio file’s native rate of 96 kHz. But Pulseaudio will never use a sample rate lower than what you configure. Since it can’t use 96 kHz, it uses the next best thing, which is an integer multiple of the native rate. That is why it switches to 192 kHz.

Resampling

The above command showed us the current state of the audio device. We can also use pacmd to get the current state of any audio being sent to or processed by that device.

First, ensure no audio is playing on your system and then enter this command:

pacmd list-sink-inputs

You should see this response:

0 sink input(s) available.

Now, try the prior command again:

pacmd list-sinks| grep -e 'sample spec:' -e 'channel' -e 'buffer' -e 'latency:' -e 'name:' -e 'alsa\.card'

You will see something like this:

name: <alsa_output.pci-0000_04_02.0.analog-stereo>
current latency: 0.00 ms
sample spec: s32le 2ch 192000Hz
channel map: front-left,front-right
fixed latency: 185.76 ms
alsa.card = "1"
alsa.card_name = "ESI Juli@"
device.buffering.buffer_size = "262144"
device.buffering.fragment_size = "70560"

This tells you that the audio card is in a certain state, but there is no data or input being sent to that card.

Now play an audio file of any kind, and while it’s playing, repeat the above commands. In my case, I played a CD file (44.1 kHz, 16-bit) and get the following:

First, the card itself:

pacmd list-sinks| grep -e 'sample spec:' -e 'channel' -e 'buffer' -e 'latency:' -e 'name:' -e 'alsa\.card'

This returns:

name: <alsa_output.pci-0000_04_02.0.analog-stereo>
current latency: 185.75 ms
sample spec: s32le 2ch 176400Hz
channel map: front-left,front-right
fixed latency: 185.76 ms
alsa.card = "1"
alsa.card_name = "ESI Juli@"
device.buffering.buffer_size = "262144"
device.buffering.fragment_size = "70560"

You can see the card switched to 176.4 kHz sampling, because the source is 44.1 kHz and it wants to use an integer multiple for resampling.

Now let’s check the status of the audio being sent to the device:

pacmd list-sink-inputs

Now you see a bunch of output. As above, let’s use grep to filter it down to the essentials we care about:

pacmd list-sink-inputs | grep -e 'sample spec:' -e 'resample method:' -e 'application\.name'

Now we see something like this:

sample spec: float32le 2ch 44100Hz
resample method: soxr-vhq
application.name = "VLC media player (LibVLC 3.0.8)"

Here we see that the source is coming from VLC (my media player), sampled at 44.1 kHz and the system is resampling it using the soxr-vhq method.

Now let’s play an audio file that happens to exactly match one of our system’s sampling rates (in my case, 176.4 kHz or 192 kHz). And then re-run this command. We get:

sample spec: float32le 2ch 192000Hz
resample method: copy
application.name = "VLC media player (LibVLC 3.0.8)"

Look at the resample method: copy. This means Pulseaudio is not resampling the audio, but is directly copying the stream from the source to the sink without resampling it. This is an important test: it tells you when the system is resampling audio.

Conclusion

So, now we know how to test our audio settings, see how the audio card is currently configured, and also check the audio stream being played. Also, whether audio is being resampled, and if so, using what resampling method, and the source and target sample rates.

As a general guide to resampling:

  1. No resampling is always best
  2. Resampling at integer multiples is better (faster, more transparent) than fractional
  3. Up-sampling is more transparent than Down-sampling

Conclusions we can draw from this

  • In Pulseaudio, set your primary and secondary rates to 44100 and 48000
    • This enables all rates from low (CD / 44100) to high to play without resampling
    • These rates are minimums, so if you set them higher, low rates (like CD) will be up-sampled
  • Avoid resampling wherever possible
  • If you must resample, upsample by integer multiples
  • If you must resample by a non-integer multiple, sample up rather than down
  • All resamplers are not created equal. Use the best quality resampler your system supports.
    • First choice: soxr-vhq
    • Next best: speex-float-10

MTB / Mountain Bike: Fezzari Timp Peak

I’ve been riding bikes of all kinds since the 1980s and done some big rides. But the Fezzari Timp Peak I bought in late 2014 was the first really good mountain bike I owned. I got this bike to ride Kokopelli’s Trail with Bikerpelli in 2015. Great ride! This bike has also proven itself on some of the biggest, hardest rides in the country, like the Oregon Trail Gravel Grinder, 350+ miles and 30,000′ of climbing.

Carbon frame, carbon wheels, SRAM XX1, dual suspension, dropper seat, weighing 25-26 lbs. ready to ride. It’s been a great bike but no bike is perfect and they all require maintenance. Here are some of of the problems I’ve encountered and how I solved them.

Some of these issues are basic recurring maintenance. Others are caused by using aluminum or weak alloys in critical parts instead of appropriate materials like steel or brass.

SRAM Sticky Brakes

The first problem was the dreaded SRAM sticky brakes. The brake lever pistons gradually grow (yes they physically get larger!) and get stuck in the cylinder. In my case it took a few years to happen. Here is my fix. That worked for a year or so, then they got sticky again. At that point instead of sanding down the pistons again, I replaced them with aftermarket metal pistons. These have perfect fit & function, came with the o-rings, and fix the problem permanently.

Since then I’ve overhauled the levers with the complete rebuilt kit. This includes all-new seals and pistons, among other things. It made a big improvement so I’ll be repeating this every 3-5 years.

Frame Suspension Pivot Bushing

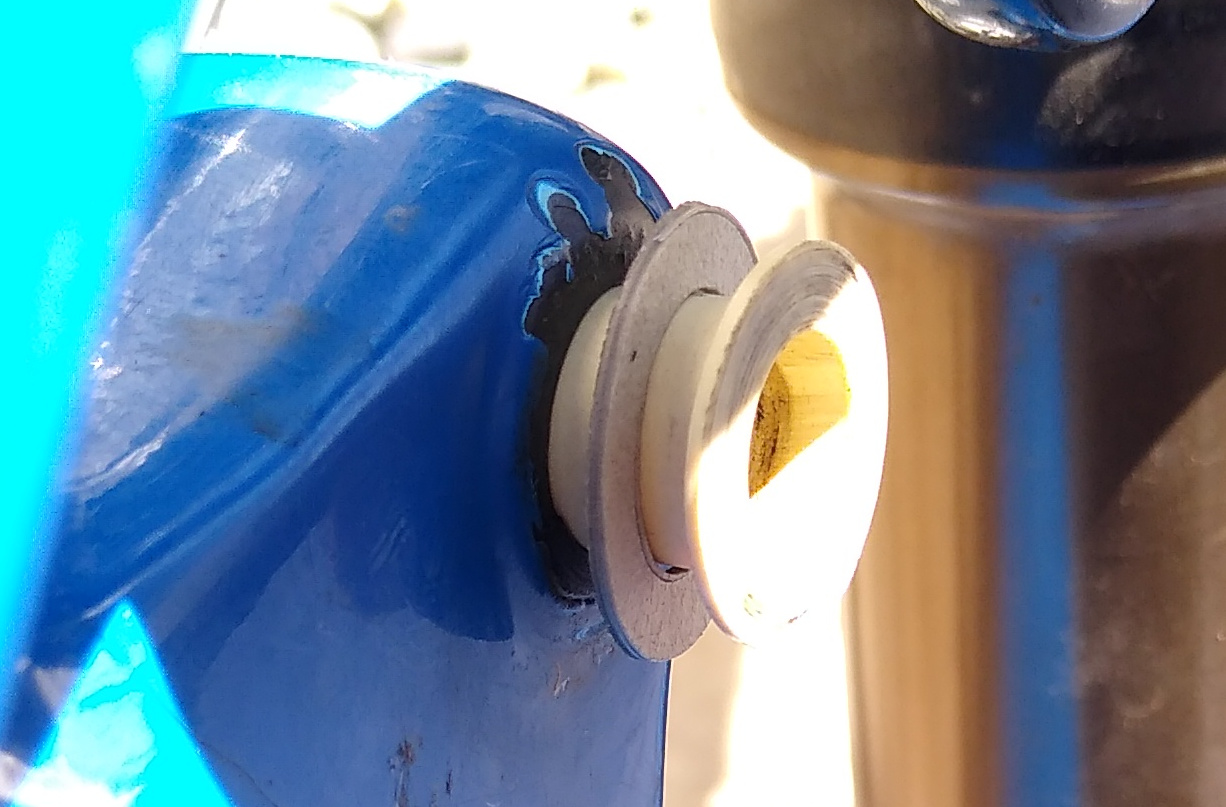
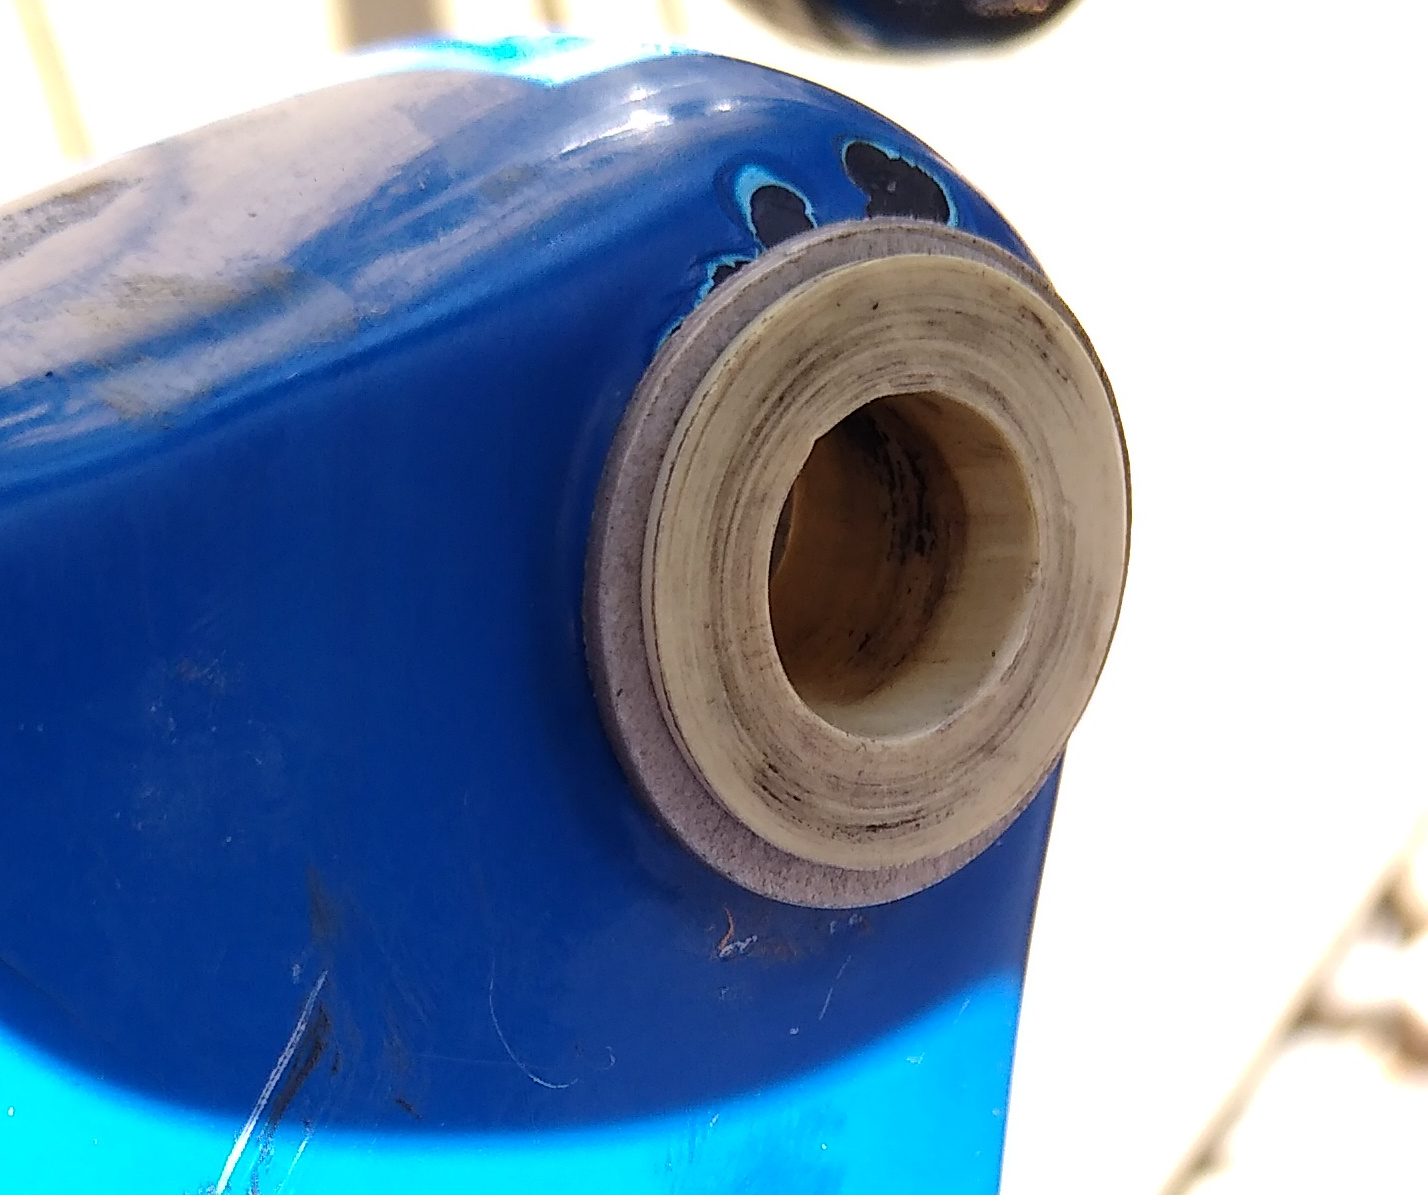
After a few years, the frame developed a bit of play. Most of the frame suspension pivots use bearings, which I serviced (cleaned, re-greased). But one of them uses a bushing, and that’s where the play developed. Over time the bushing wears and needs replacing. I contacted Fezzari and they told me:

The bushings at the main rocker pivot are IGUS L289 sleeve bushings. The part number for them is LFM-1012-06. The “-06” part of this part number is in reference to the bushing length which is 6mm.

However, what I would recommend trying is a bushing with a 10mm or 12mm bushing length (part no. LFM-1012-10 & LFM-1012-12, https://www.igus.com/product/?artnr=LFM-1012-10). It will allow for a bit more overlap with the frame and should help reduce the play.

I ordered that part, 12mm size. It fit perfectly and the frame is like new again. Actually, better than new!

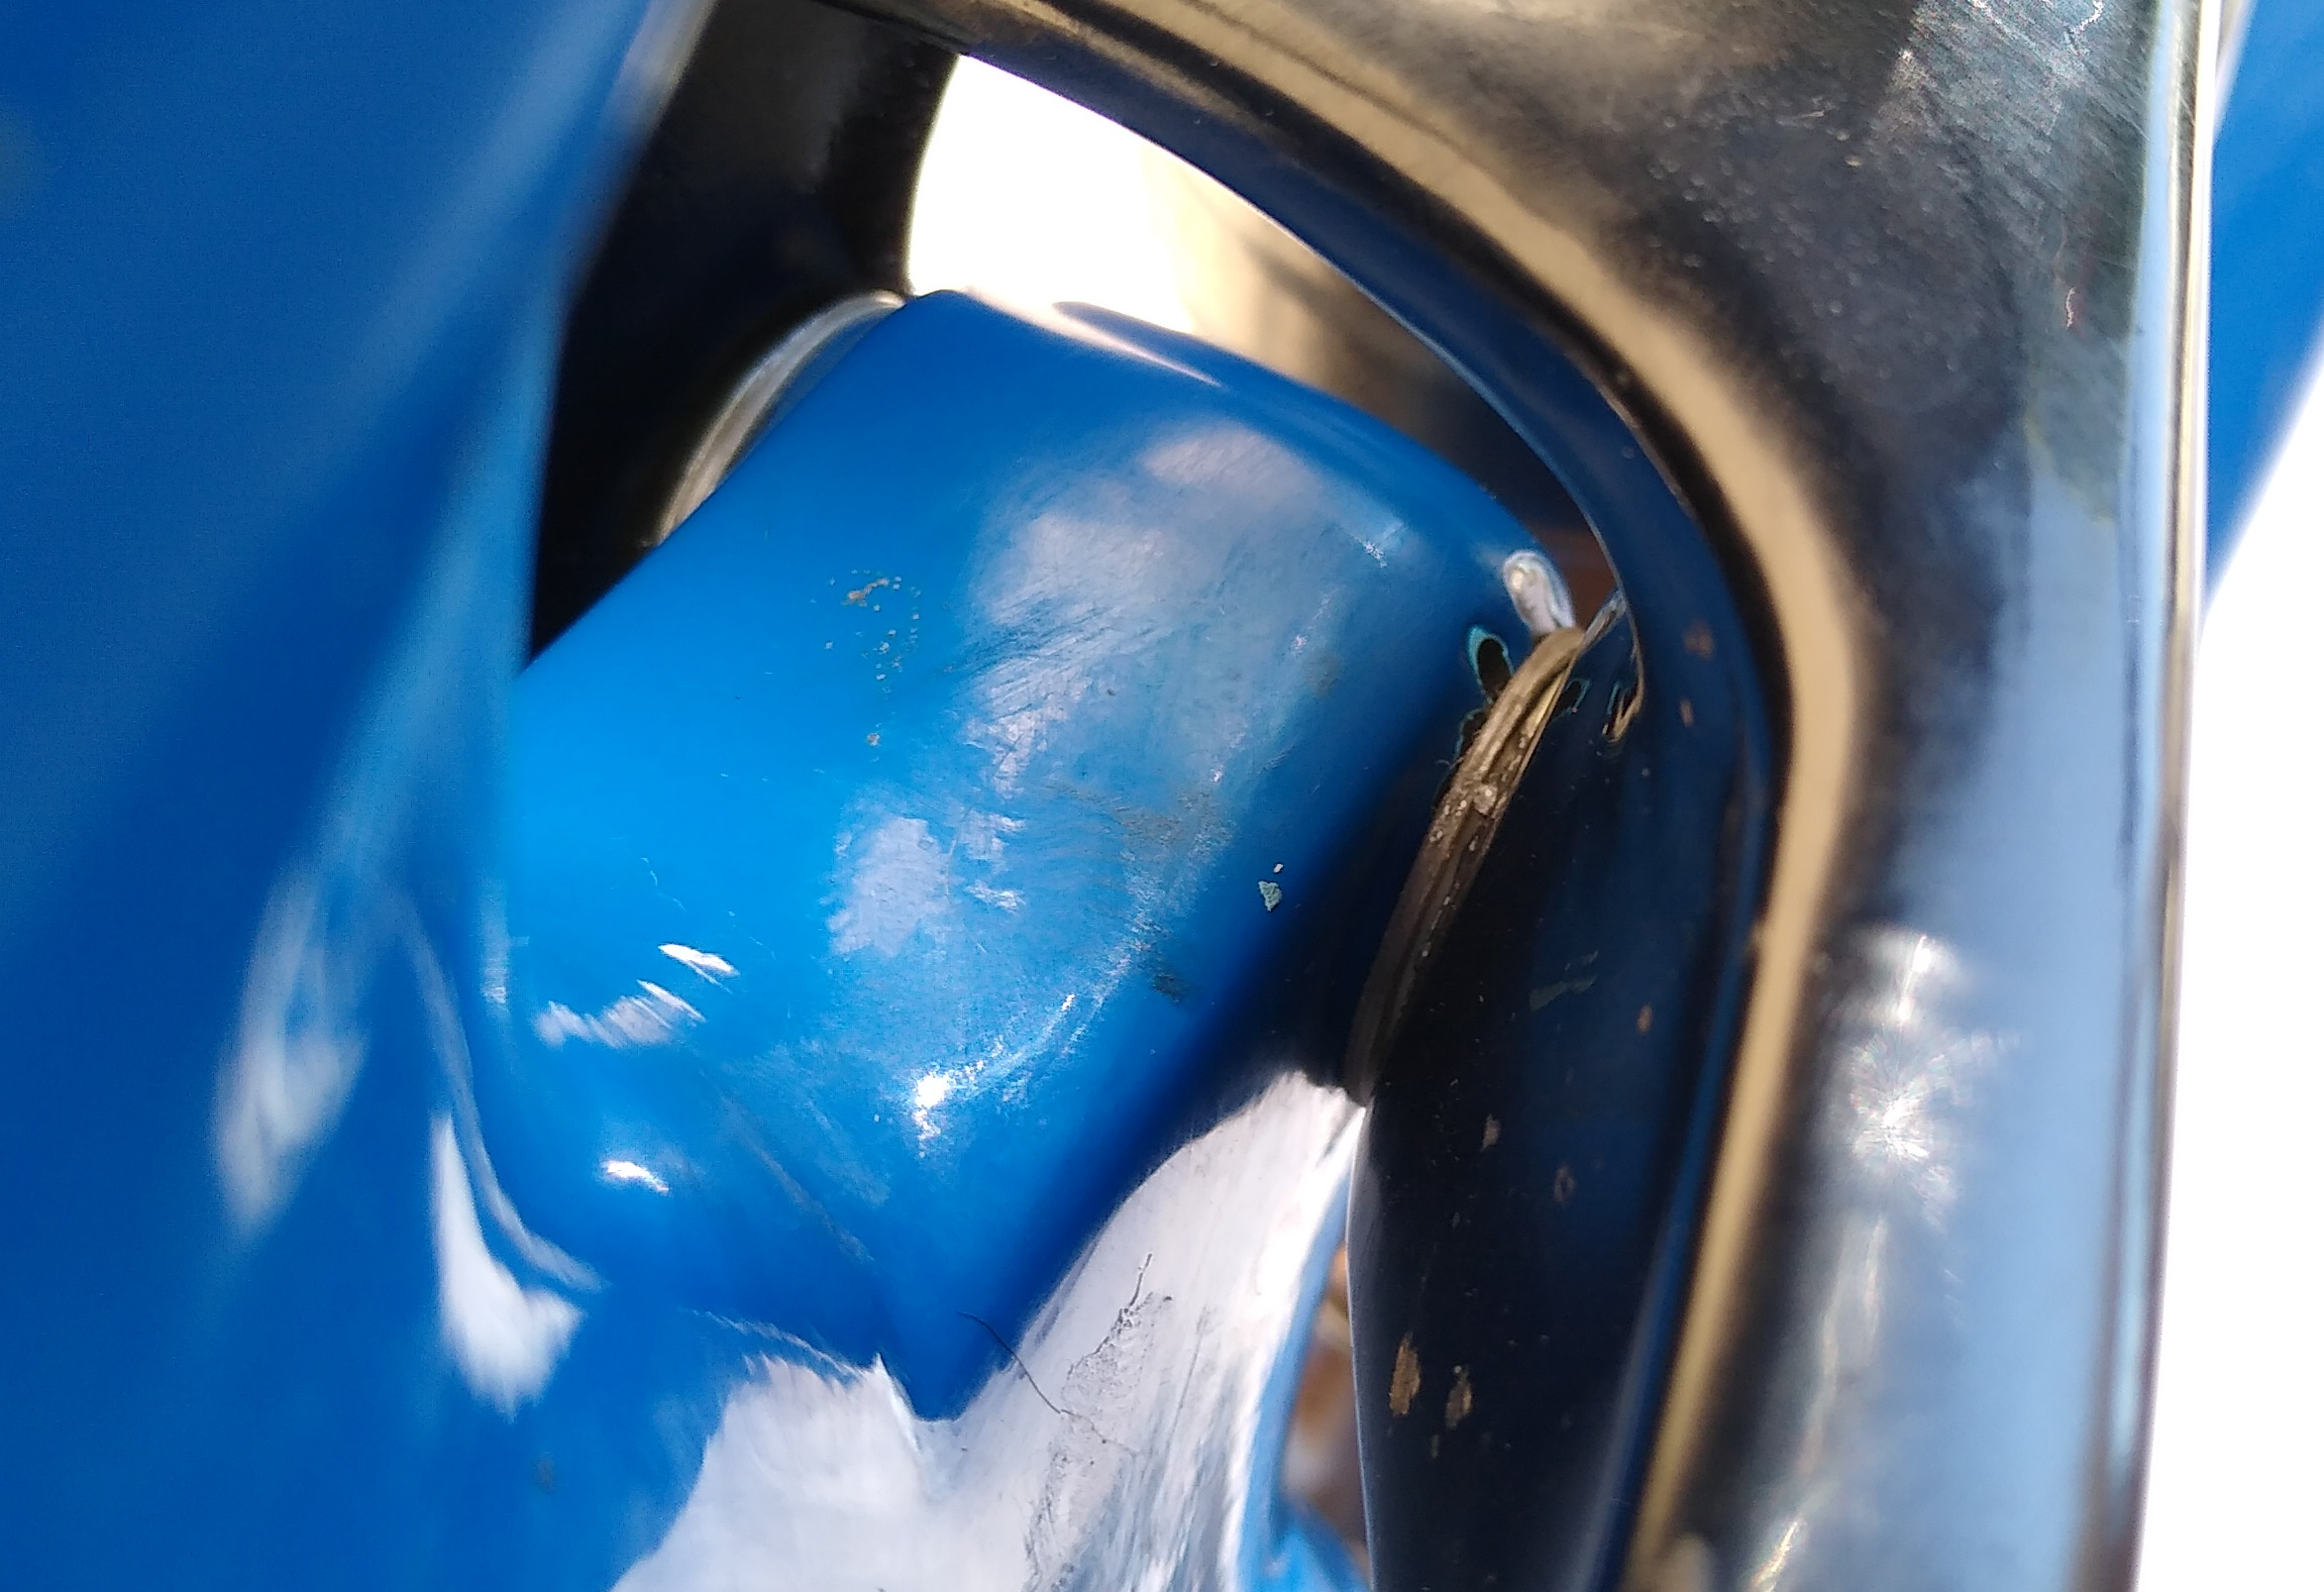
Another issue that gradually develops is side-to-side play. The frame pivot that meets the bushing has a shiny black surface (paint?) that gradually wears down, allowing this play. The solution is to place thin spacer washers around the bushing’s core, “inside” between the bushing face and the frame. This pushes the bushing faces slightly outward to eliminate the play. The best washer size is 1/2″ inside diameter, 3/4″ outside diameter, and 1/32″ thick.

Rear Hub Failure

The last problem I encountered was a severe ride-stopper. It stranded me out in the desert near Moab and I had to walk my bike out. Going up a hill, the bike suddenly made a horrible clacking sound and the pedals were free-spinning. The chain was completely intact. I took apart the rear hub by the side of the road to discover that pawls that engage the freehub ratchet had worn down and were slipping.
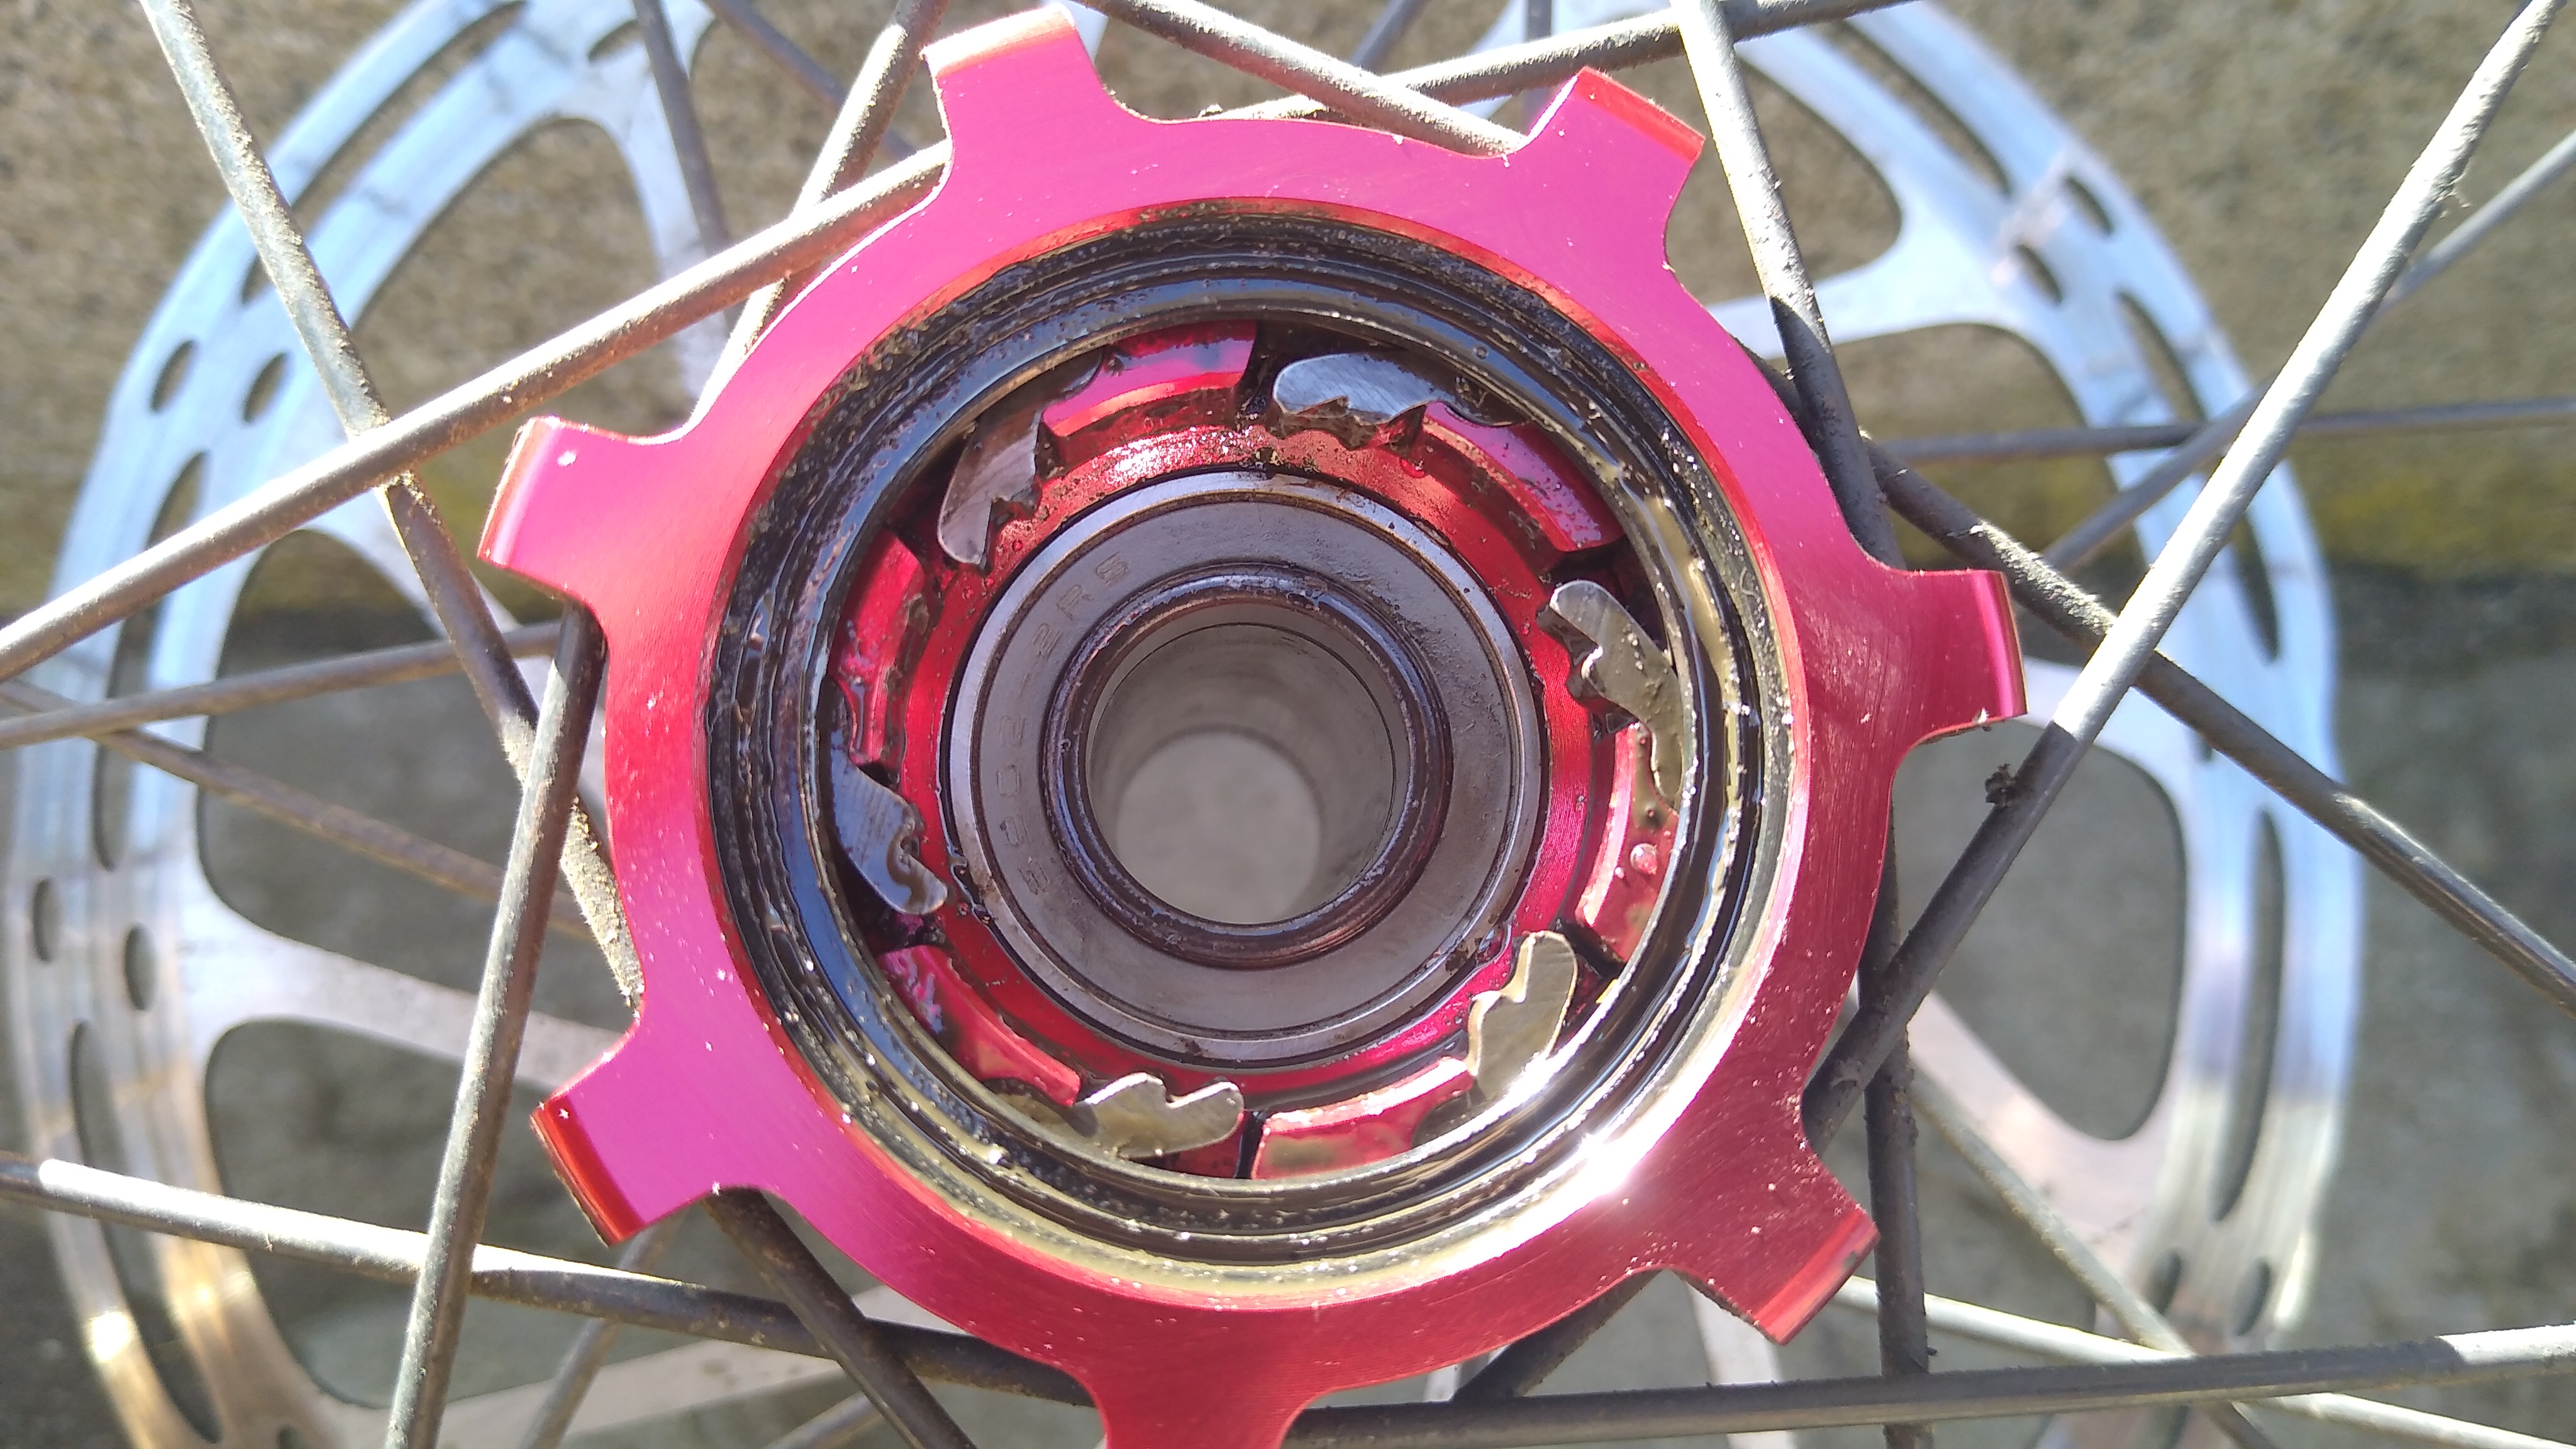
No way to fix that by the side of the road. And after I hiked back to the car and drove to town, none of the bike shops in Moab could fix it either.

Fezzari connected me to Hayes/Reynolds where I contacted a guy named Dan and ordered the parts:

Part 21290 "Reynolds XD Driver Body" replaces the cassette ratchet gear.

Part 20702 "2015-2016 Attack Assault Strike Hub Rebuild Kit" replaces the hub pawls (and other things).

When I told Reynolds this unusual and catastrophic failure happened to a bike that was only a few years old, equipped with some of their best carbon wheels, and left me stranded having to hike out of the desert pushing my bike, they gave me a 25% discount. The above parts fixed it. The pawls were the essential part; they were visibly and obviously worn down and rounded off. The freehub ratchet wasn’t obviously worn, but I replaced it anyway since it could have had non-visible damage from the damaged pawls slipping over it.

After just over a year, I inspected the new pawls to find that they had visible wear, though they were still working. I ordered another set of pawls, installed them, and kept these as emergency replacements.

It’s frustrating to note that if these pawls were made of steel, they’d last forever and the wheel would only be a few grams heavier. But they’re made of some kind of lightweight alloy.

Bottom Bracket Crank Arm Spindle Bolt

After servicing the bottom bracket (cleaning & re-greasing bearings) I was re-assembling it. These SRAM cranks have a single bolt on the left (non-drive) side that holds everything together. The spec says tighten to about 52 Nm, or 38 ft.lbs. As I was tightening it, well before it got that tight, I felt it give. I removed it and discovered 2 things:

  1. The head had sheared off the bolt
  2. The bolt was made of aluminum (or alloy) — not steel ?!

This is a high torque, high stress bolt. It should be made from steel! Making it from a softer, weaker aluminum alloy is a total fail in design. I’ll gladly pay a weight penalty of a measly 12 grams for the confidence of knowing my cranks won’t fall off the bike. Apparently I’m not the only person who thinks so. Shout-out to one of my LBS, Gregg’s Cycles, who had a replacement bolt in stock. I bet I know why they keep these bolts in stock… <groan>

Details:

  • Truativ GXP M15 Crank Bolt
  • CR2193
  • 11.6900.002.140
  • M15/M26

Sadly, it is alloy like the broken one. So it is probably “single-use”. I’m still looking for a steel one, but this one will serve until I find it.

Alloy Spoke Nipples

Descending Olallie, I heard a “ping” from the front wheel so I stopped. A spoke was loose; the nipple head had sheared off. I smoothly bent the free spoke to weave it through adjacent ones so it couldn’t flop around. Fortunately, the wheel is strong enough and with disc brakes I was able to finish the ride slowly.

The Timp Peak came with Reynolds AM 27.5 carbon wheels. Apparently, carbon fiber causes a redox galvanic corrosion reaction with alloy nipples. It starts slowly and progresses incrementally over time, so the wheels may go 5 years or so before it weakens the spoke nipples enough for the heads to shear off. I replaced that spoke with a brass nipple and re-sealed the wheel.

After the OTGG, another spoke nipple head popped off while I was truing the wheel–actually loosening the spoke, not tightening it! At this point I unsealed the wheel and replaced all of them with brass. While doing so, I found 4 others that were already cracked just waiting to break.

<rant>
No carbon wheel should use alloy spoke nipples. Brass will last forever and a set of 28 only weighs about 20 grams more. Alloy may be appropriate for super light road bike wheels, but the weight savings is immaterial on a MTB, considering we typically run 800 gram tires. This is an example of the race to the lightest wheelset at any cost. Reynolds confirmed that their wheel builders use only brass spoke nipples when servicing wheels, even though their OEM wheels come with alloy nipples.
</rant>

Rear Rim

The rear wheel rim delaminated near the outer edge; structure failure. Fortunately, I noticed it after a ride so it didn’t fail while riding.Reynolds replaced it under their lifetime warranty. Normally, this means mailing them your broken wheel, they rebuild a new rim onto your old hub and charge you $150 for the parts (spokes, sealing tape). It takes 6 weeks.

But 6 weeks wouldn’t work. This happened 1 week before the OTGG, a 5-day stage ride I had been training for 18 months. I asked Reynolds support to simply mail me a new rim, I would rebuild the wheel myself. And they did! They don’t make the AM wheels anymore, so now I have the closest match, a Blacklabel 287 (which has off-center spoke holes to equalize spoke dish angles). It arrived 1 day before the big ride, I built the wheel that afternoon (using DT 14 gauge straight-pull spokes and brass nipples) and it all worked out. Now that is just-in-time warranty service!

The new rim has a deeper profile, so the ERD is 9mm smaller, which meant I needed shorter spokes. Split the ERD difference in half means 4mm shorter on each side. But the original spokes didn’t fully protrude from the nipple heads, so I added 1mm (3mm shorter). This way the spokes would pass all the way through the nipple heads which makes it a bit stronger.
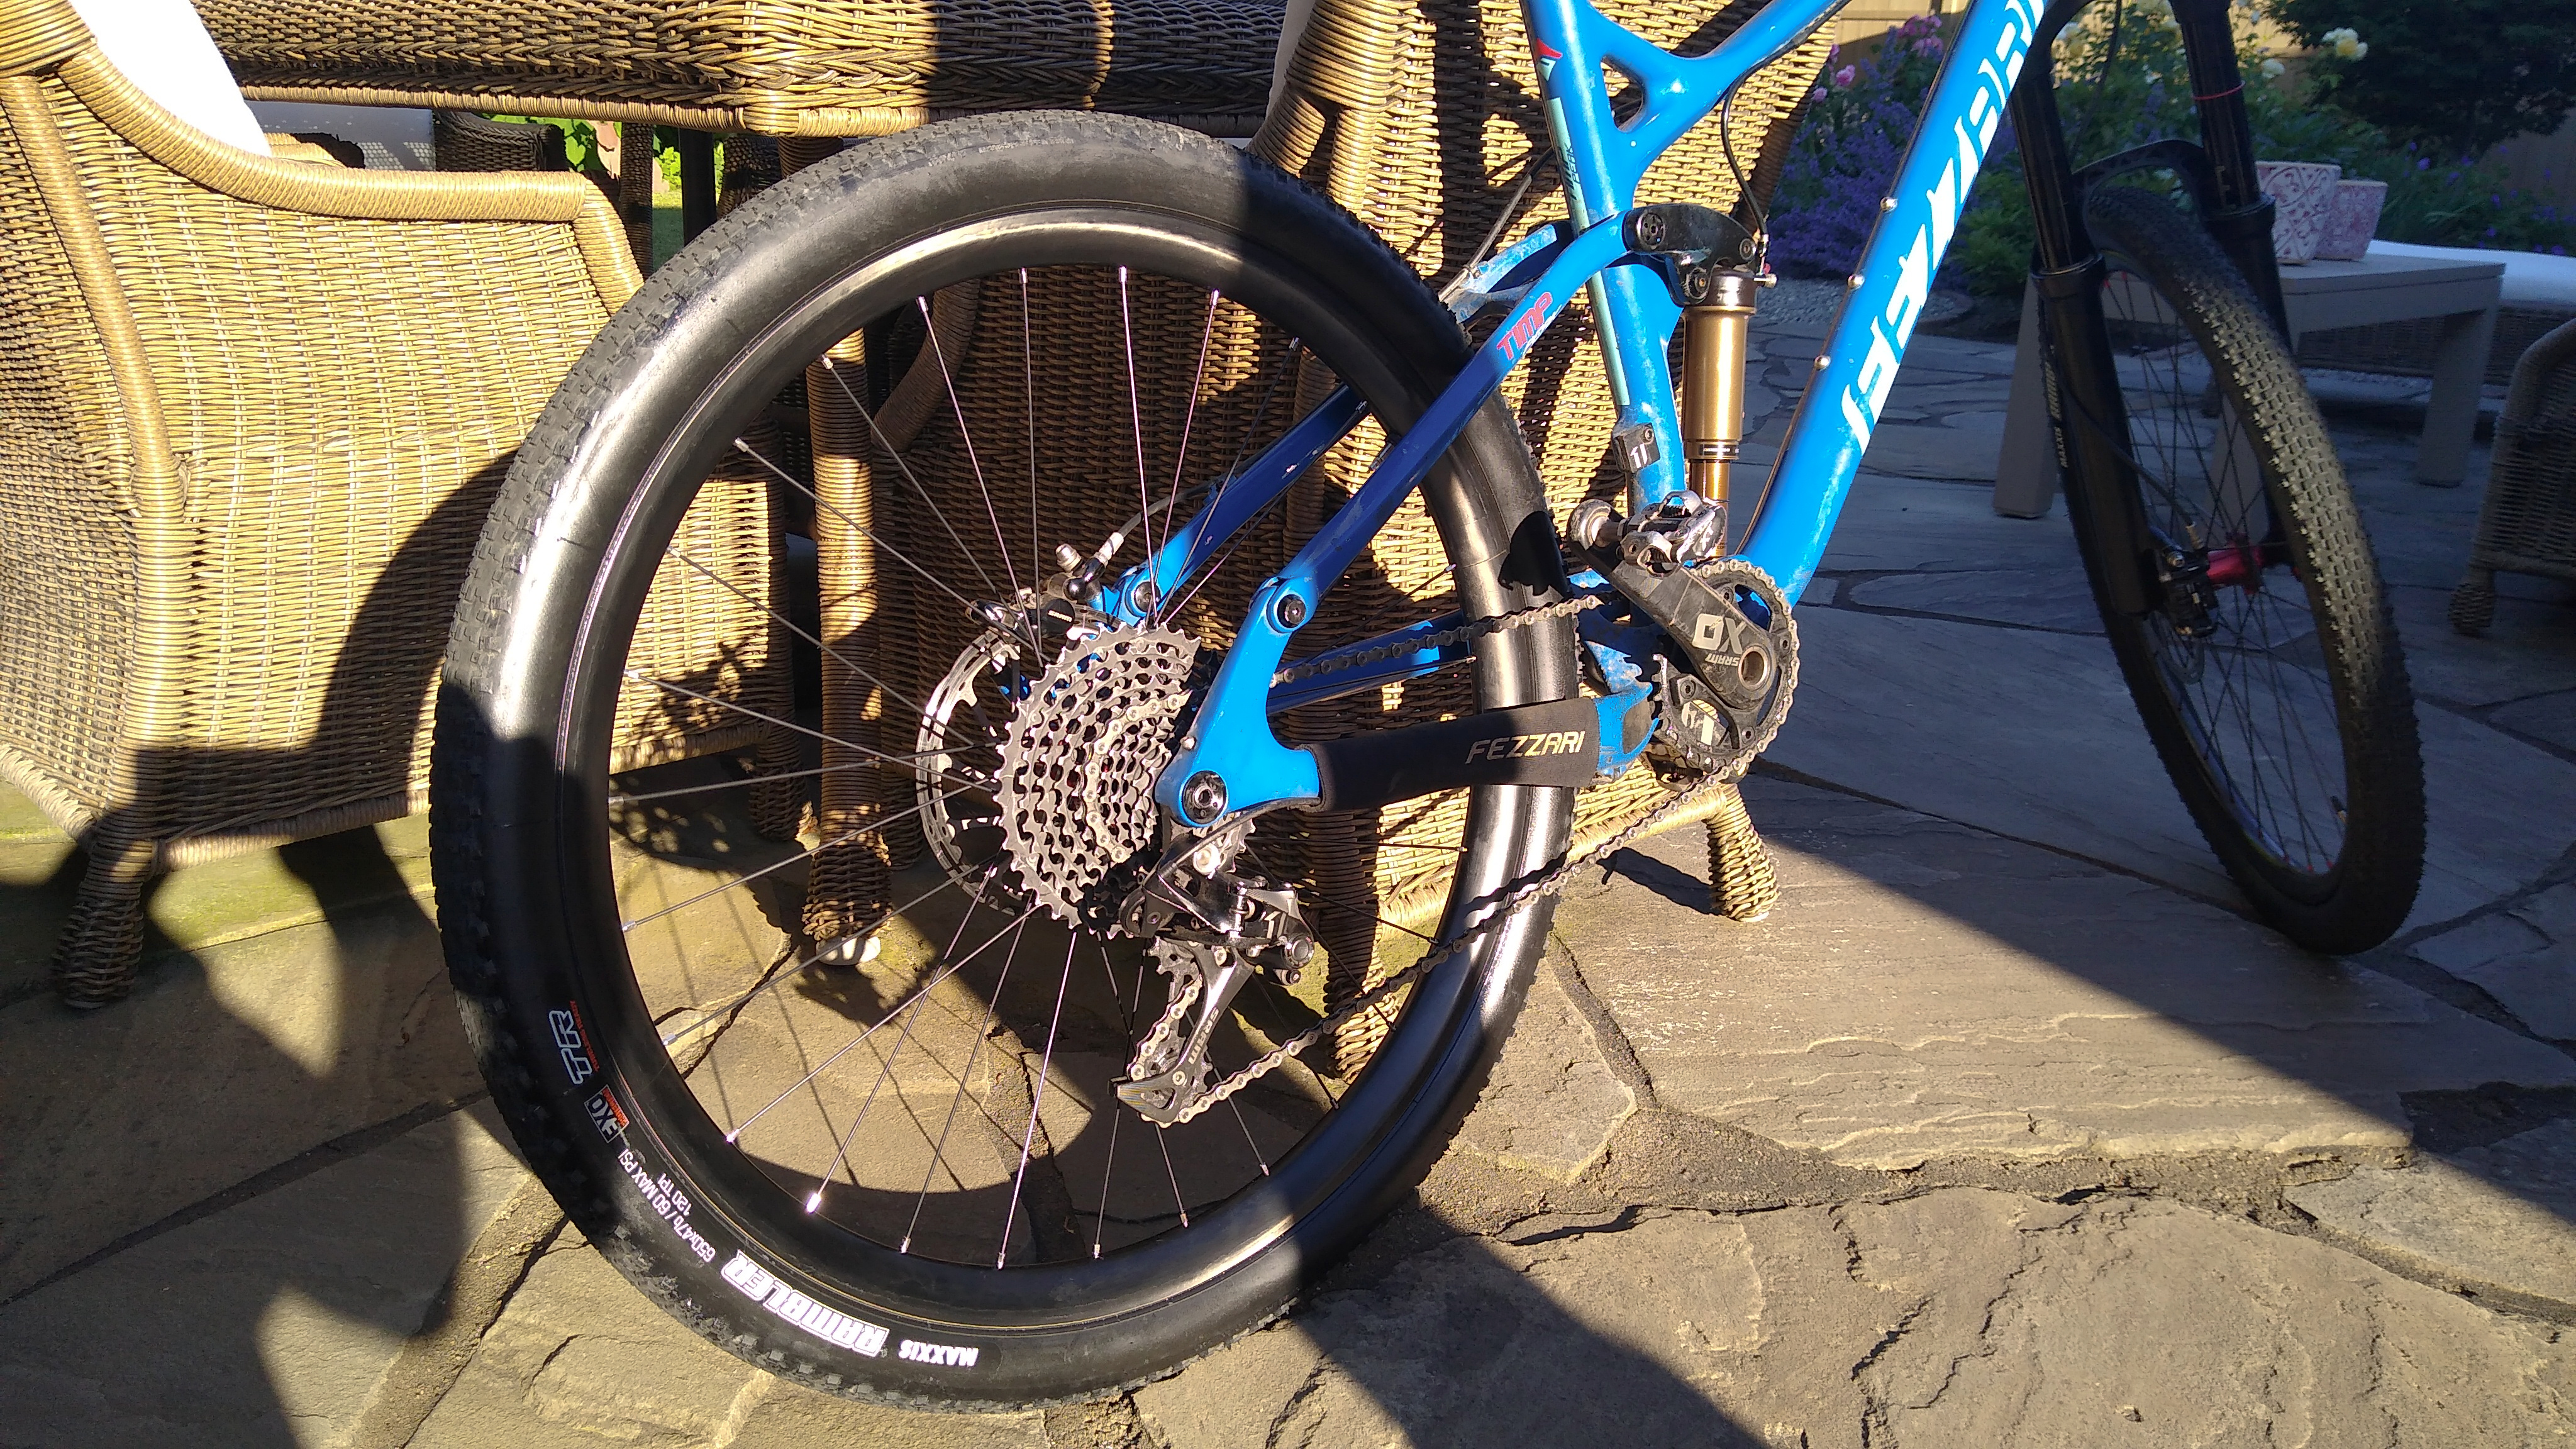
OTGG was this new wheel’s first break-in ride. It performed flawlessly.
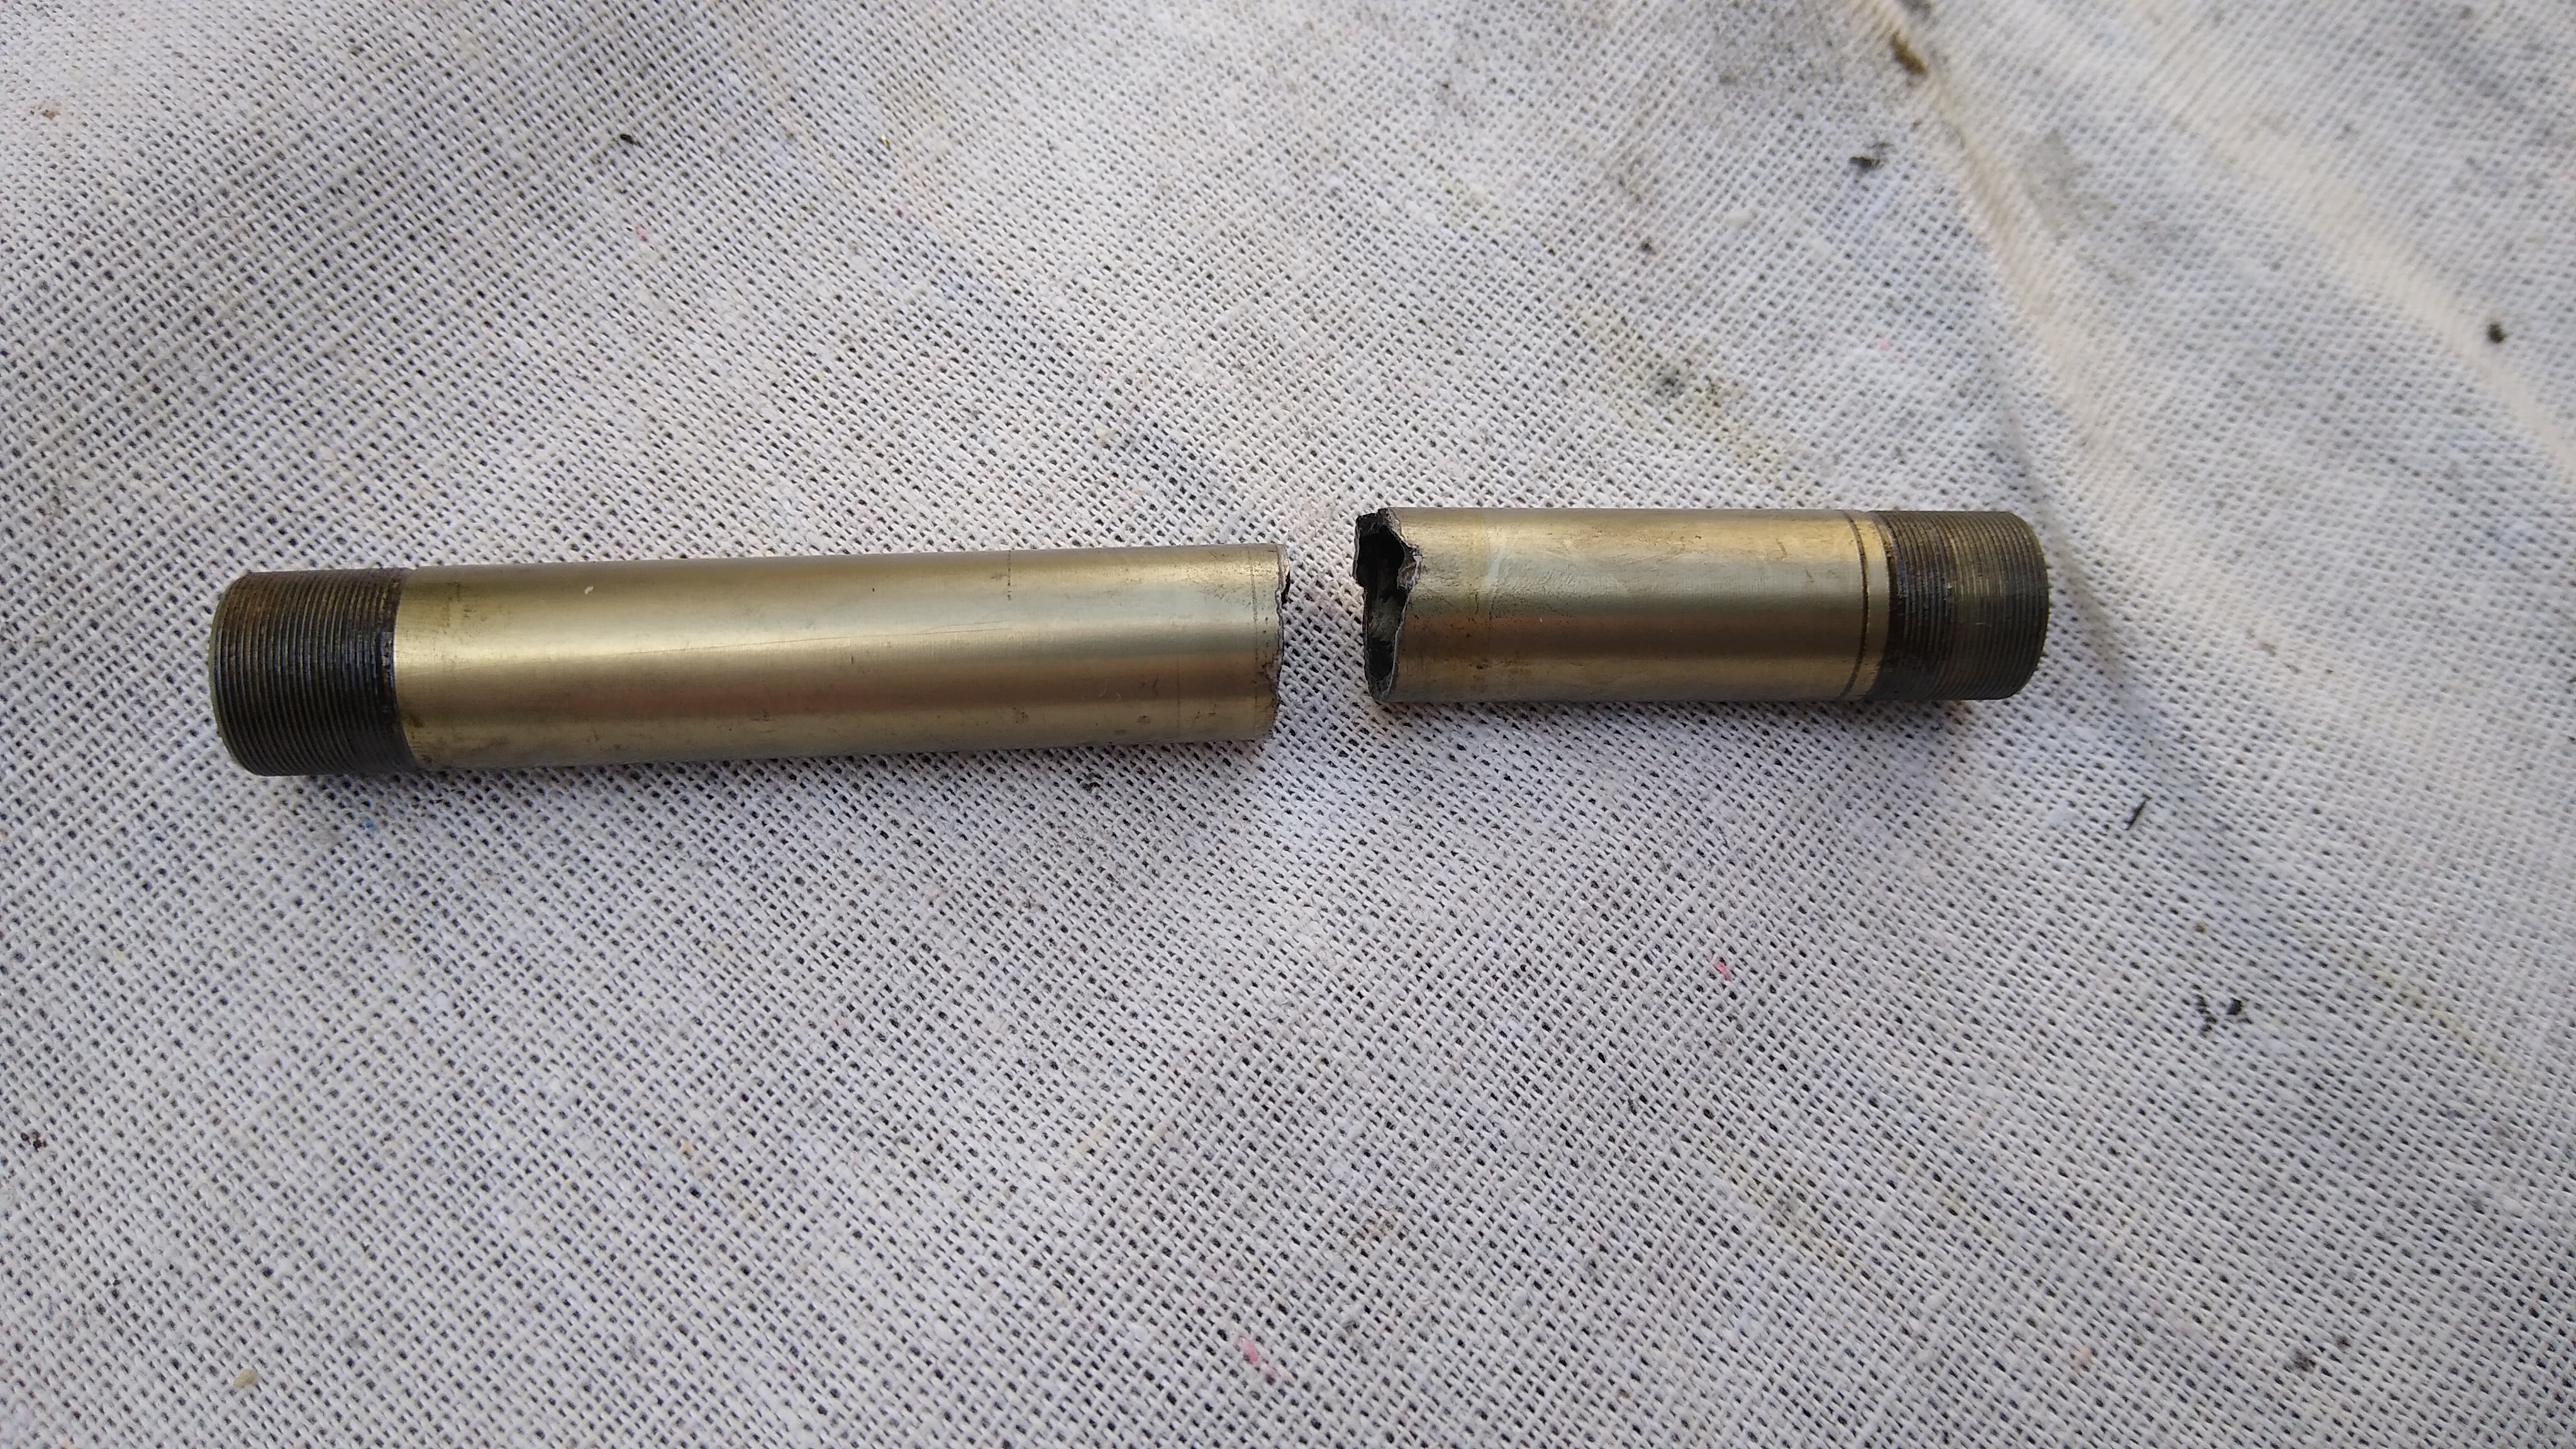
Rear Axle

In Sep 2022 riding the John Wayne / Palouse trail, the rear axle broke between Beverly and Othello. This is normally a critical failure that makes the bike un-rideable. At the same time, the derailleur swung forward and sheared off the end stop of the hangar. I was able to MacGyver both the axle and the derailleur in order to ride back to the nearest town and hitch a ride.

Rear Wheel Bearings

While I was replacing the axle I decided also to replace the bearings. They were still in serviceable shape, but not perfectly smooth anymore. I ordered a set of NSK bearings (size 6902) since they’re supposed to be excellent. I cleaned out the rat piss that they use for OEM grease and packed it with Schaeffer’s 221 #2. The bearing was smooth as butter. After installing it (smoothly with a proper bearing press, not whacking it in), it was rough & notchy. I pressed it out and it was smooth again. Weird. So I bought a generic 6902 at the LBS. Same procedure: cleaned out the OEM grease, packed with Schaeffer’s 221 #2, installed. It was smooth as butter installed.

Perhaps the hub’s bearing socket wasn’t perfectly round? Maybe, but 2 other bearings were butter smooth as installed, so seems unlikely.

Perhaps somehow the compression/squeeze forces of the press-fit install, eliminated the bearing’s internal tolerances? Maybe.

Perhaps it was due to the generic bearing being cageless, combined with an imperfectly round bearing socket? The NSK is a caged bearing, which is normally better. Yet perhaps cageless bearings are more tolerant of imperfectly round sockets?

Rear Through-Axle

After riding the bike 15 miles with a broken axle, the through-axle showed metal fatigue right at the point where the axle had snapped. Apparently, this put more stress on the through-axle. It was still serviceable, but due to the visible metal fatigue I replaced it anyway. It’s 12mm OD, 142mm rear dropout spacing, 174mm total length, 20mm of threads at the end, with a 1.75 pitch.

Rear Hub Shell

When the 2nd set of replacement pawls showed signs of wear in only 5 months, I sent Reynolds a photo and asked for a warranty replacement. They studied the photo and found that the pawl pockets machined into the hub are worn & distorted. I took a close look and they’re right! The distortion is only slight and the hub is still serviceable, but its days are numbered.

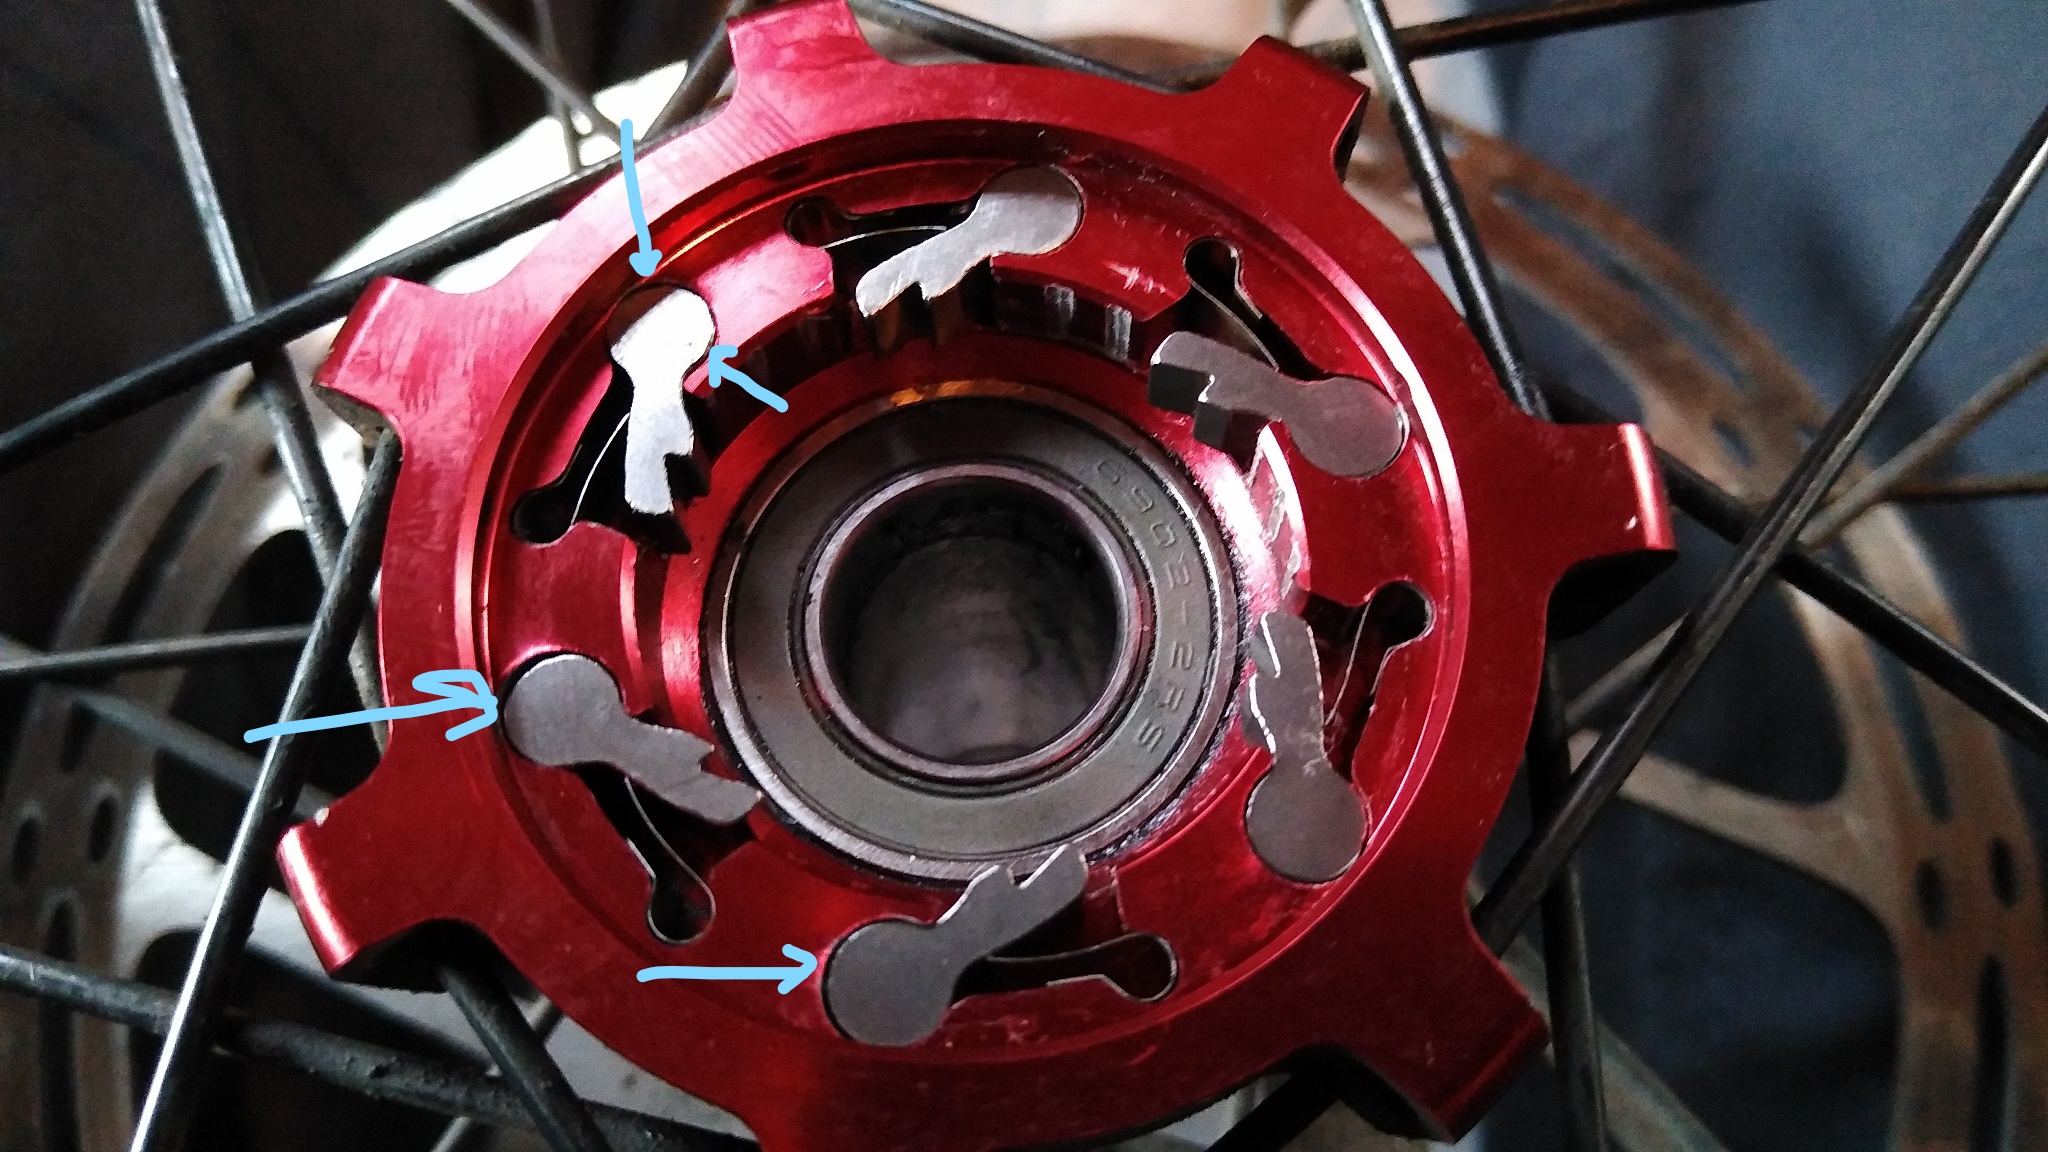
Looks to me, and to a friend with experienced eyes, Reynolds should have used a harder grade of aluminum alloy. Not only for the hub shell, but also for the pawls, and for the axle (all of which have failed on me).

They offered to warranty the hub shell, which means mailing them the wheel, the rebuild it onto a new hub shell and send it back, charge me $200 for parts (spokes, axle, bearings, freehub) and labor. I asked if they had a parts list because I prefer to do my own work and build my own wheels. They said no, it’s only a service. Which is different from last year, when they mailed me a warranty replacement rim for me to build myself.

That doesn’t sound like a great deal because I can buy top quality parts for less and build the wheel myself. But I do appreciate their sharp eyes in detecting a problem that I overlooked. I suspect they knew what to look for, as this isn’t the first of their hubs that has had this problem. Indeed, after all the problems this rear wheel has given me, I’m not inclined to use another Reynolds wheel. In summary:

  • OEM spoke nipples cracked and failed, due to aluminum/carbon redox reaction. I rebuilt the wheels with brass spoke nipples
  • Freehub pawls sheared, stranding me in the Moab desert.
  • Carbon Rim delaminated; Reynolds sent me a new rim under warranty and I rebuilt the wheel (again).
  • Axle broke, stranding me on along the John Wayne Trail.
  • Hub shell pawl pockets wore out of shape.