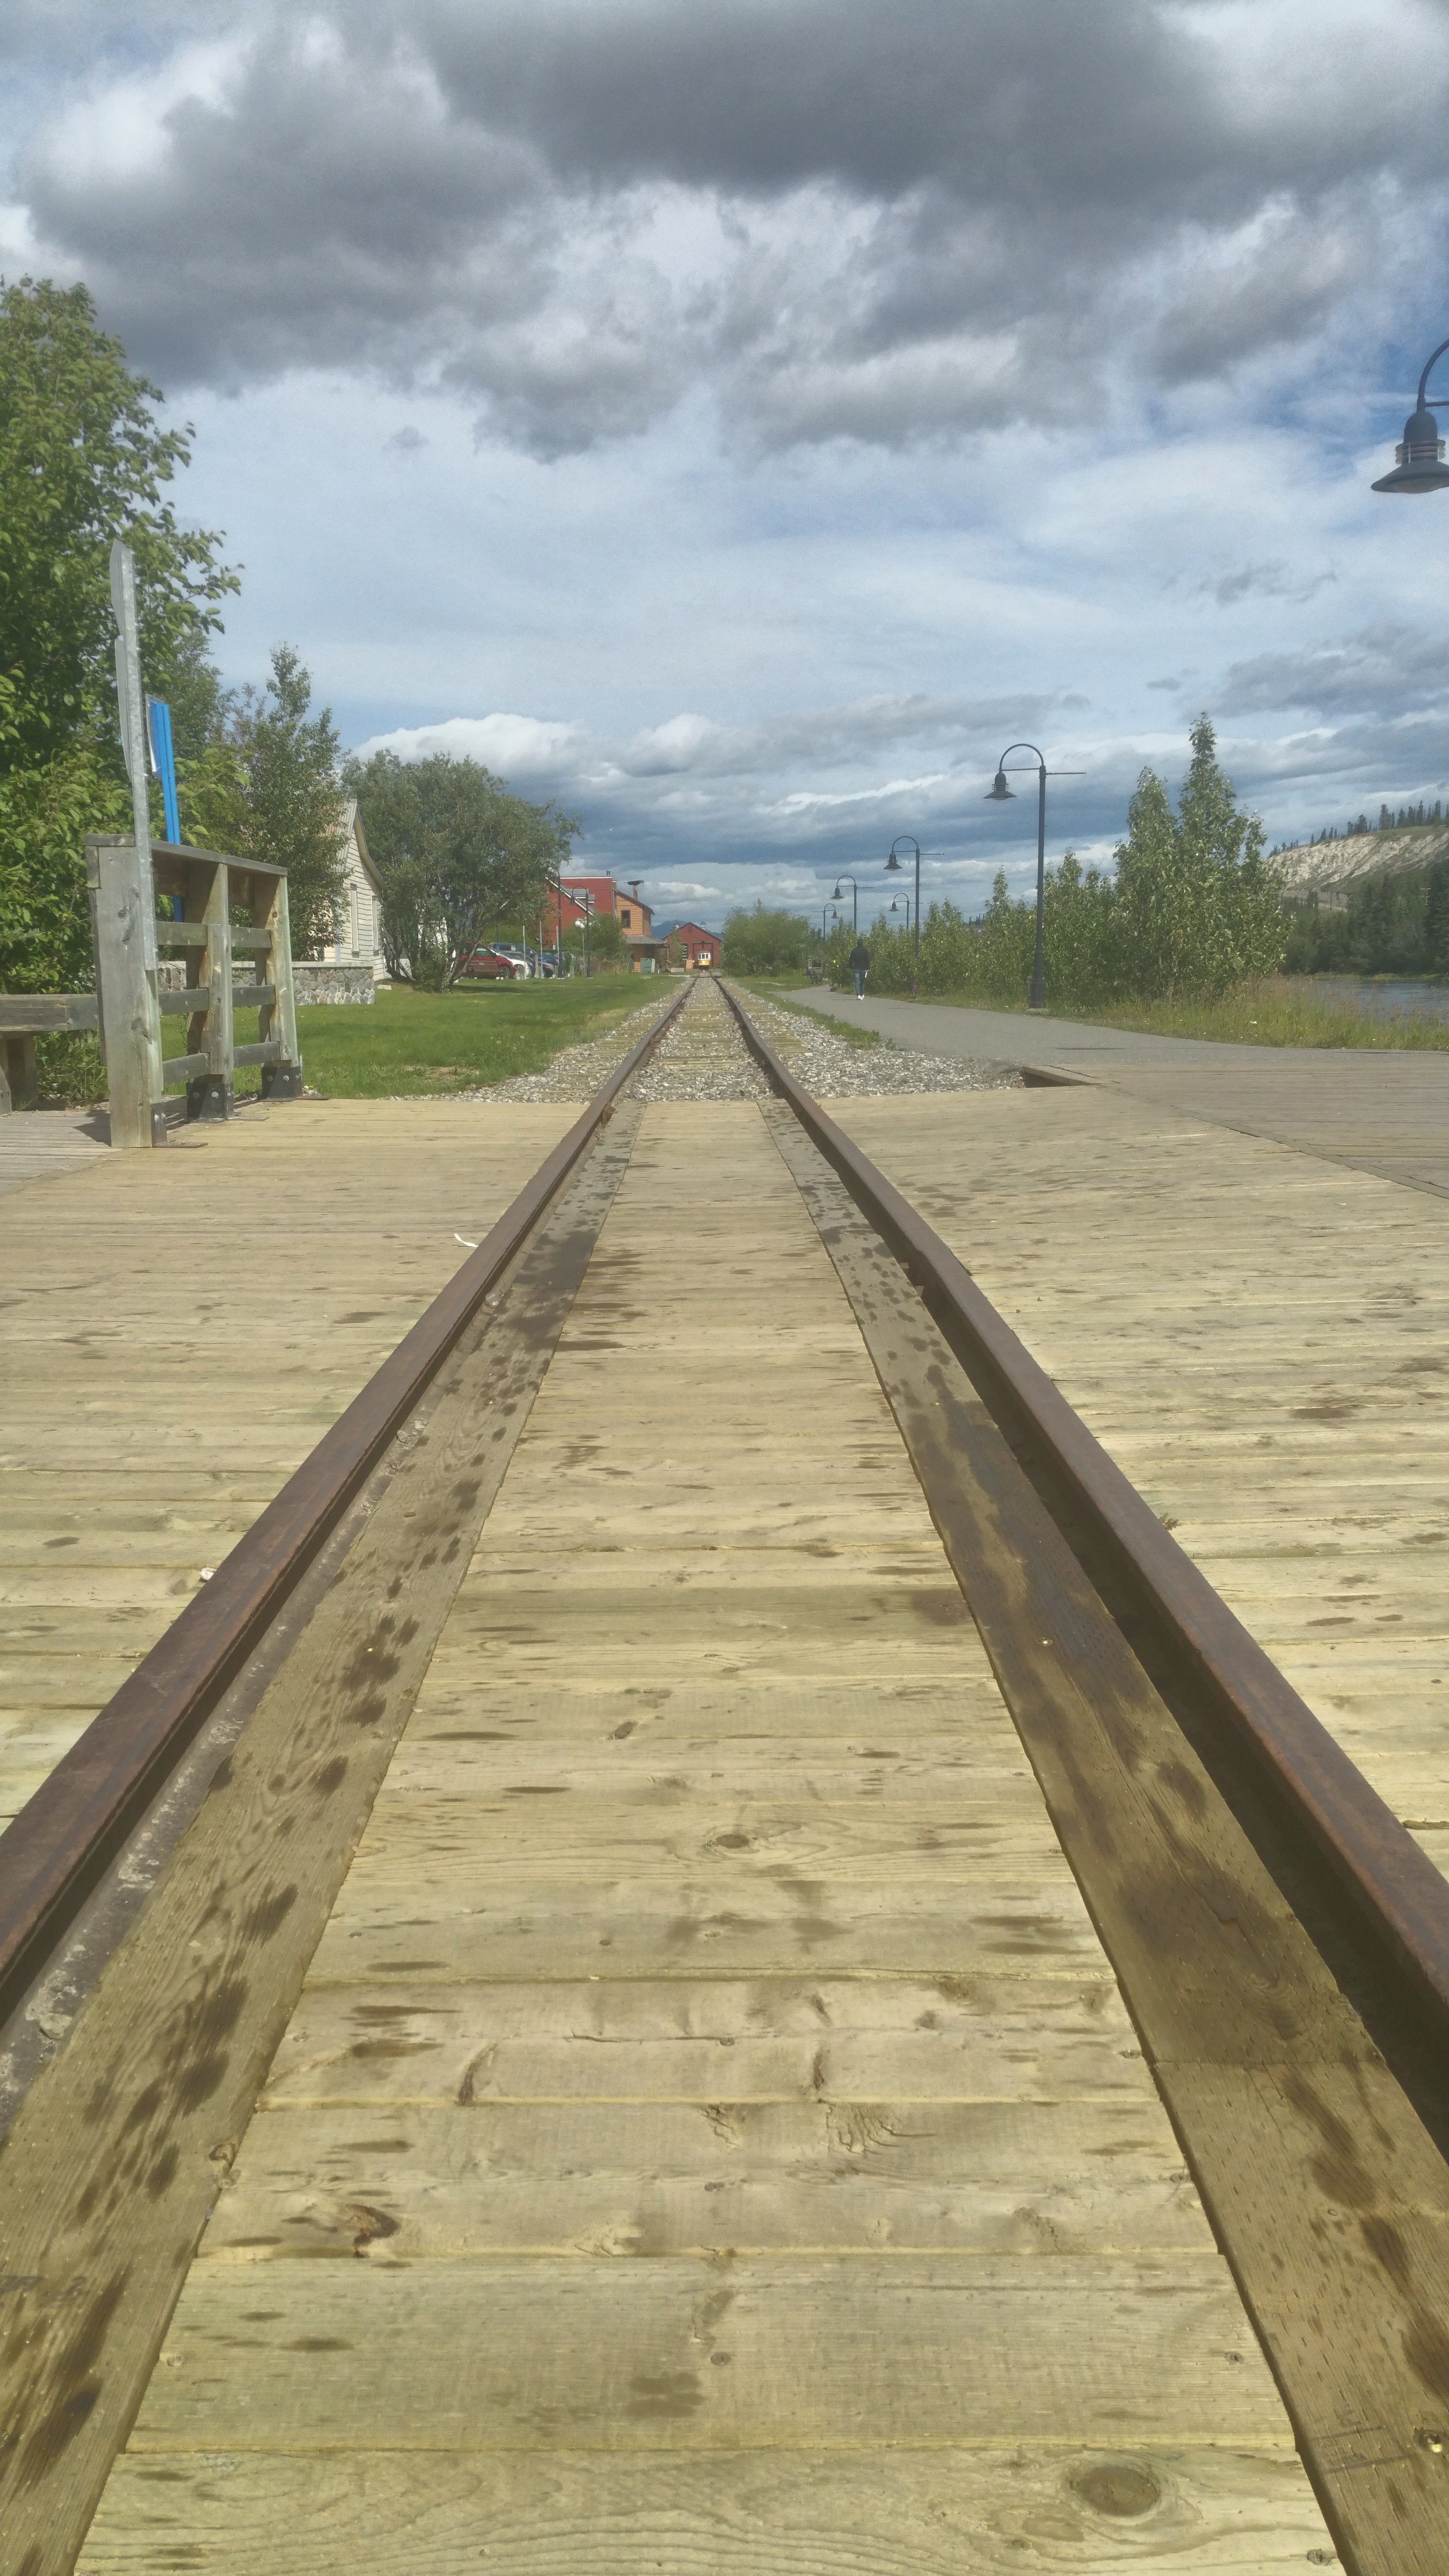
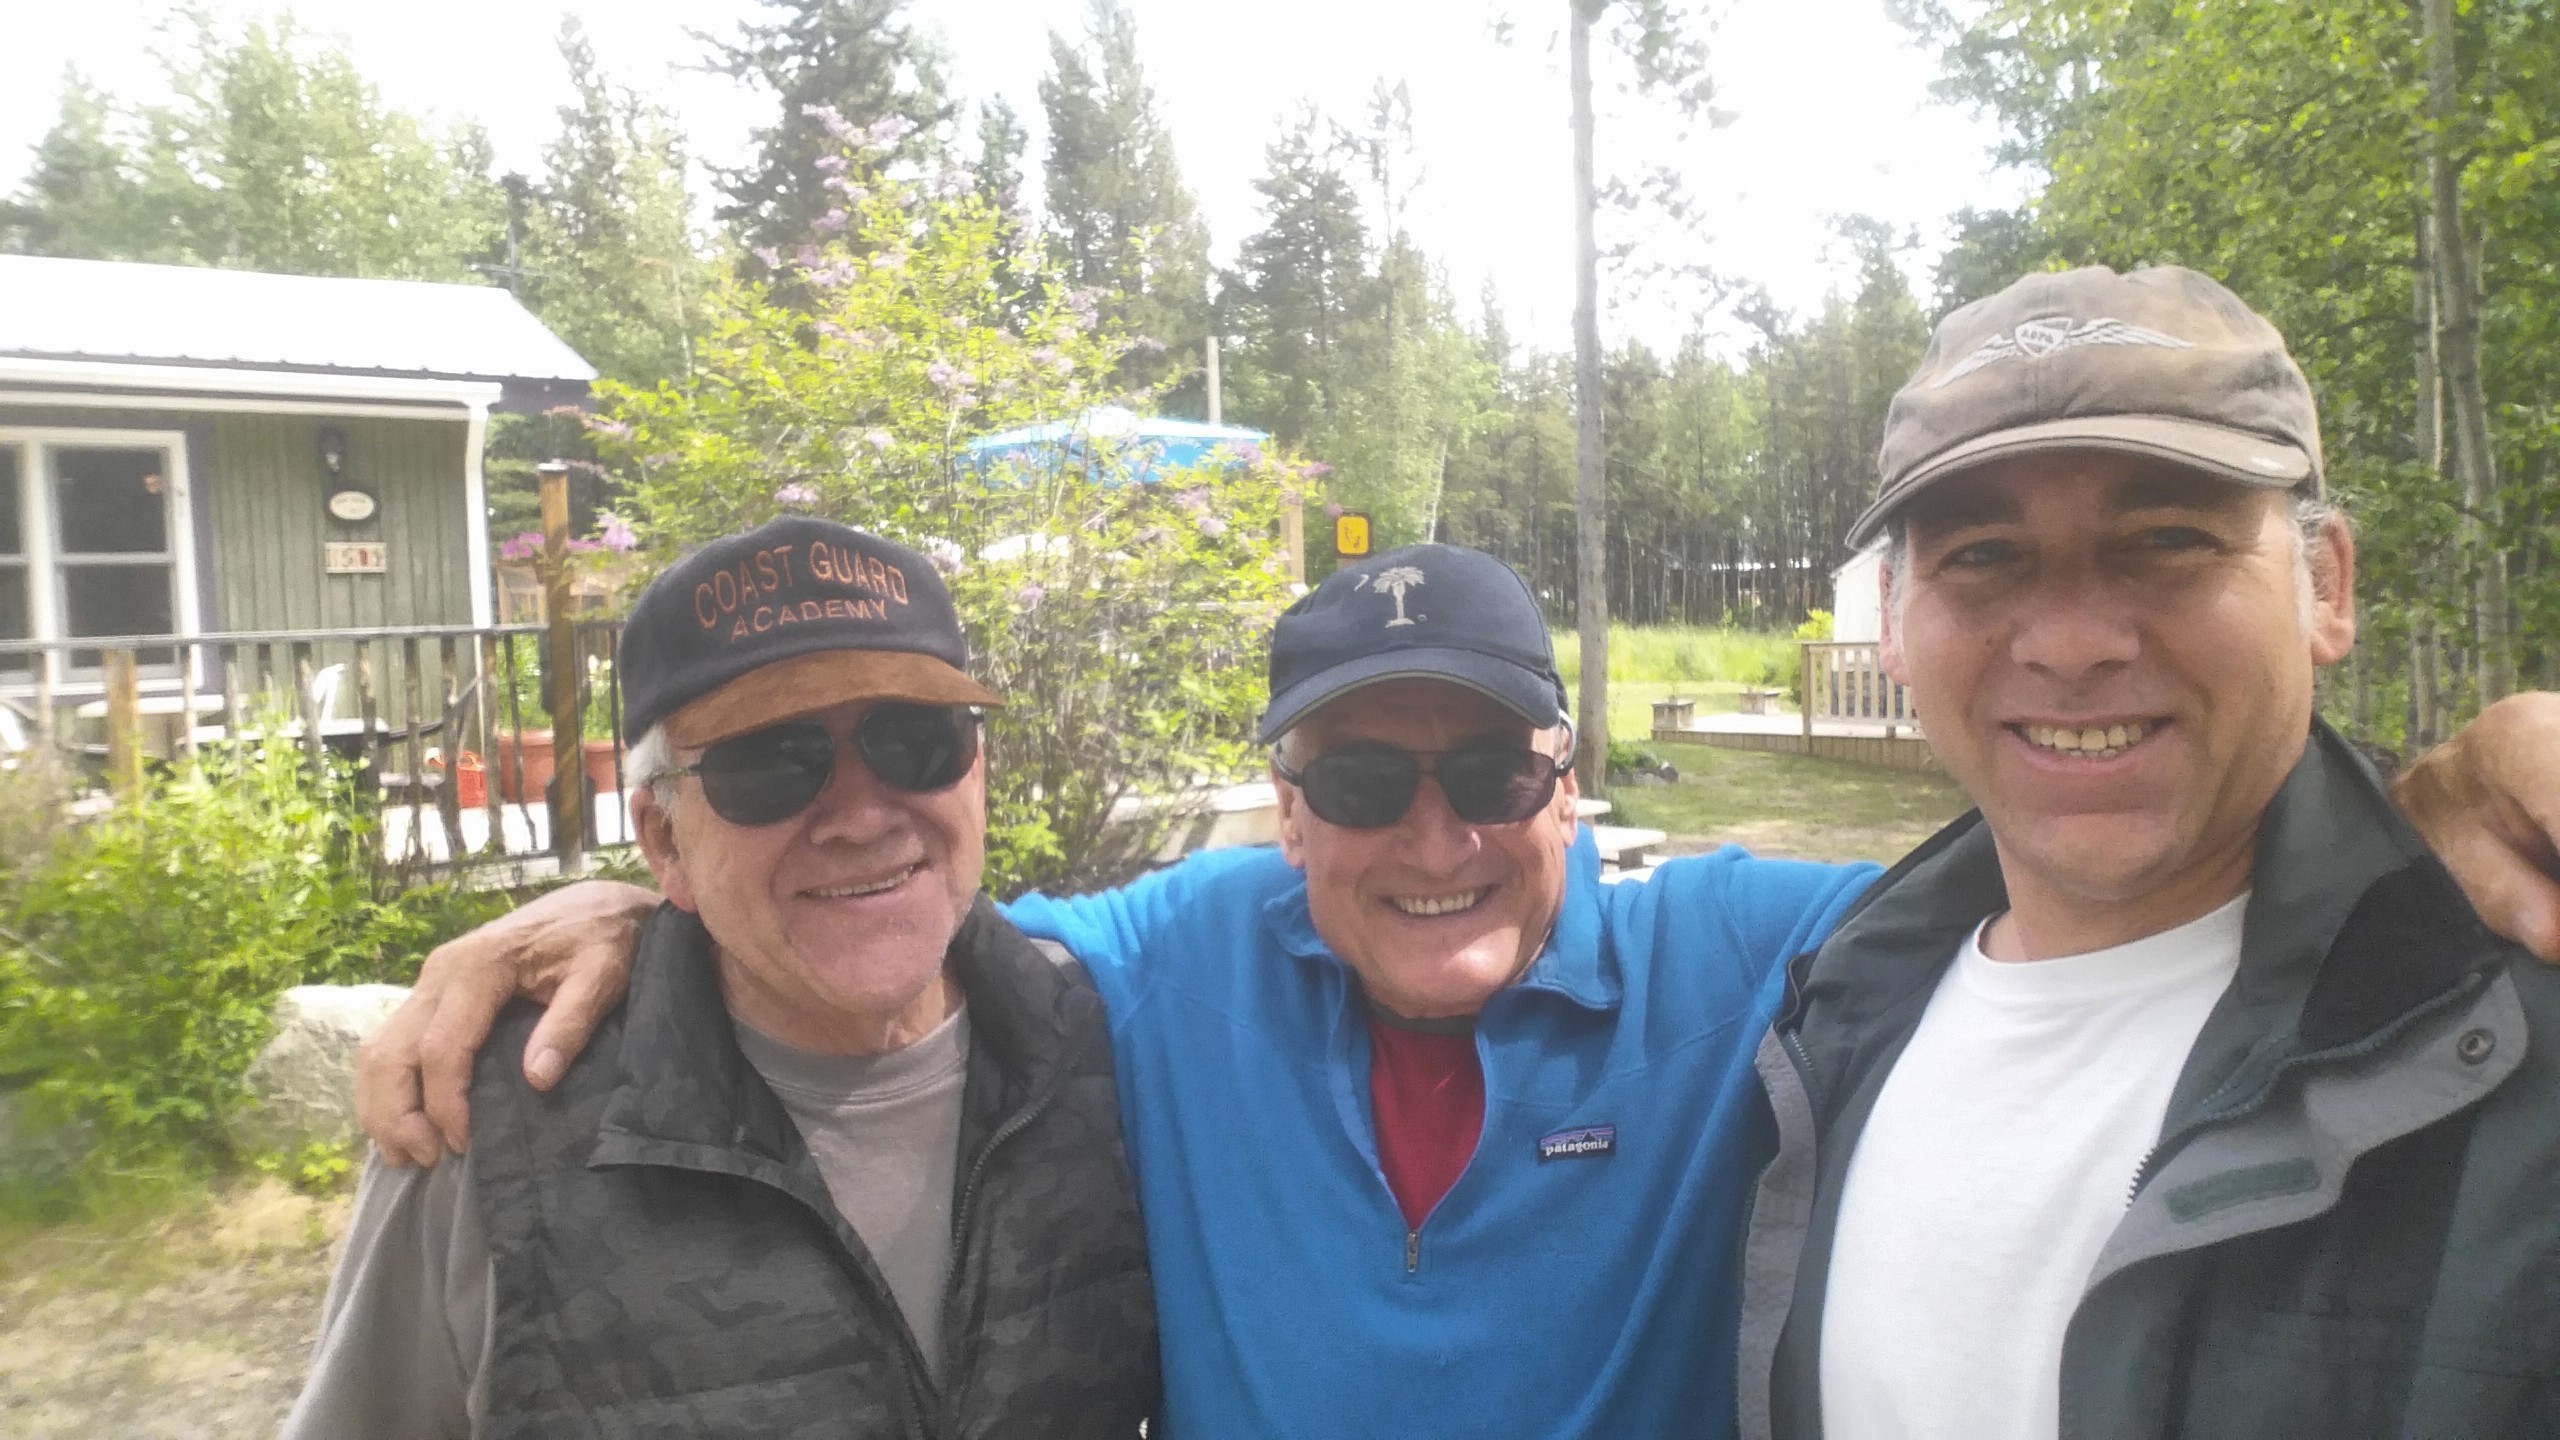
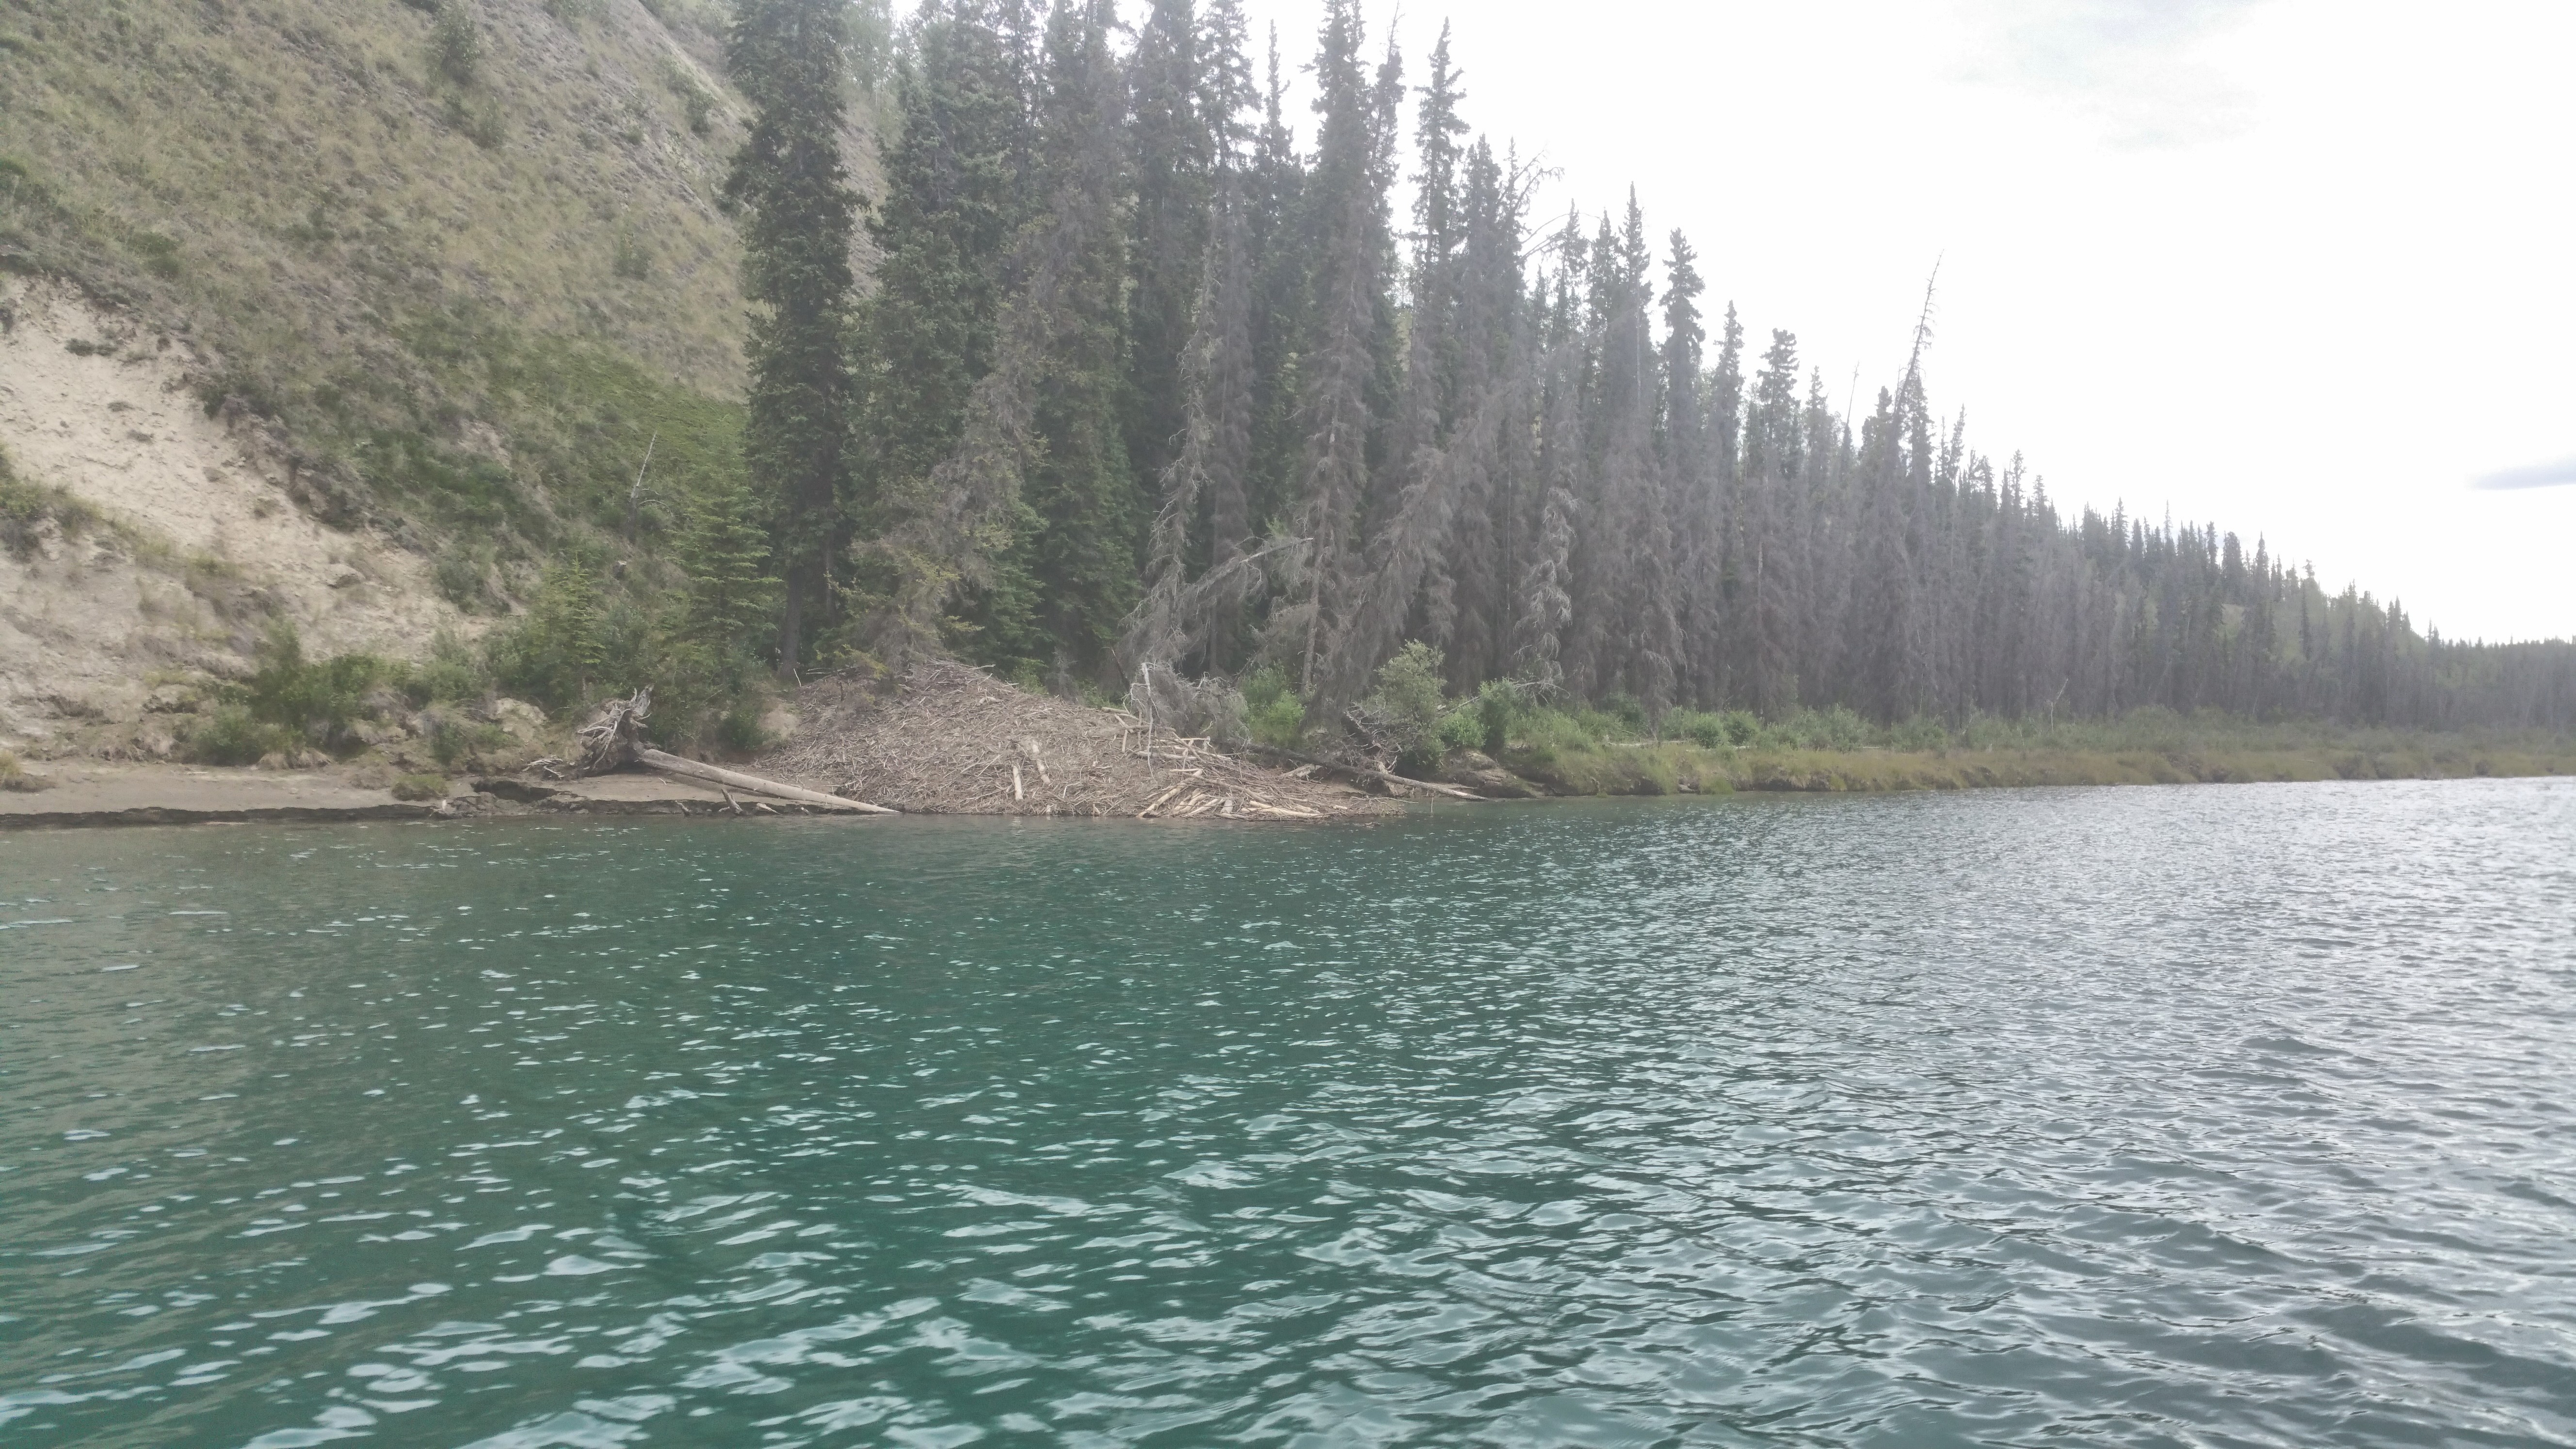
Your Stalwart Travelers at Bean North CoffeeBeaver dam along the Yukon
We lunched at Whiskey Jack’s and met Dave, a local retired US Air Force who moved to Yukon decades ago.
Captain Ken took us out on his boat for a 3-hour tour of the Yukon river. We saw bald eagle, beaver, beaver dams and other sights.
We ate dinner at Klondike Rib & Salmon, a local joint with long lines but good food & service.
Next day, we hiked Fish Lake, which is a long drive on dirt roads out of town. We would not have found it except for the detailed directions from the visitor center.
We met a squirrel at Fish Lake
We re-visited the Takhini Hot Springs and lunched again at Whiskey Jack’s. Dave and I had dinner again at Klondike Rib & Salmon and in the evening, I filed our EAPIS and called US Customs to arrive in Northway, AK the next day.
This is Day 1 of a 14 day trip from Seattle to Alaska and back. Click here for the prior and next entries.
Preparation
The Trench route is the quickest and quite scenic, and we had been tracking weather for the past 2 weeks. Our target date was July 8. We were ready to delay the entire trip if necessary, but it wasn’t: things looked good all the way from Seattle to Whitehorse. I filed the EAPIS, international flight plan from KBFI to CYXX, and called Canadian customs the prior night. We got to the airport at 6:30am for a planned 7:15 departure. We loaded the plane, weighing each item and distributing to maintain CG within limits. With the 3 of us, all our gear, and full fuel, our total weight was about 2,460 # which is 90 below GW. CG was around 46.8″, which is toward the rear end of the range, which means slightly better cruise efficiency.
Seattle to Abbotsford
We took off at 7:15 as planned. I requested flight following and was transferred to Seattle approach. I asked if they could activate my flight plan; he replied negative. I asked if he had the local RCO frequency handy, he said negative. So I switched to 122.2 for flight service. The controller activated my flight plan and gave me a discrete squawk code. When I switched back to Seattle approach, the controller said he couldn’t service me because I changed my squawk code. Since I was on an active flight plan and had my squawk code, I didn’t need to talk to him anymore so I cancelled service. Incidentally, that Seattle approach controller was the worst service I have received in the air in nearly 1,000 hours of flying, so I can’t complain too much.
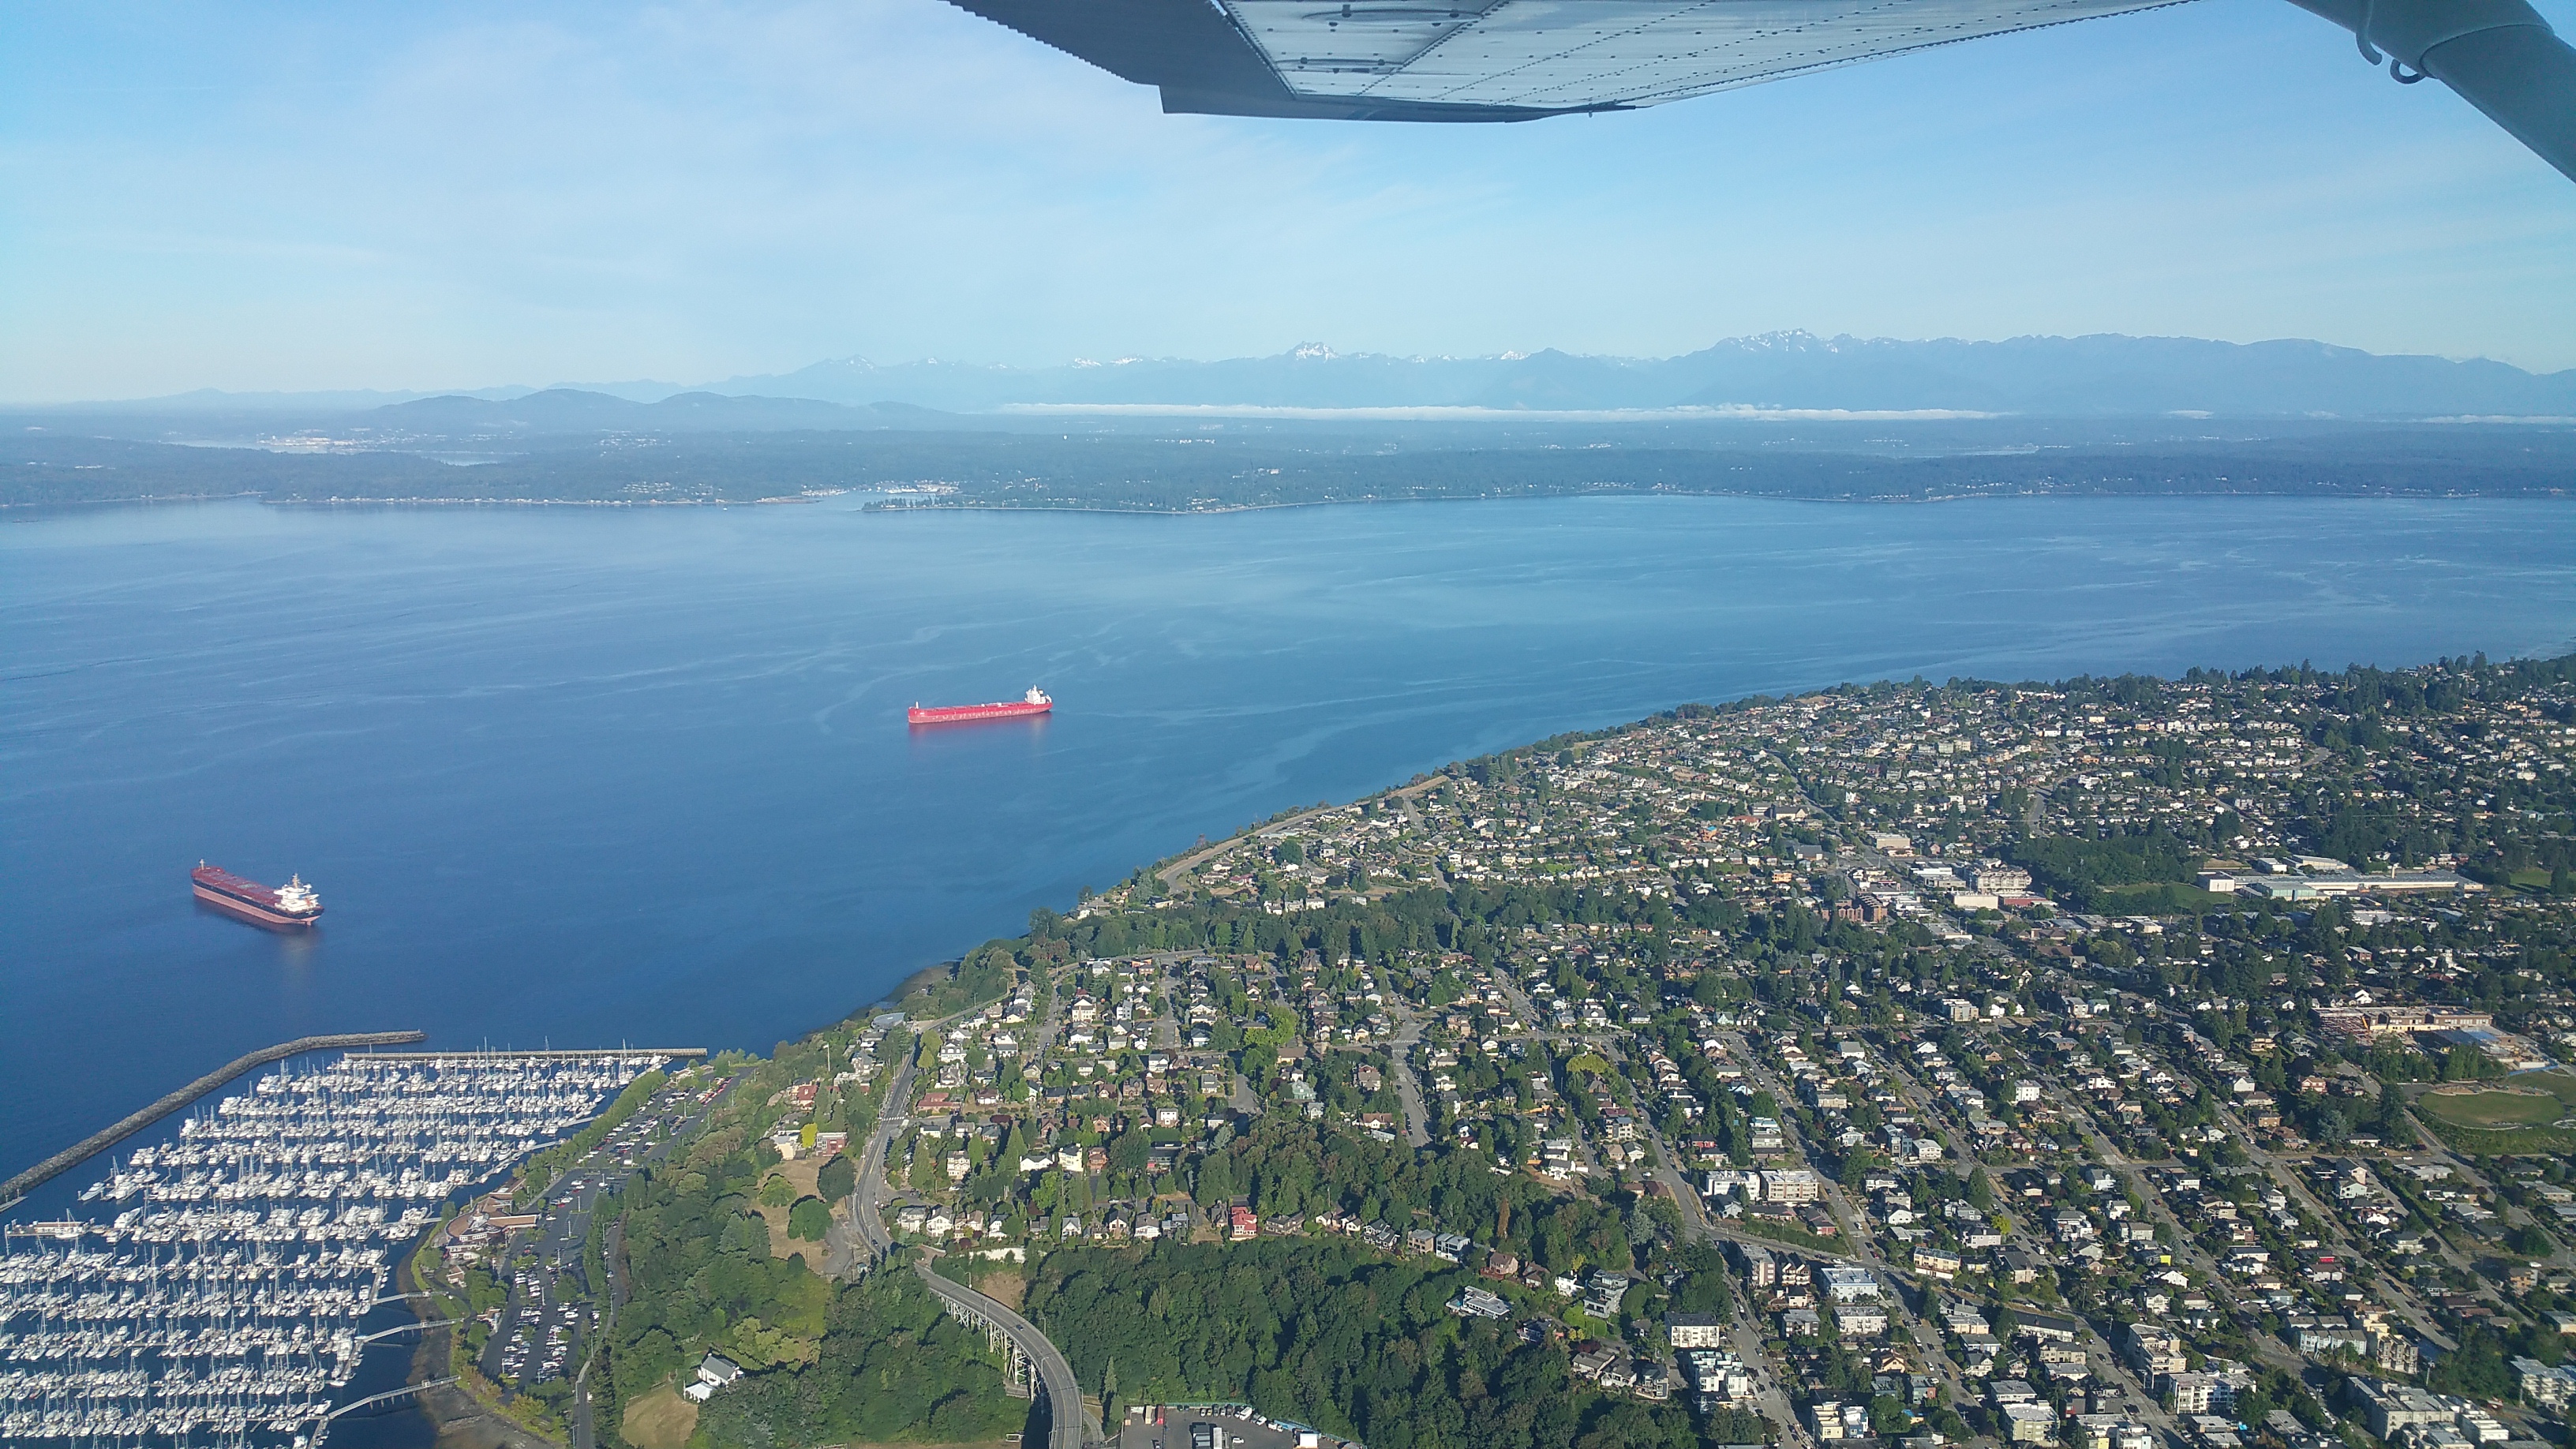
A rare sunny early Seattle morning
50 minutes after takeoff we were over the Whatcom HUH VOR. Abbotsford was 10 miles away so I called them up (I already had their ATIS). They gave me L base for runway 25.
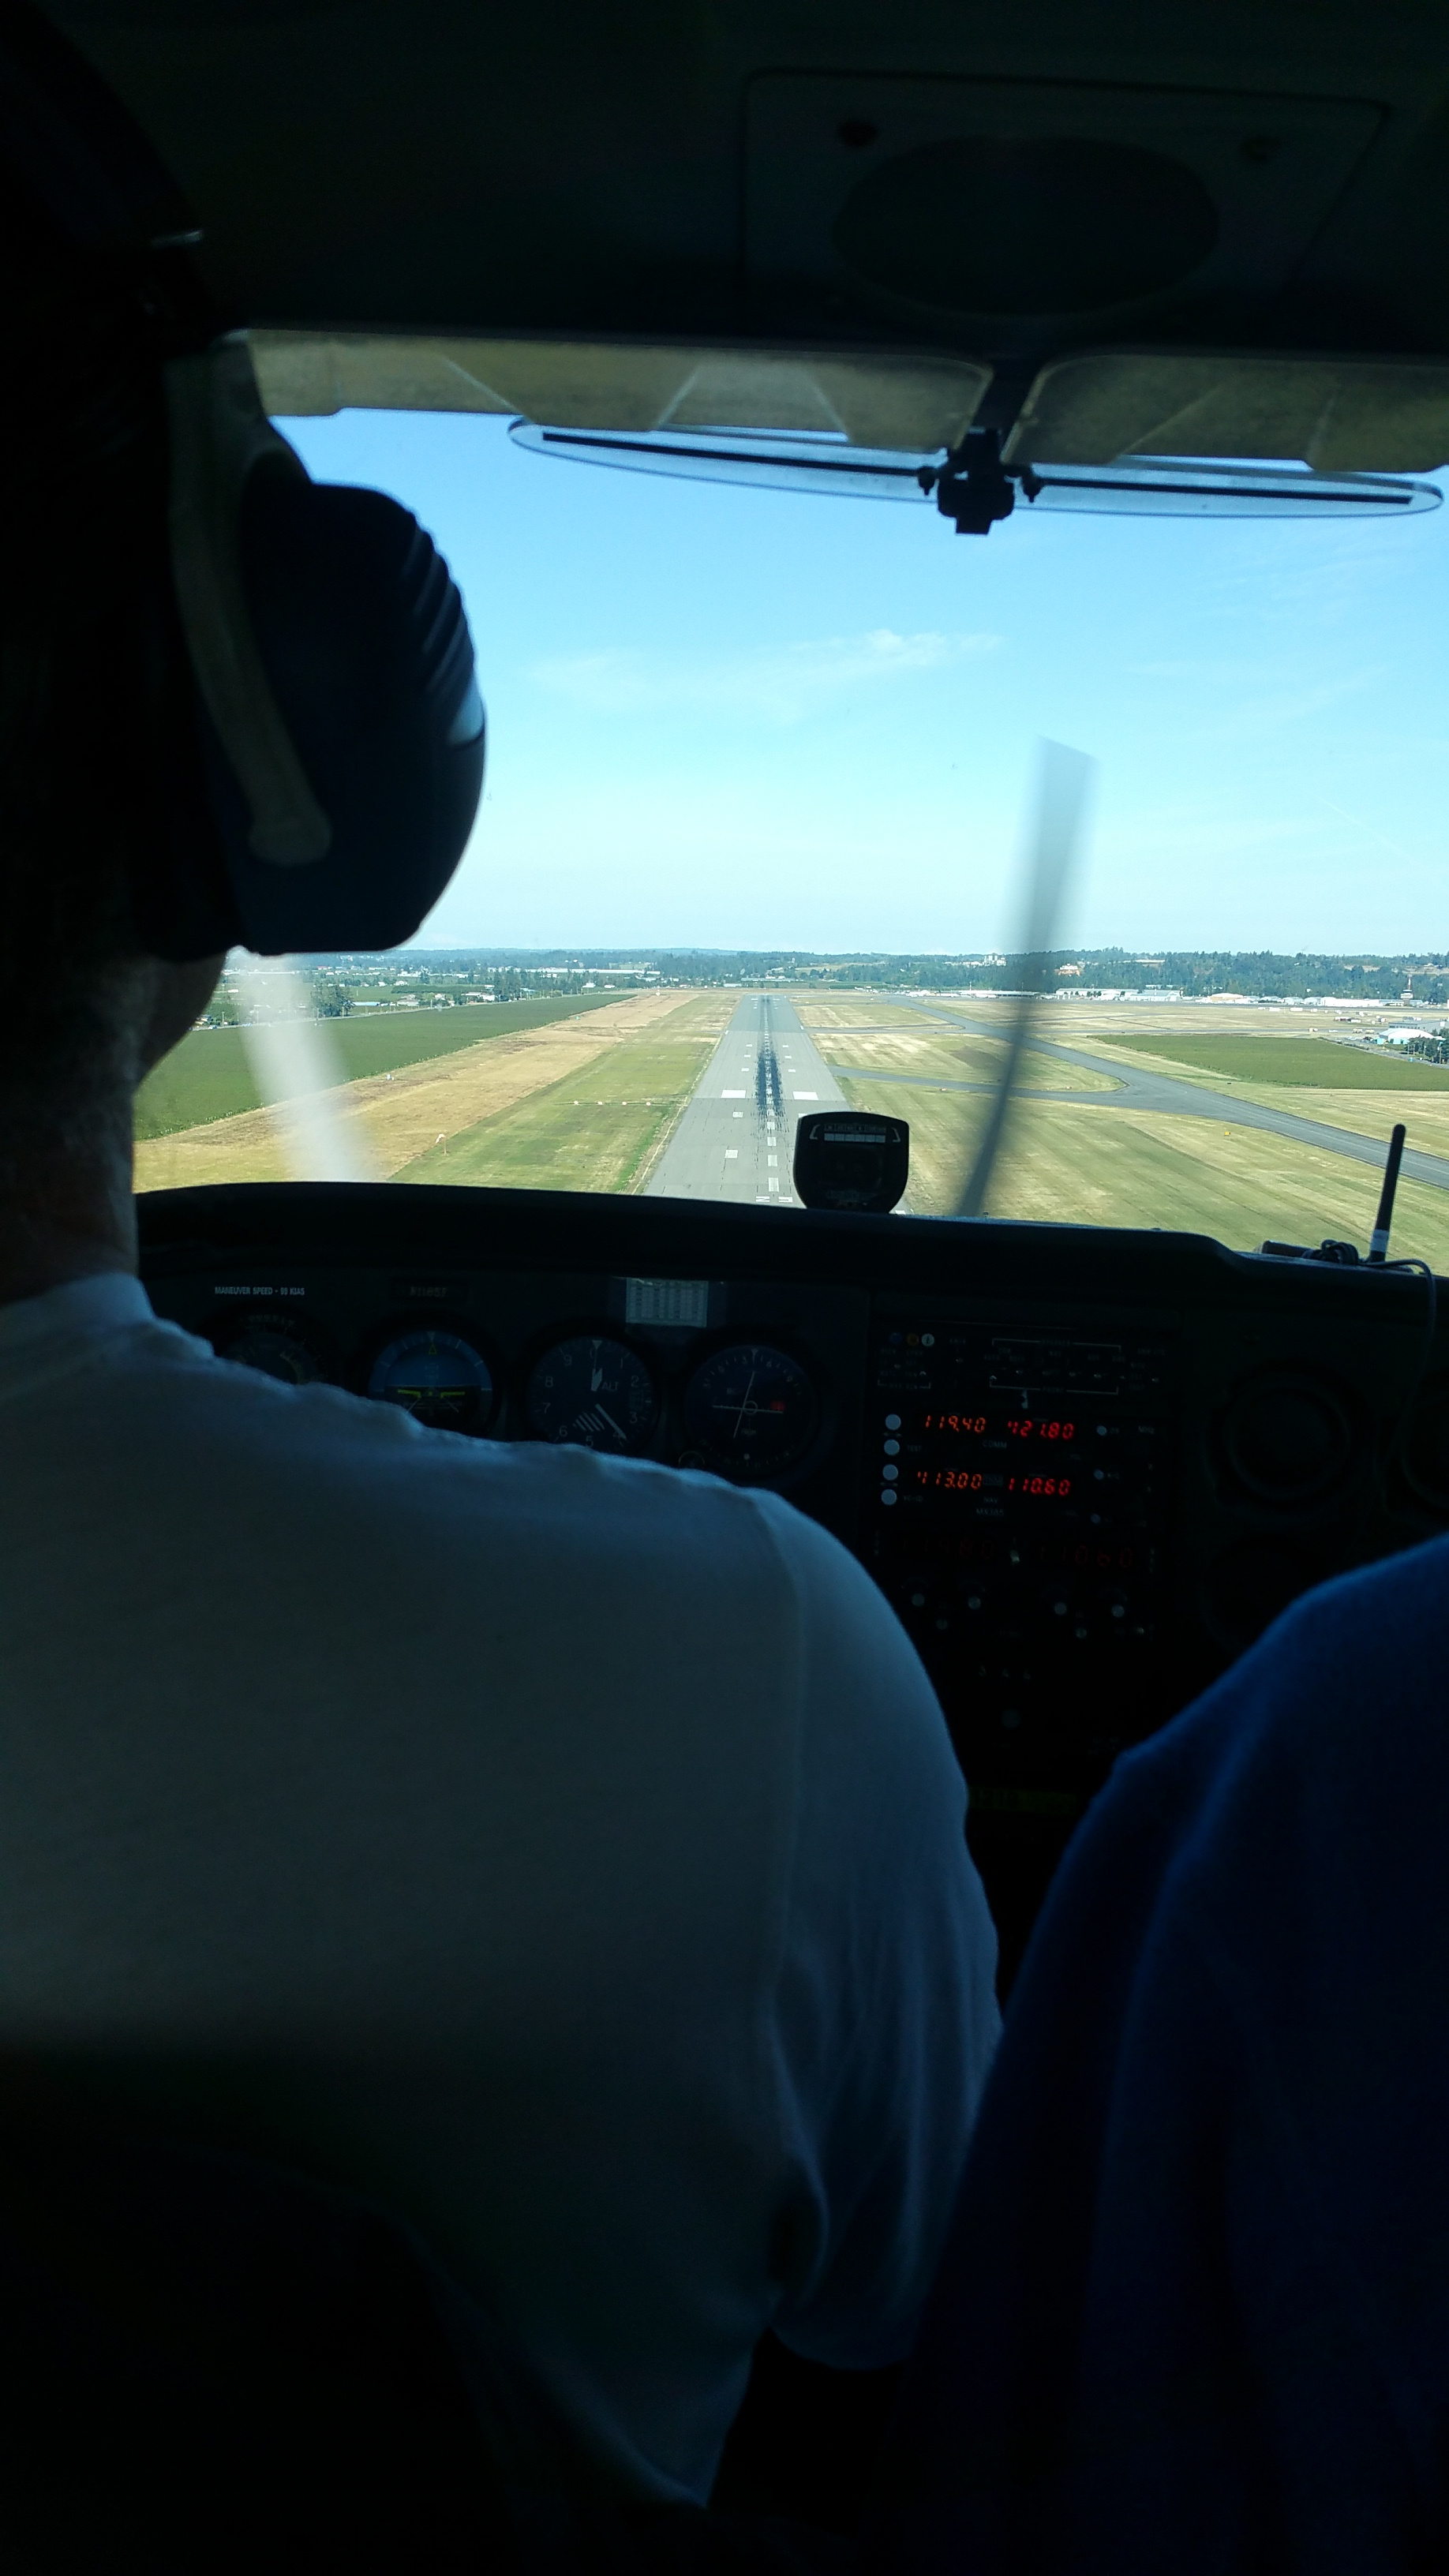
Final to CYXX runway 25
Days earlier, I had called the FBO on the W side of the field, which has self-service avgas pumps. They said I could land there and Customs would come out to meet me. But the controller said to taxi to the Shell FBO on the E side of the field, because that’s where Customs usually meets people. So that’s what I did. We were spot-on-time to our estimated arrival of 8:20am.
Flight time: H 59.7 – 60.8: 1.1 hours
Here are our flight tracks for this leg. Some get split due to Naviator (the app I was using) crashing during flight, and restarting.
I called customs and had a 15 minute wait before getting a person. He was just about to clear us over the phone, when I declared that we had a shotgun with us, and the accompanying Candian paperwork RCMP form 5589. He put me on hold for about 10 minutes. Normally, they have an agent meet you in person to process this, but apparently there was some kind of screw-up and despite my 2-day advance notice with this declaration, they didn’t have an agent at the airport. When the customs agent returned to the phone, he said he’d process the form over the phone by us manually reading off the fields to him. All in all, clearing customs was a 50 minute phone call.
Next, we walked to the FBO to fuel up the airplane. I could make it to Williams Lake without extra fuel, but I had not flown the route before and wanted to be extra cautious about fuel. After that, I called Nav Canada to file the flight plan from Abbotsford to Williams Lake, fetched latest ATIS, contacted ground, then tower, then took off for Williams Lake.
Abbotsford to Williams Lake
We headed NE toward Harrison Lake, over the Northern Rockies to the Fraser River Valley, keeping below Vancouver’s “C” shelf at 6,500′ until we got far enough NE. The clear weather allowed us to fly high and cut the corner, not having to fly E to Hope then N. It was a beautiful flight. Then we followed the river N to Williams Lake.
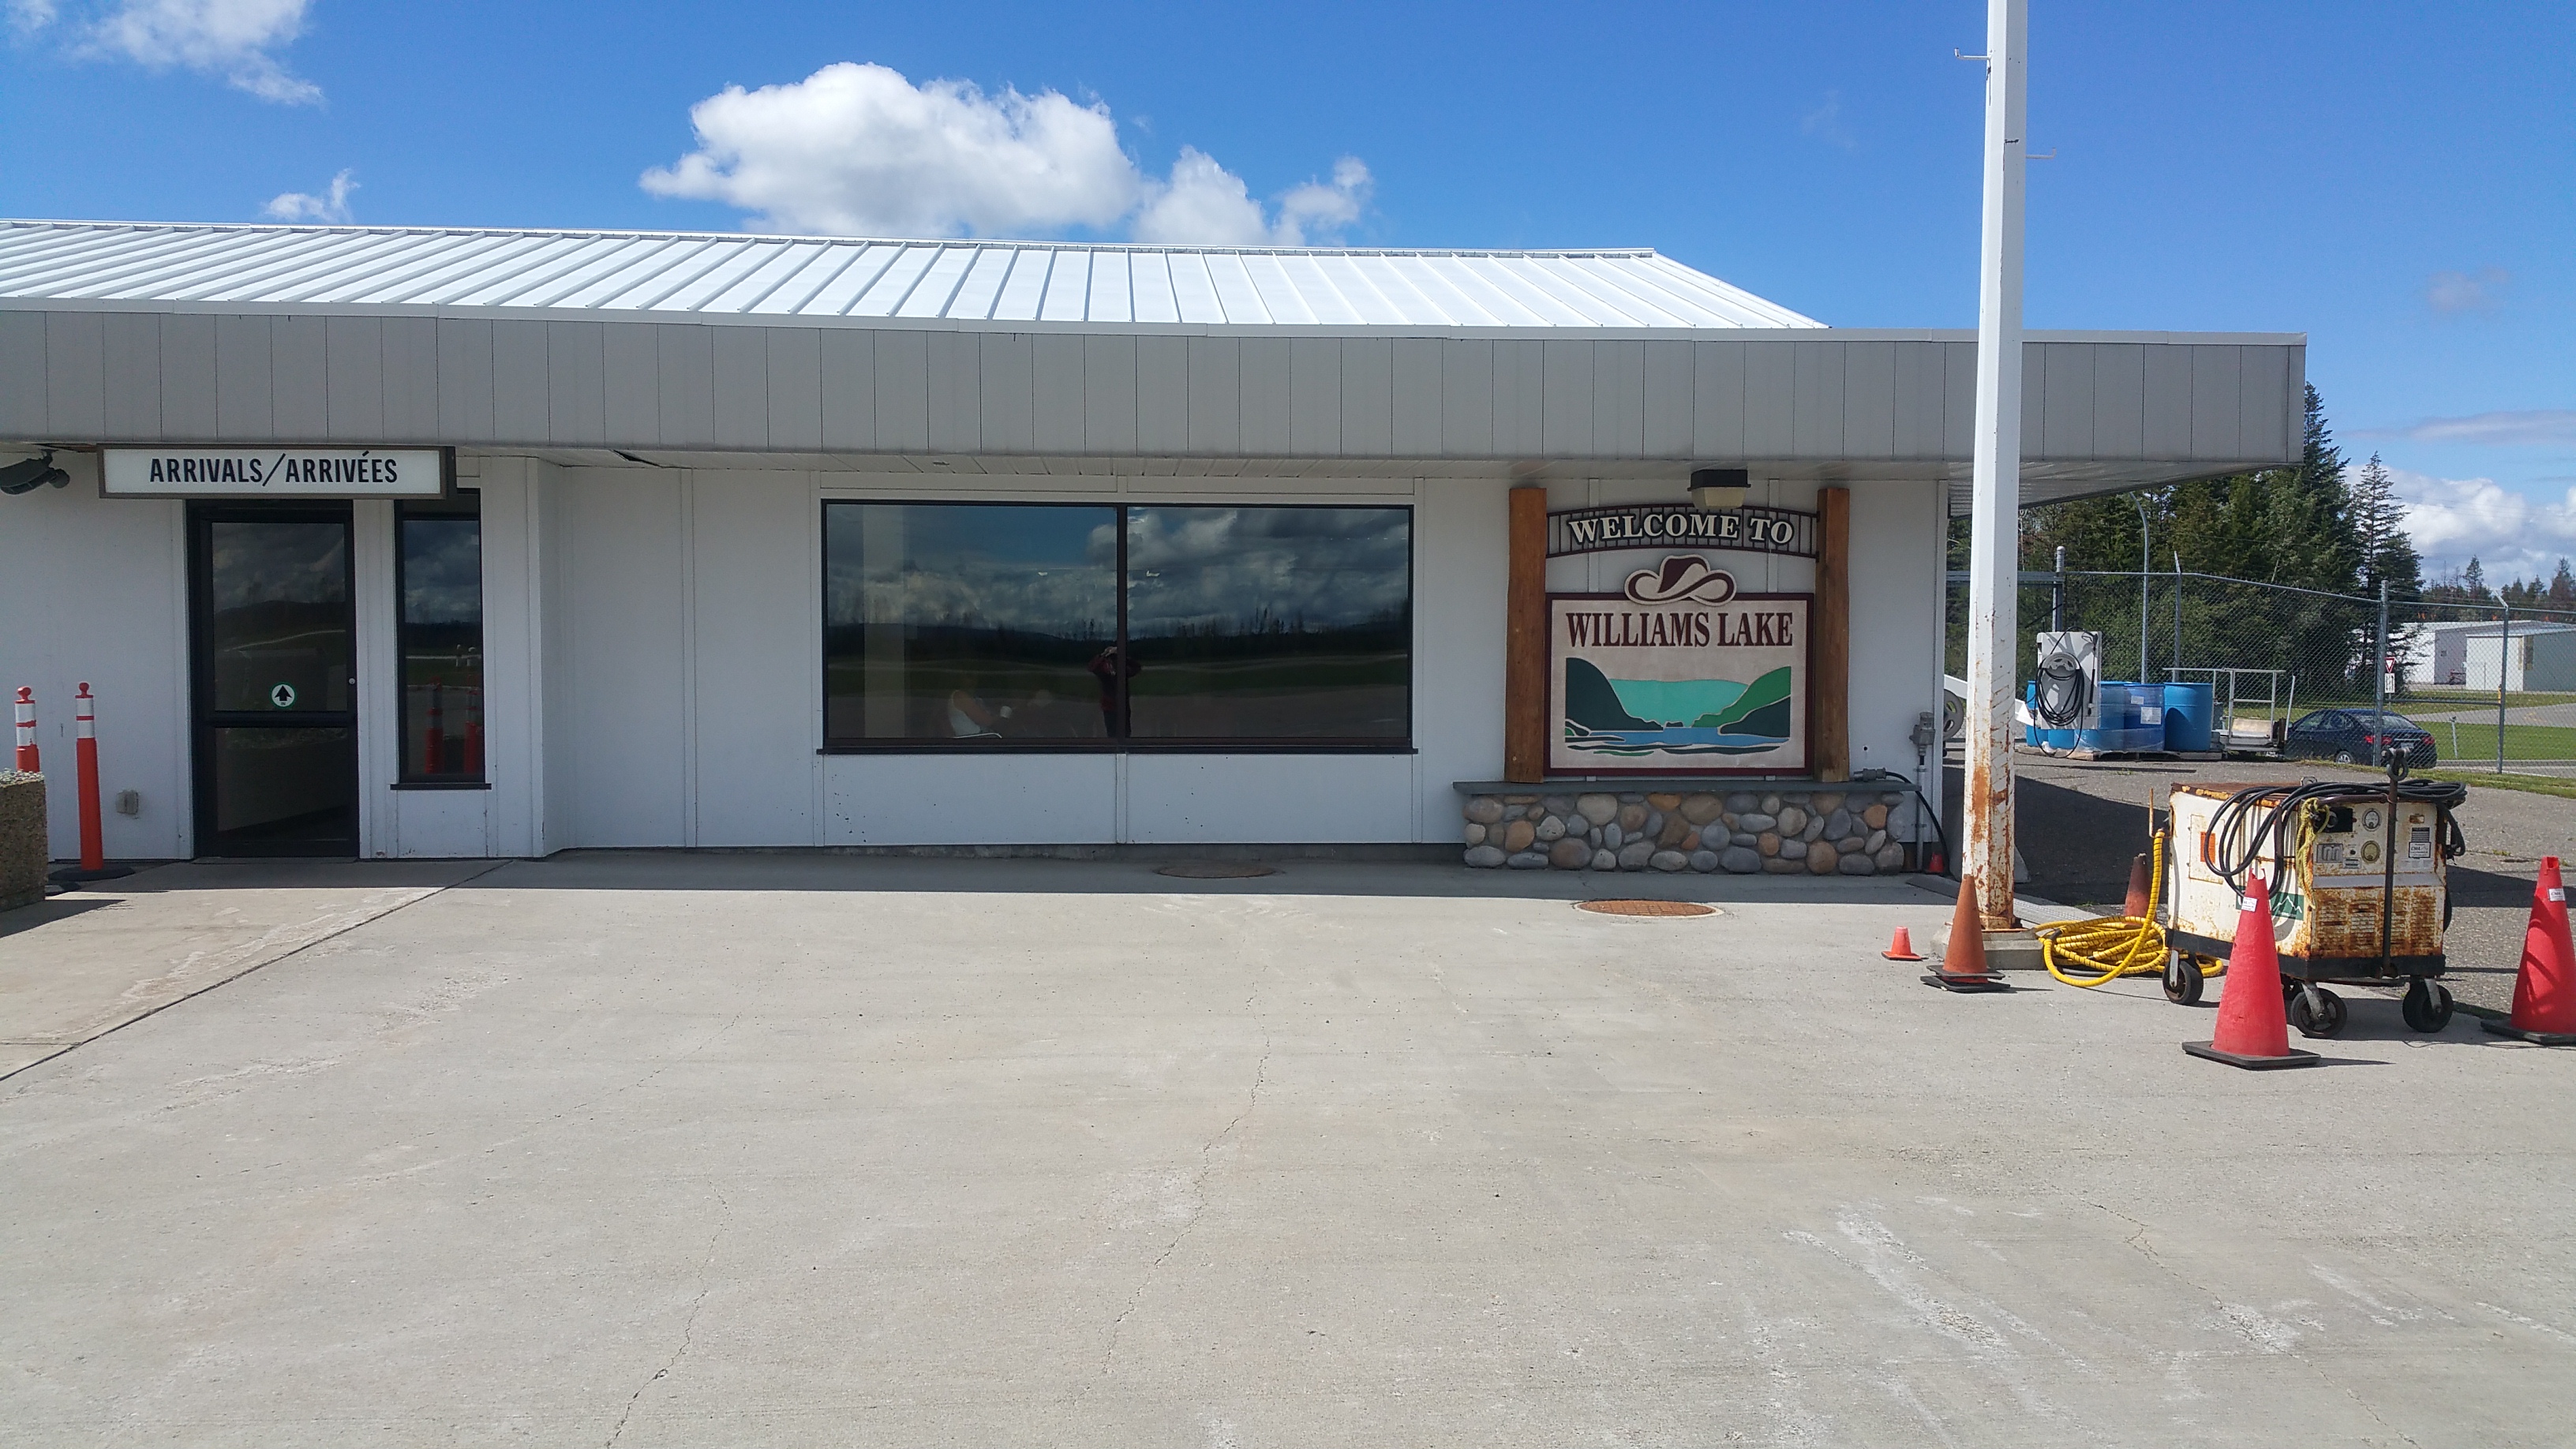
Williams Lake is not a towered airport, so as we approached I made US-style radio calls on their frequency. On my first call about 8 miles out, Williams Lake responded giving the airport wind and barometer setting, asking which runway I would use. This was my introduction to how Canada is a little different from the US. Their untowered class E fields usually have an active RCO with mandatory radio comms. It all went smoothly because they’re not that much different from the US. A commercial flight landed after we did, so we did our best to stay out of their way at the self-serve pumps as they were de-boarding passengers.
Next, I called Nav Canada to check weather up the trench. Prince George makes a good transition point between the trench and Al-Can routes. With good weather, we’d go to Mackenzie and up the trench to Watson Lake. Otherwise, we’d divert NE and cross the mountains to Ft. St. John, then along the Al-Can highway to Ft. Nelson. That is a longer route, but sometimes has good weather when the trench is socked in. Weather was good up the trench, so that was our plan.
Williams Lake to Mackenzie
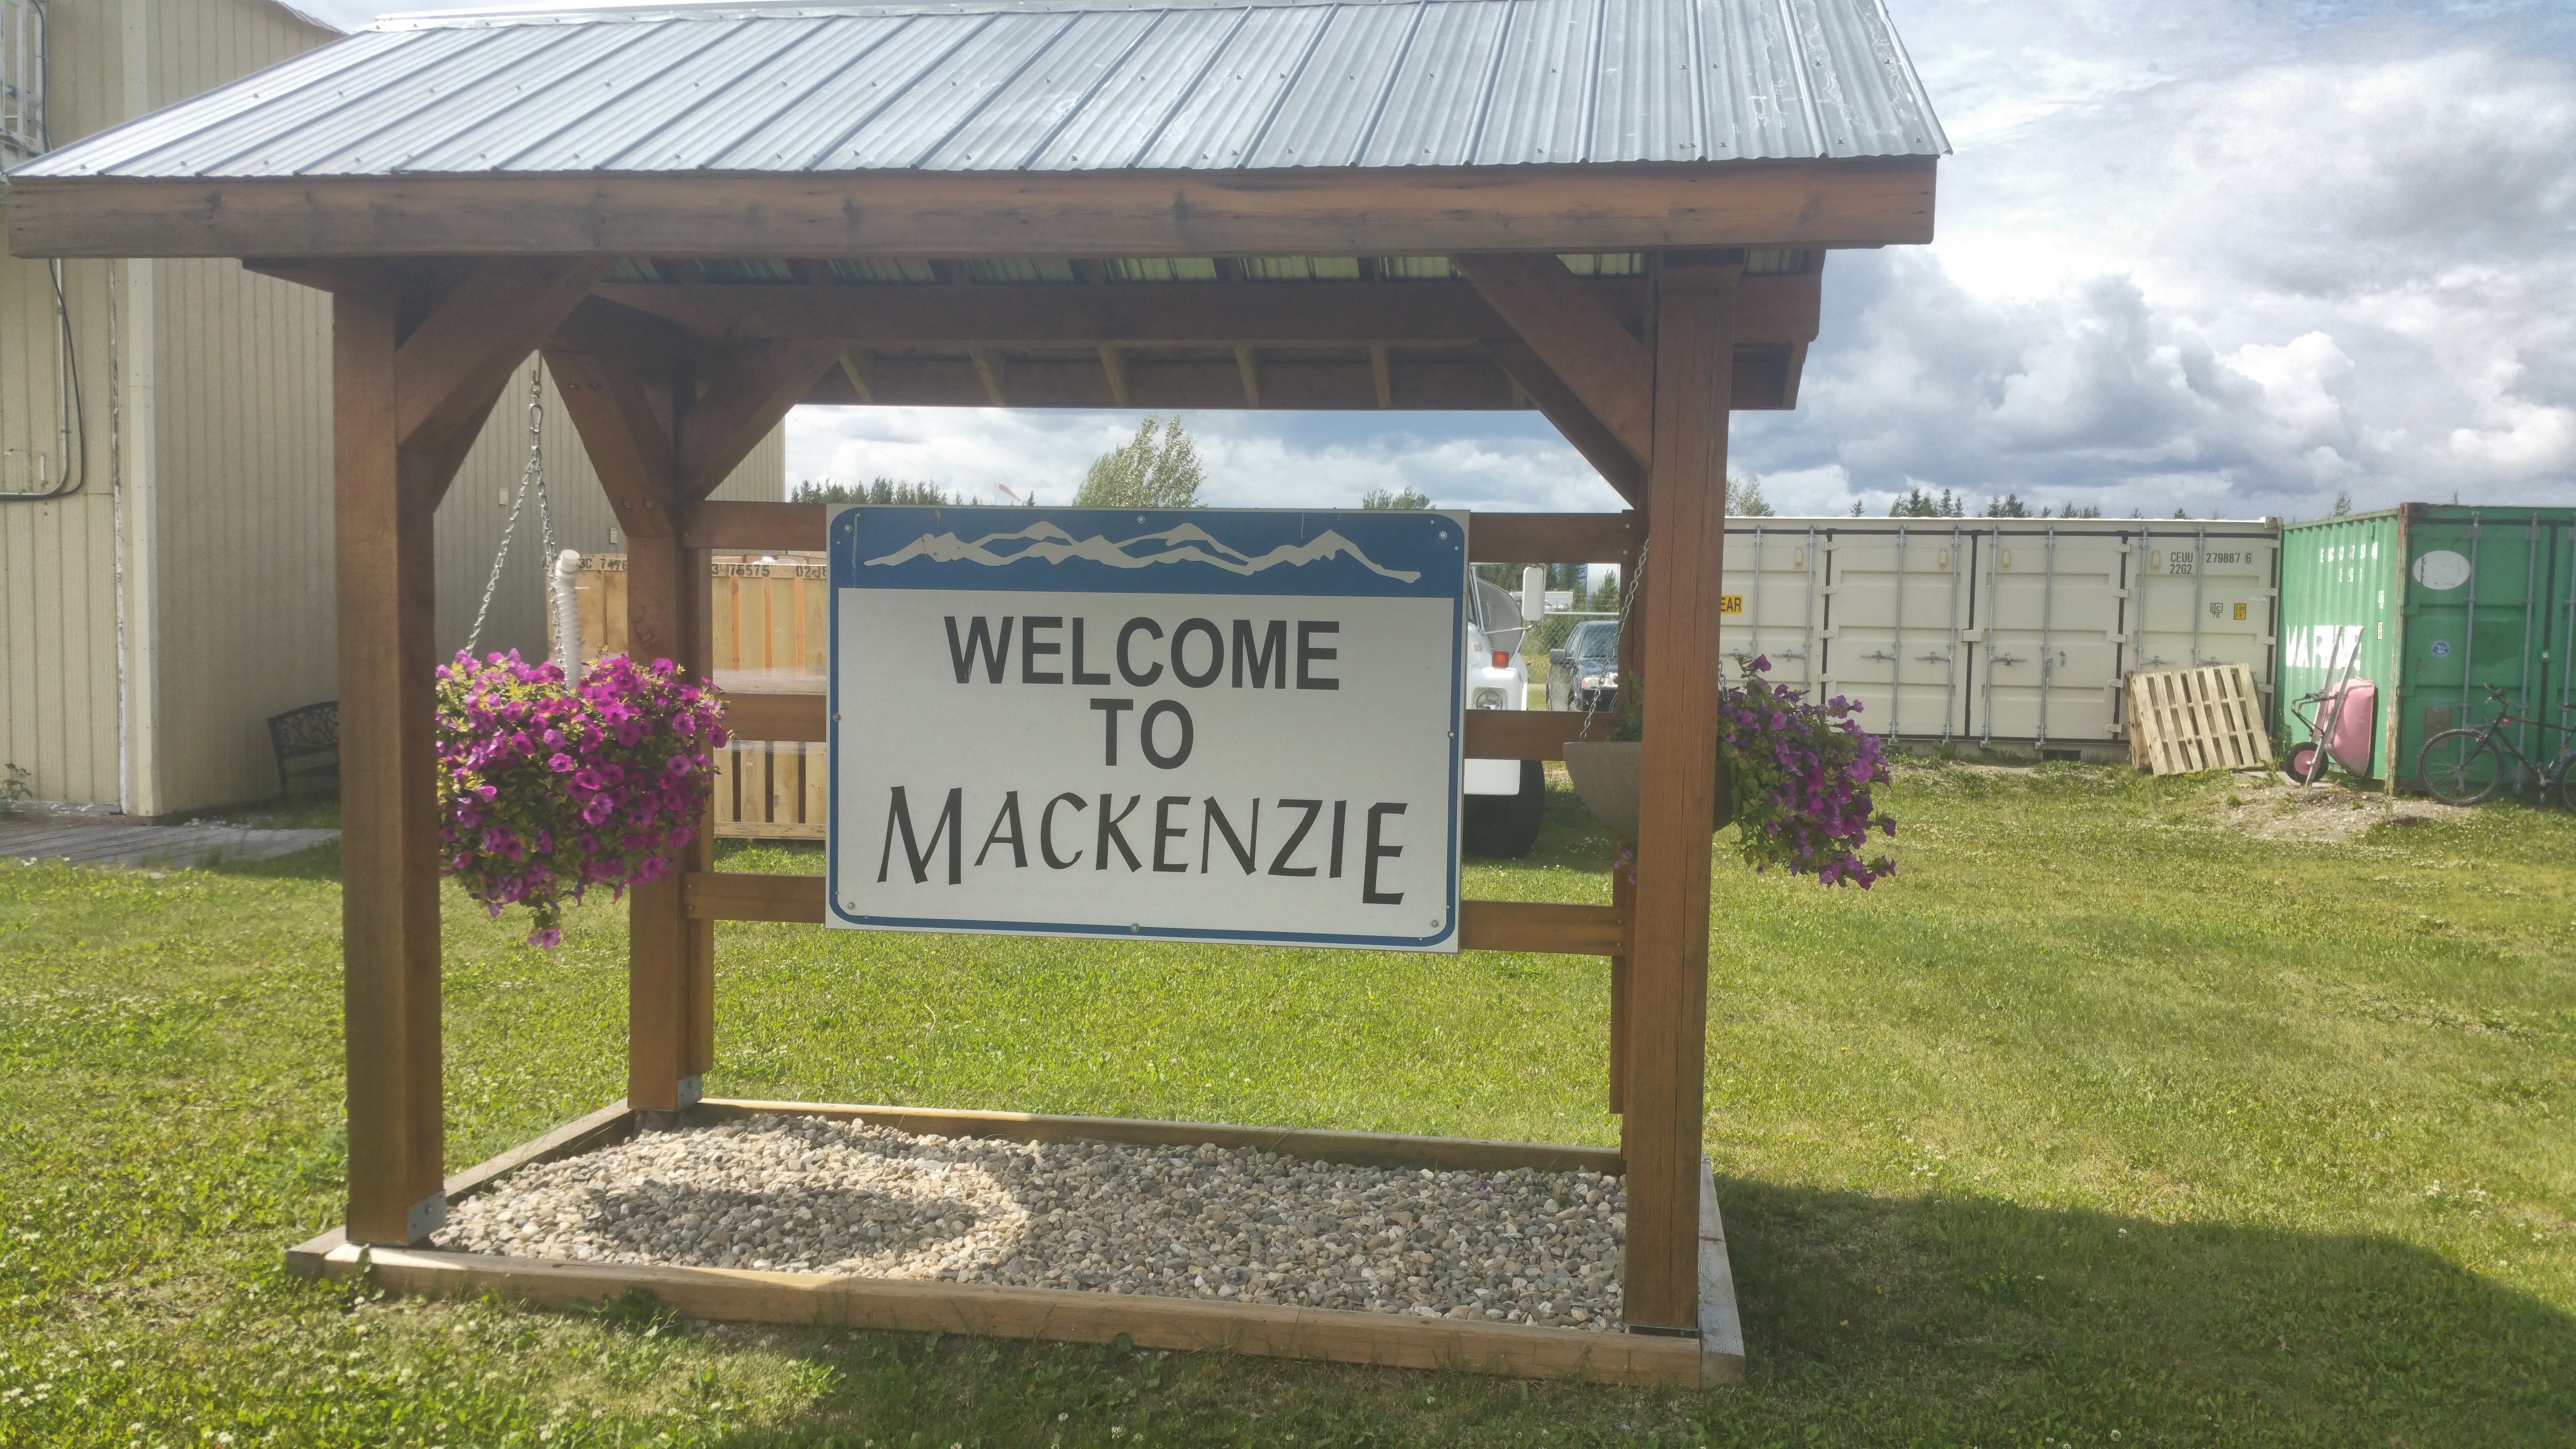
This was a short leg and I ran it at high power (2600 RPM, 120 kts TAS). We flew right over the Prince George VOR, which is atop a hill just E of their towered airspace. Then N to Mackenzie, which has no nearby VORs or ADFs, so you need to find it the old-fashioned way, with the Mark VII eyeball using landmarks and paper charts. It’s about 8 miles up from the S end of the big lake, on the E side.
At Mackenzie we called the fuel phone number from the CFS because nobody was there. The same lady I spoke with a week earlier answered and remembered me calling. She drove out to the airport, helped us refuel, offered us (free!) ice cream cones and cookies, and local advice with very detailed charts of the trench on her wall.
I had noticed the plane was just a bit tail-low on short final during landing, so I readjusted our load, swapping a heavier backpack forward into the rear seat to bring the CG forward just a touch. And I moved the tent under the right side passenger seat, which not only brought the CG forward a touch, but also cleared a little more space in the airplane. We kept this loading for the rest of the trip.
This (Mackenzie to Watson Lake) would be the longest single leg of the trip: 346 nm. It’s well within my range, but I’d fly it a bit slower for better efficiency: around 2400 RPM which is about 10% more efficient than high speed 2600 RPM cruise.
Mackenzie to Watson Lake
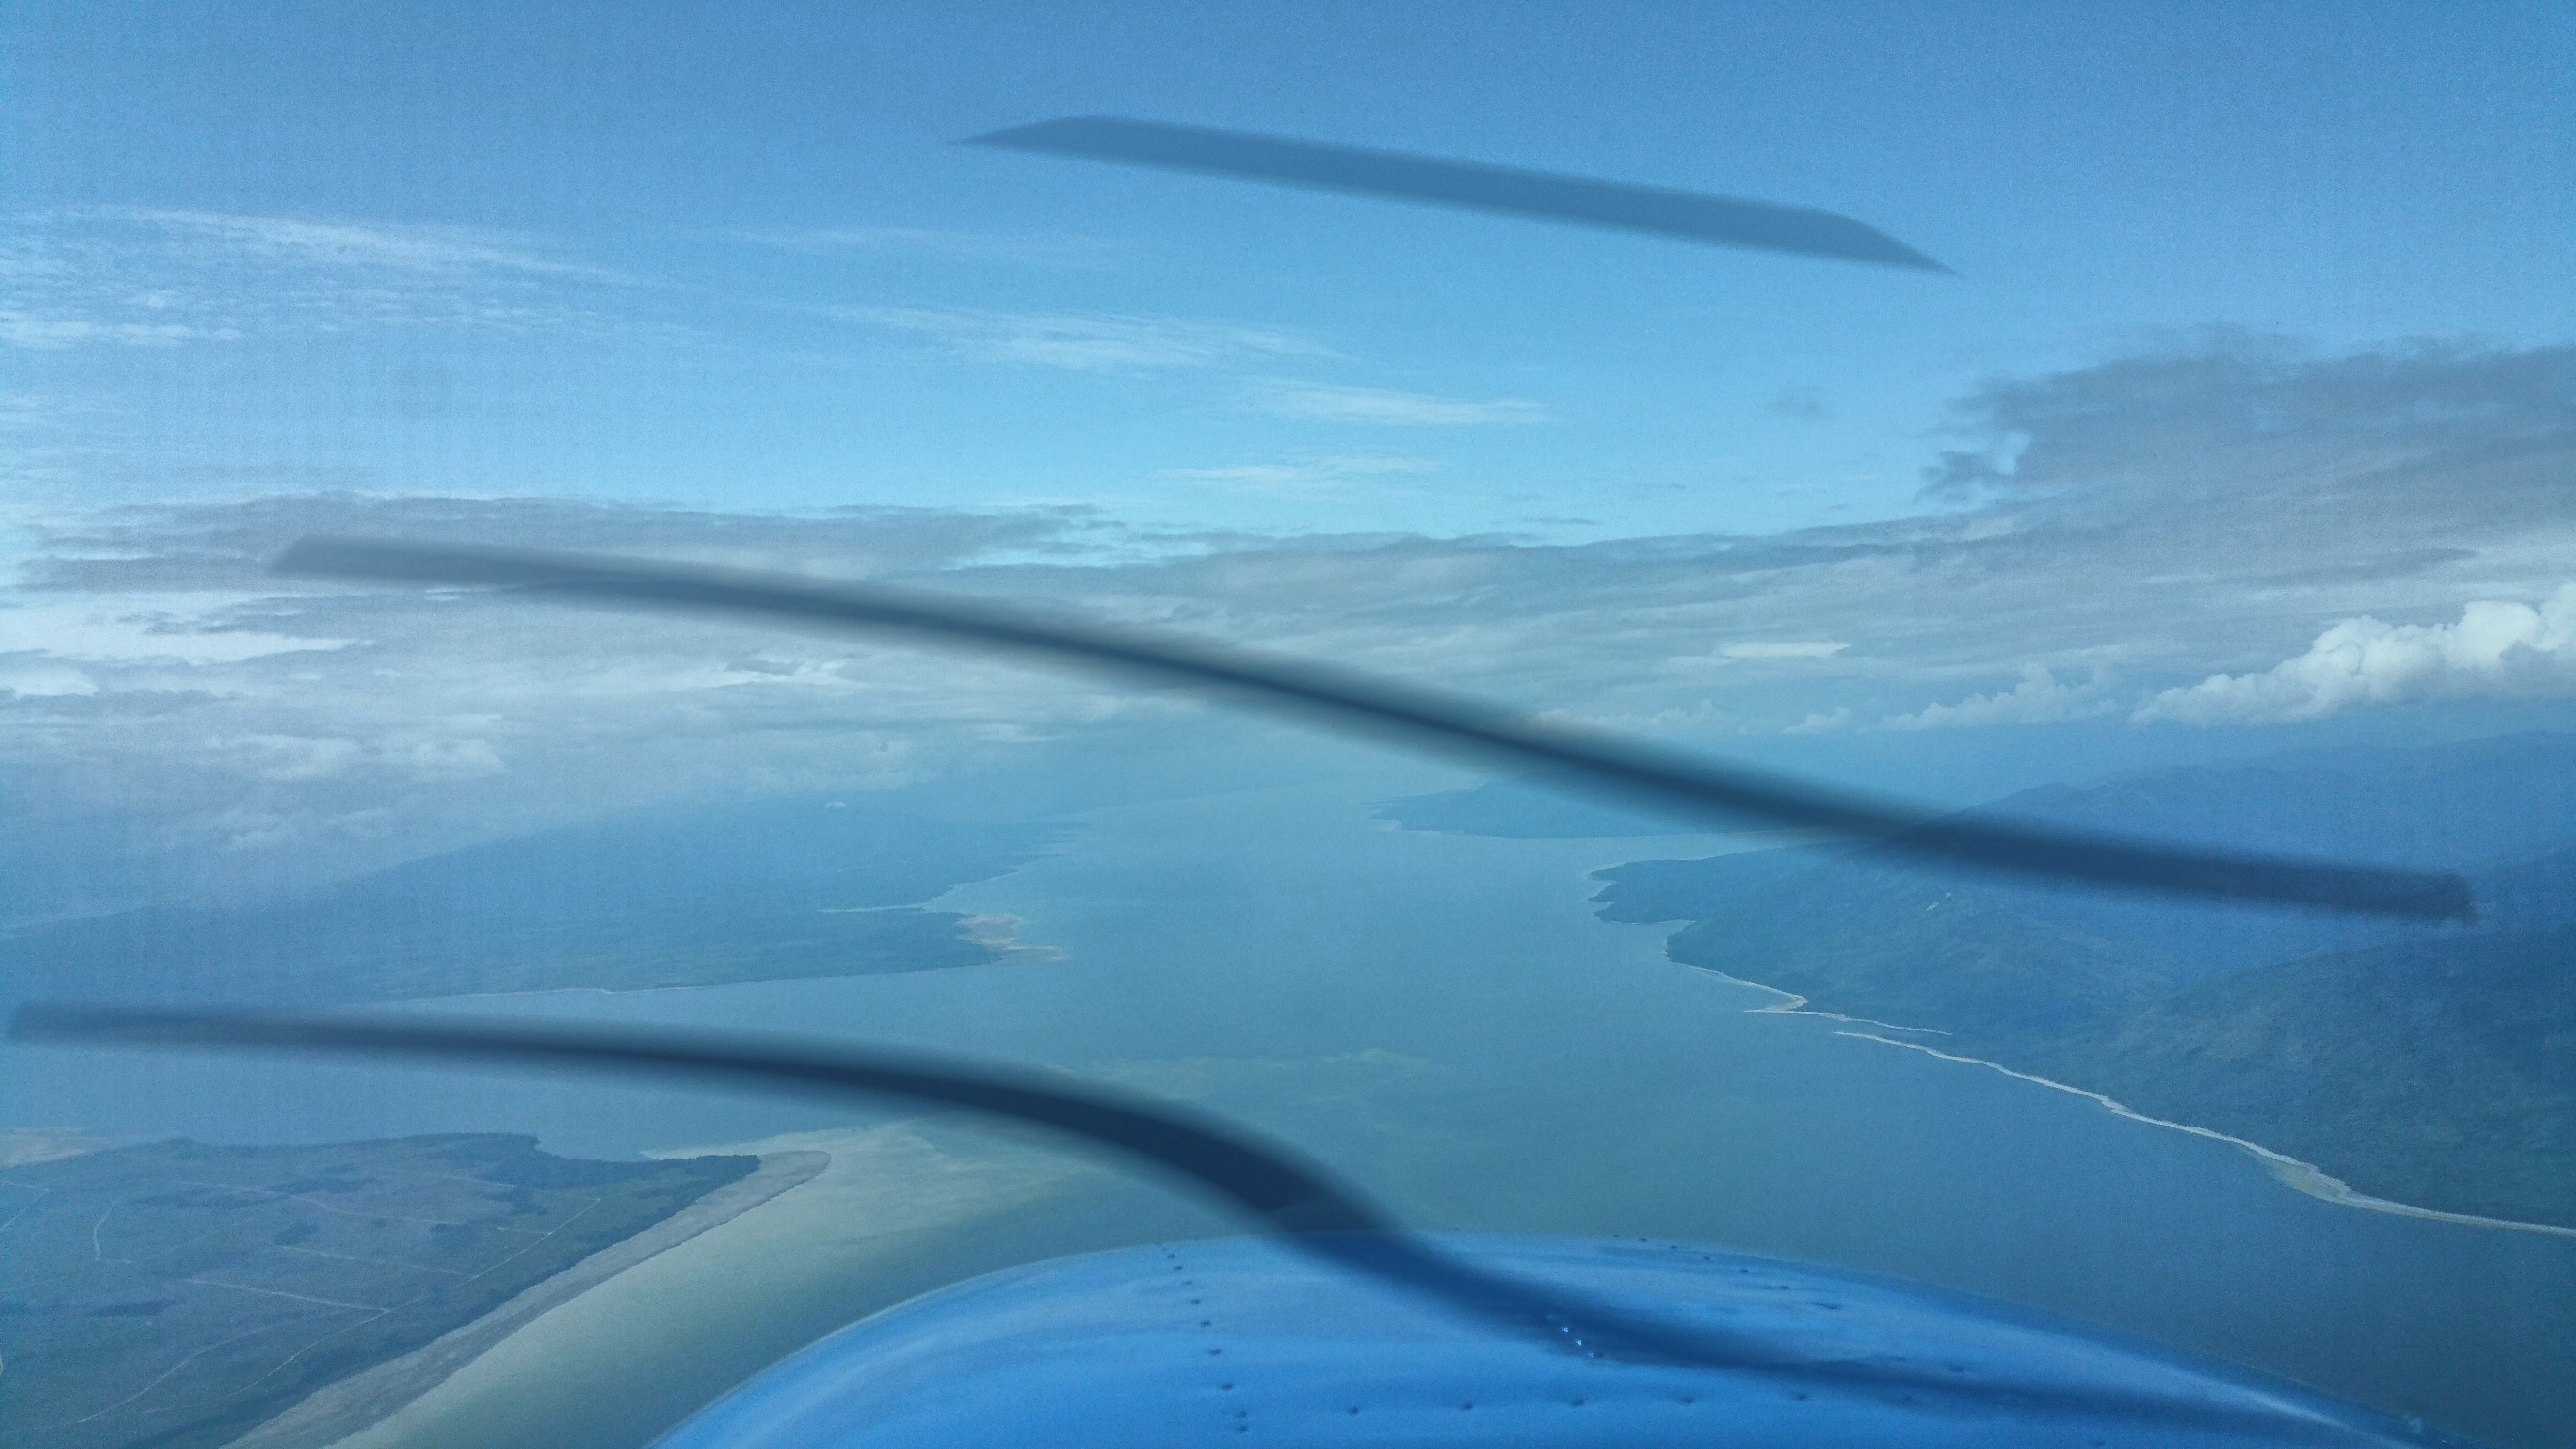
This leg goes N up the trench. It starts with a long, narrow lake (actually, the Williston Reservoir) lying in a gorge that runs perfectly straight for about 1,000 miles. The lake runs for about 160 nm, with Tsay Keh Dene at the N end. This marks roughly the half-way point of the leg; from there, it’s about 180nm straight to Watson Lake.
Flying up Williston Lake
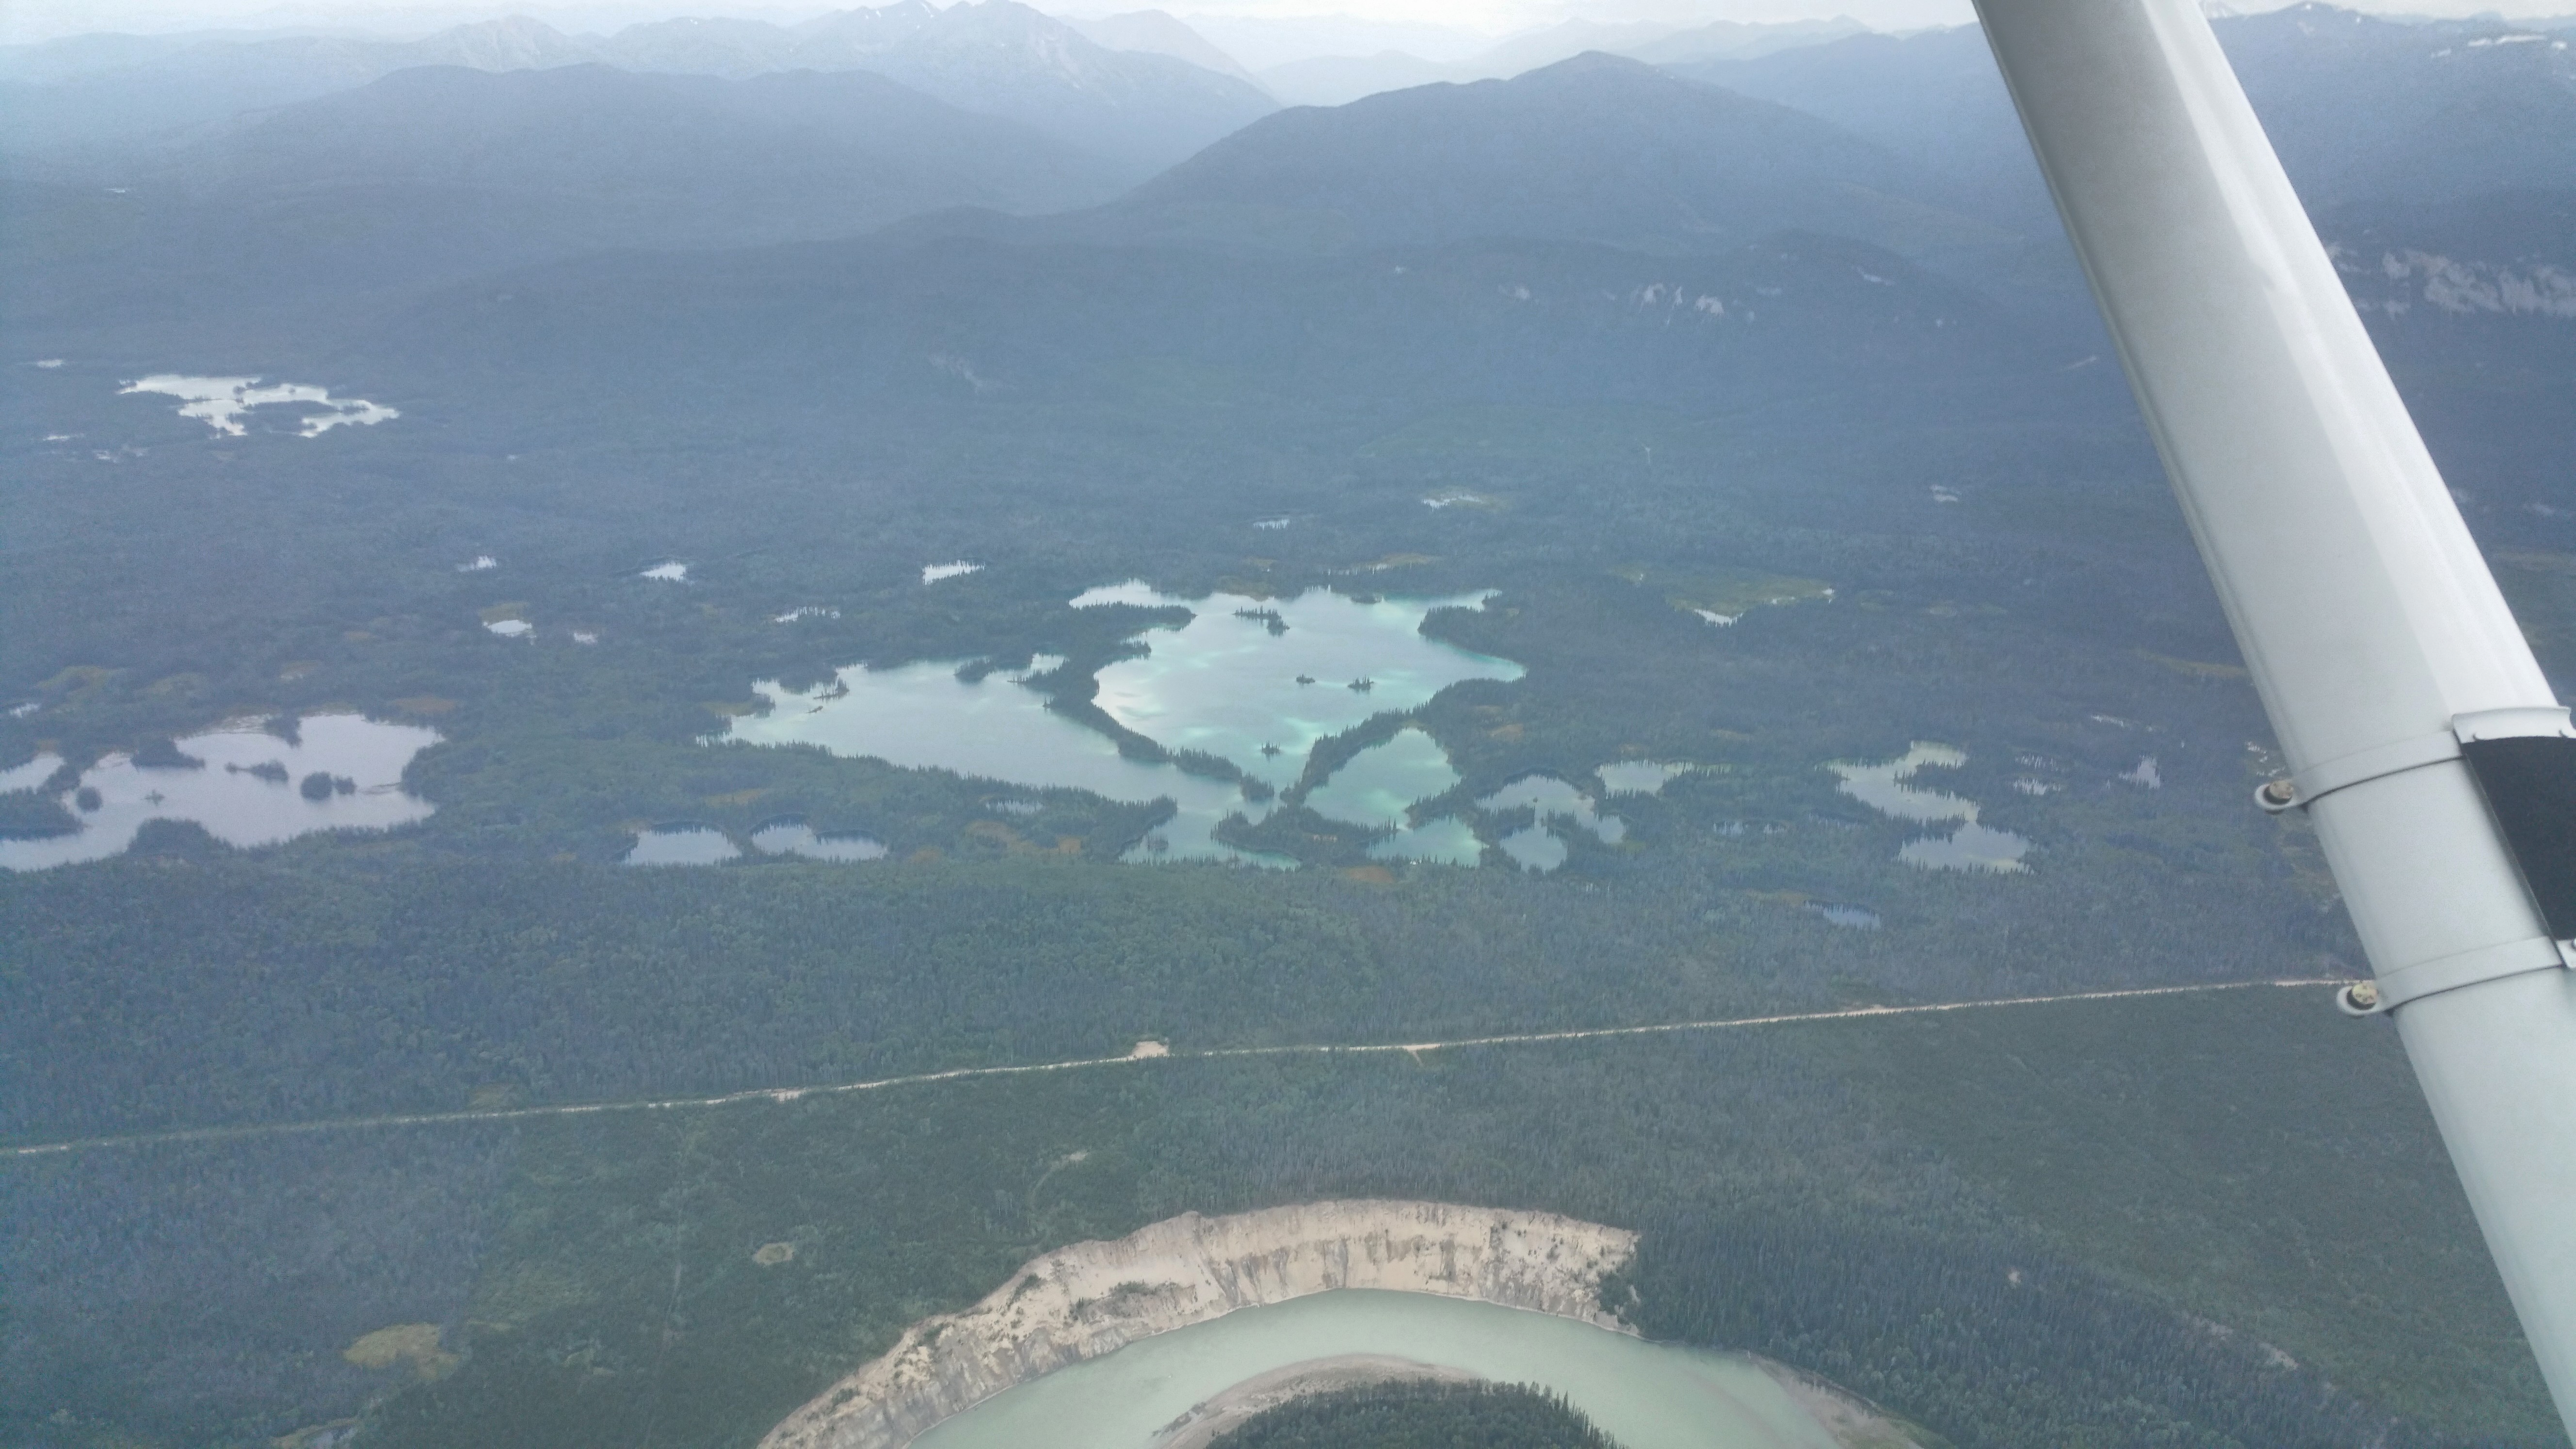
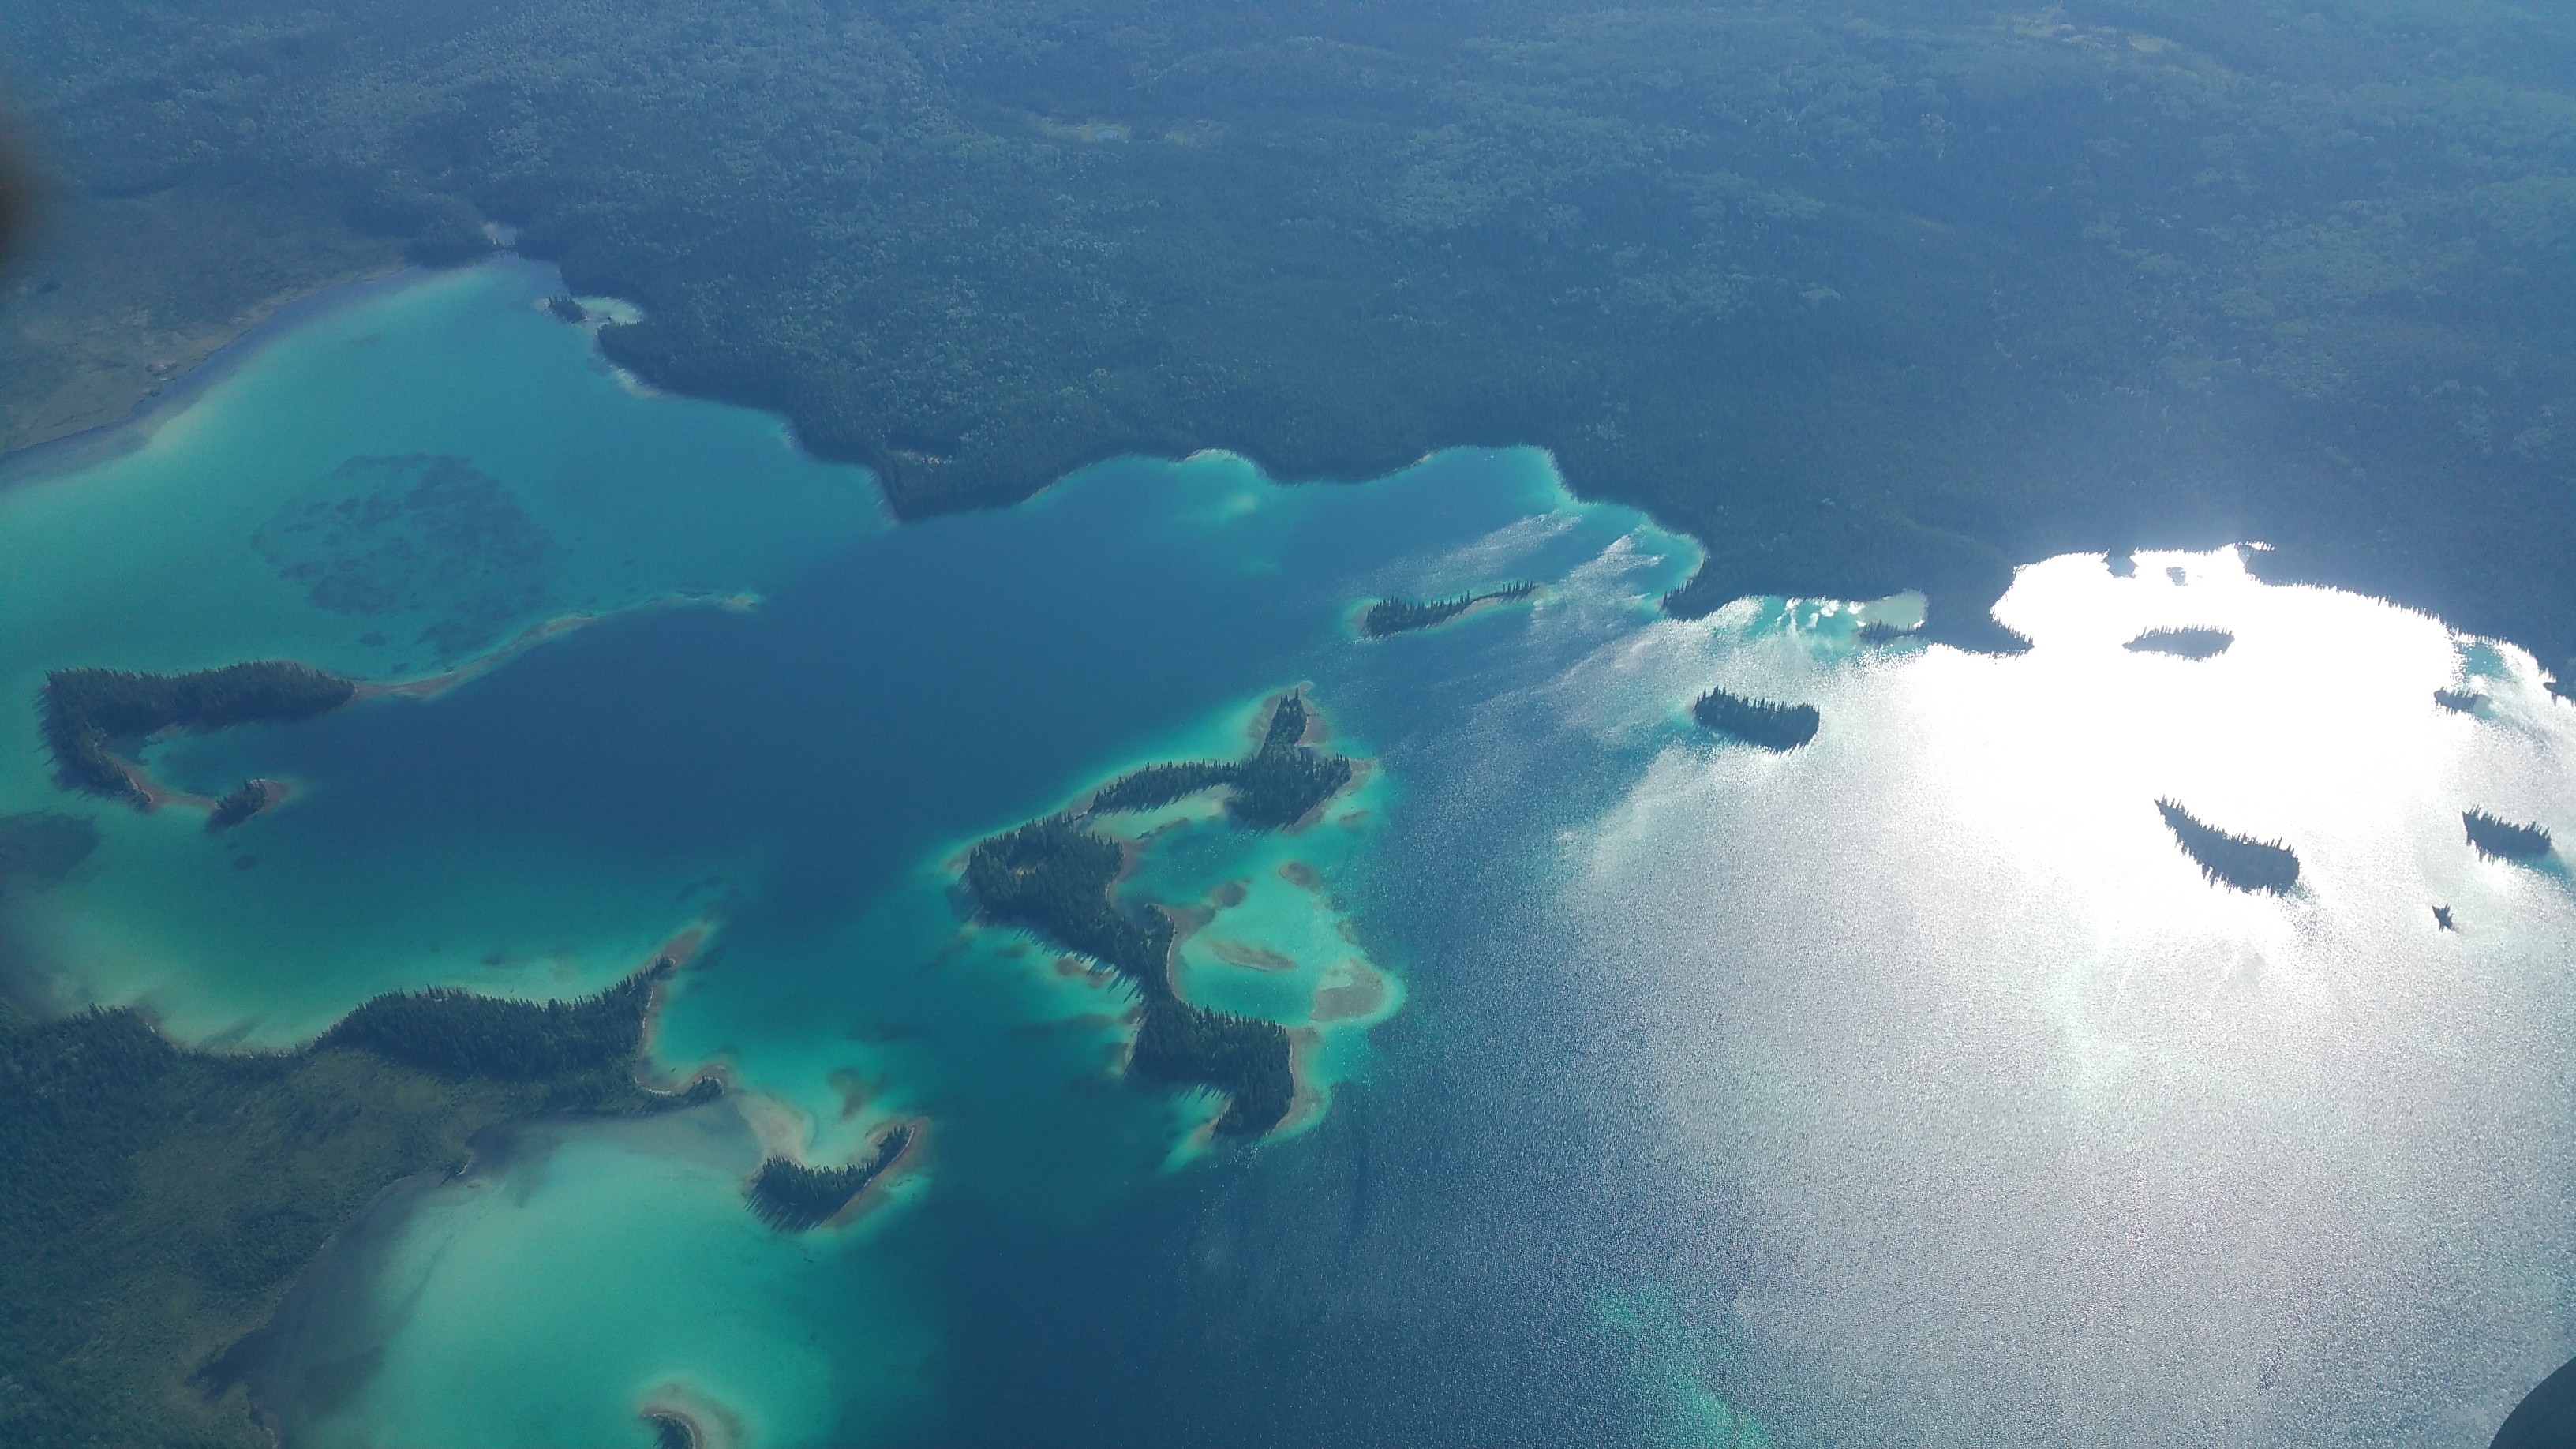
We found this leg incredibly scenic, and remote, though we saw numerous private dirt runways along both shores of the lake. If the engine stopped chugging, any of them would make a good safe landing spot. We also saw several lakes with amazing shades of turquoise, looking like Caribbean reefs.
Lakes with Caribbean sea colors
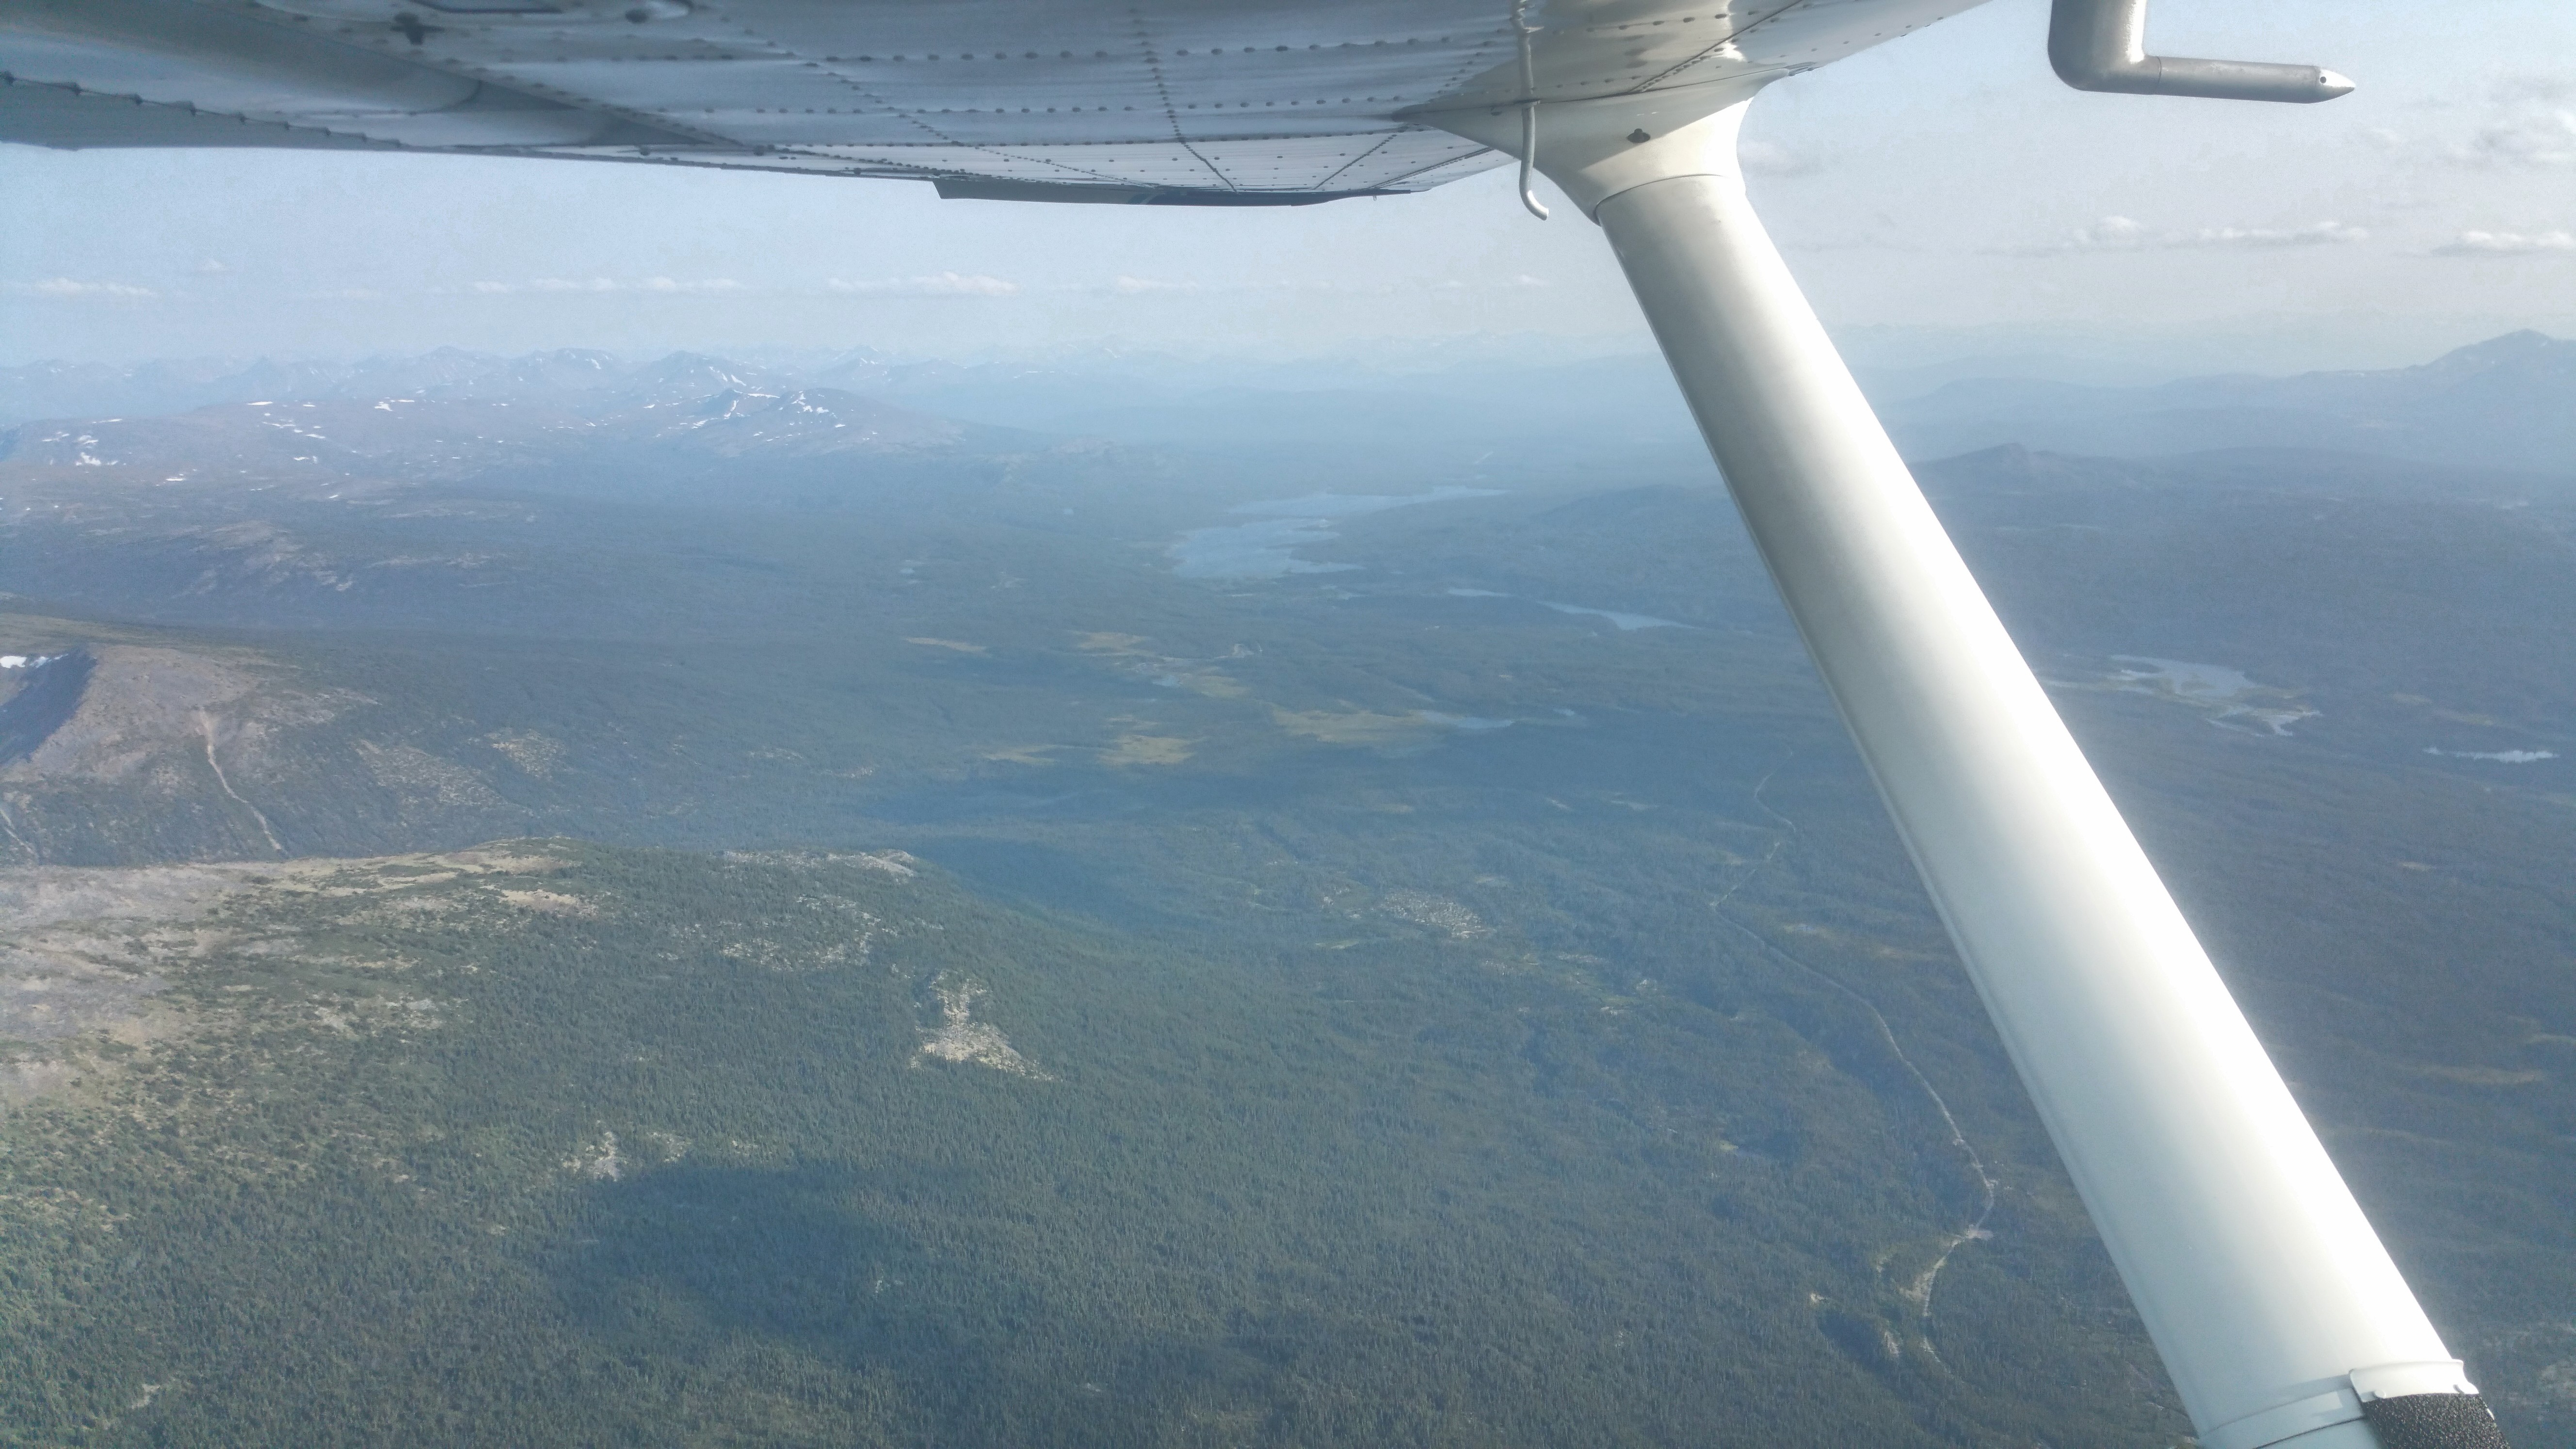
Finally, we emerged out of the mountains into the flatlands getting closer to Watson Lake. Here we encountered light turbulence and 10 kt headwinds.
Out of the trench mountains into the flatlands approaching Watson Lake
Finally, we landed at Watson Lake. Flight time: H 63.5 – 66.9 = 3.4 hours. It took 26.5 gals to fill up, so we had 13.5 remaining and were burning 7.8 gph. Fueling at Watson Lake is a little different. First, go to the terminal to get “the card”. Take the card to the pump terminal and activate it, then fuel up. Then, go back to the pump terminal and print the receipt. Then, take the card & receipt to the terminal to pay for your gas.
At Watson Lake we met a fellow pilot named Paul flying a 1948 Aeronca. He was also en route to Whitehorse, but planned to camp at Watson Lake for the night. Flying a 172, one doesn’t often meet people who fly lower or slower, but the Aeronca is one of them. As we prepared to depart, Paul changed his mind and followed us west toward Whitehorse. This far north (above 60* latitude) in July, we’d have light until past midnight.
Watson Lake to Whitehorse
We departed into the wind to the W and followed the 261* radial of the Watson Lake VOR, which goes straight to Whitehorse. About 15 minutes after we took off, we heard Paul on the radio behind us. On this route, 8,500′ MSL is sufficient to clear terrain and fly straight, which saves you 30 minutes or more over following the twists and turns of the Al-Can highway, which you might have to do with low cloud ceilings. We had 10-15 kt headwinds but only scattered clouds and were in no rush. Perfect conditions, daylight and amazing scenery the entire way.
We flew direct to the Whitehorse VOR. Their ATIS reported winds 22 gusting 35 from 200 to 220. About 8 miles E of the VOR I called the tower. They gave me a L base to runway 19, which is only 1,800′ long. With that stiff headwind, this would be plenty! Whitehorse airport is on a big elevated plain, running N-S, west of town. As you approach from the E side to land on runway 19, with wind from the SW, one expects a down-draft as the wind follows the terrain drop-off. And that is what we got. Landing was a cinch. Came in at 60 kts on short final, pushed in some power for the down-draft, then back to idle over the numbers. We had a smooth landing using only half the runway.
Flight time: H 66.9 – 69.1 = 2.2 hours. We fueled up and it took 16.1 gallons to full, which is 7.3 gph. Total flight time for the day: 9.4 hours. Surprisingly, I still felt fresh while landing. I didn’t feel any fatigue until after we hit the town.
Our tie-downs were too short to reach the runway hard points, which were widely spaced. And in a windy place like Whitehorse, tie-down is a must. We walked over to the fire department and they gave us some extra rope. We tied them into large loops which we used as extenders. While we were finishing all this, we saw Paul land in his Aeronca, about 1 hour after we landed. We grabbed a taxi to the Westmark Hotel, walked to the Big Bear Donair (the only place still open) for a tasty midnight dinner of falafels and draft beer, then walked back and hit the sack. Over 9 hours of incredible flying through some of the most scenic country in the world made this one of the best days of my life.
In July 2017 I took a cruise to Alaska with family & friends. 1 week N on the ship, 1 week inland, then flew home from Fairbanks. It was a fun trip, but I told myself that one day I would fly my own plane up there to visit the real Alaska outside the corporate padded room of cruise ships, trains and buses. Later that winter I started planning what would become the Alaska trip of July 2018, described here. The planning in all its aspects would consume more than 6 months.
This is the first of 12 journal entries, each detailing part of the 14-day adventure: this introduction, one entry for each of the 7 flying days, plus one entry for each of the 4 blocks of days we stayed in each place. The next covers day 1.
Trip summary:
Day 1: fly KBFI-CYXY Whitehorse
Days 2-3: Whitehorse
Day 4: fly CYXY-PATK Talkeetna
Day 5: fly Denali
Day 6-7: Talkeetna
Day 8: fly PATK-PAGK Gulkana
Day 9: fly PAGK-CYXY Whitehorse
Days 10-11: Whitehorse
Day 12: fly CYXY-CYXJ Ft. St. John
Day 13: Ft. St. John
Day 14: fly CYXJ-KBFI Seattle
Planning
Flying a small plane (my 1980 Cessna 172 Superhawk) to Alaska requires some planning. I started with local advice from a guy who lives on Kodiak Island and had flown a 1952 Cessna 170 there from Los Angeles. Then used AOPA resources like their forums and videos. Also used sites like Skyvector, Weather Underground, and aviation apps like Naviator and Droid EFB. I tried to use Flight Plan Go, but it crashed so frequently it was unusable on all 4 of my Android devices (3 different tablets and my phone). Another essential resource was the Alaska Aviator Handbook. I also ordered a set of paper charts from Nav Canda (8 VFR sectional charts, the Vancouver terminal chart, and the Canada Flight Supplement), and measured & marked the routes the old fashioned way with pencil, highlighter, ruler & protractor. This became essential during the trip because Flight Plan Go is the only Android app with electronic Canadian charts, and it was an unusable steaming pile of bloat-ware.
Electronic Charts
My favorite flight app is Droid EFB for Android (formerly known as Avilution). But it is strictly US-only; it doesn’t have Canadian charts, airports, airspace or navaids (VORs & NDBs). Naviator is my next-favorite app; it works well but has sluggish response and drains the battery faster than Droid EFB. Naviator doesn’t have Canadian charts either, but it does have Canadian airports, airspace and navaids. And it also has high-res terrain for all of N America including Canada. Both work well with my Stratux, having ADS-B In with a WaaS GPS. So for this trip, I used Naviator alongside my Canadian paper charts and CFS for airport details. My navigation, both planning and in flight, was primarily by Mark VII eyeball and compass. But I mapped all my routes to follow VORs and NDBs where possible, and I had 2 navaid fixes for every airport we’d land at.
At the end of the day I had planned about 15 different flights, considering terrain, airspace, range between fuel stops, each with individual legs, headings, waypoints, timing, altitude, airspeed, fuel burn rates, etc. Printed them hardcopy so I could use during flight. For each of these, I also had a matching electronic flight plan in Naviator. This covered the 3 basic routes to Alaska: from W to E they are coast, trench, and Al-Can highway. It also covered transition points between these routes, and planned flights around points in Alaska like Fairbanks, Gulkana, Talkeetna, King Salmon and Kodiak Island.
Preparation
The Alaska Aviator Handbook is a great resource. Not only does it describe all the RCOs, special flight areas with their frequencies & rules (like Denali and the Anchorage corridor), but it also recommends survival equipment to carry on board for summer & winter. We carried everything recommended–and more–but kept it light. The survival gear included everything we’d need to camp for a week (tent, sleeping bags, fire starting gear, camp stove with fuel, etc.), plus extra Alaska-specific stuff like mosquito head nets, fishing kit, bear repellent, etc. Note: Mountain House makes a 5-day pack of dried rations that weighs just under 5 lbs. We got the total camping & survival gear for the 3 of us down to 50 lbs, including a 12 gauge shotgun with ammo (Brenneke 3″ mag slugs and 3″ mag #4s). This would enable us to camp comfortably for a week, if necessary. But we didn’t plan to camp at all.
Flying over thousands of miles of northern wilderness in a small plane, bear defense is a thing. We took a big can of bear spray and a 12 gauge shotgun with Brenneke Black Magic ammo (3″ mag, 602 grain slug, 1500 fps). A 12 gauge is about .73 caliber so imagine the hitting power of a supersonic “C” cell battery and you will not be too far off. This is what some of the rangers carry in Alaska and Canada. They are supposedly able to stop any animal in N America (including polar bears) with a single shot. That is quite a claim! We took it to the range to test the consistency and accuracy and were impressed. At 50 yards, fired from a Mossberg 500 pump, bench rested, we got a 5 slug group with holes that were nearly touching. It makes a stout blast that turns heads at the shooting range, but it’s quite controllable. Common sense (and US and Canadian law) requires that it be unloaded during flight and locked inside the airplane when unattended.
The Airplane
I had recently installed a new engine, the Penn Yan Superhawk O-360 upgrade. I flew it through the break-in protocol for 50 hours and measured its performance and efficiency over a variety of conditions. Just before the trip, the new engine had 62 hours and a fresh oil change to Philips 20w50 AD. We expected to fly about 40 hours on this trip, so it would not need an oil change. I brought 3 extra quarts of oil and ended up using 2 of them over about 35 total hours of flying, which makes an oil consumption rate of 17.5 hours per quart. This is normal and healthy for this model of engine.
International Customs
Flying a small plane to Alaska means crossing back and forth between Canada and the USA. Advance preparation for this includes the following. Some of these steps require several weeks, so get an early start!
Ensure your airplane has a radio station license, and the pilot has a radio operator license.
Ensure your airplane is insured to Canadian requirements, and bring written proof
If you are bringing a firearm
Ensure it’s legal in Canada (bolt/pump/lever action rifle or shotgun)
Ensure it’s sufficient protection from large bears (high caliber rifle or 12 gauge with slugs)
Get the RCMP form 5589: fill it out but don’t sign or submit it yet
for purpose: say “in transit” or “protection from wildlife”
Get the US Customs form 4457
After you’ve done the above advance prep, here’s what you do to cross the border:
At least 1 hour before the flight, file an EAPIS manifest describing your airplane, passengers, date, time and airports you’ll use to cross the border.
You will need passport #s and dates of birth for every passenger.
There is no advance time limit, so you can file a day or a week beforehand, if you want to.
Within 5-10 minutes you’ll receive the EAPIS email confirmation – keep it just in case.
Ensure your first landing in the country you’re entering, is an airport of entry.
Call Customs of the country you’re entering, 2-48 hours before you land there.
File an international flight plan with the country you’re departing.
After takeoff, before crossing the border, contact flight service or RCO to activate your flight plan and get a discrete squawk code.
Note: before flying across any international border you should be squawking a discrete code. The exception to this is Alaska. You can cross Alaska to Canada and vice versa while squawking 1200.
Canadian Flying
Canadian GA flight rules are similar to the US, but just different enough to trip you up. Here is a brief summary of the differences. Of course, these are not all the differences, just the main ones most relevant to VFR pilots:
VFR flight plan required for all flights > 25nm
Plan activates at filed start time – no need to activate after takeoff
Must call to close plan upon landing
Altitude: 10,000 – 13,000 limited to 30 mins without oxygen
VFR over the top is restricted
VFR night is restricted
MF: mandatory frequency; like CTAF
Class “E” airports (untowered) have mandatory reporting before entering their airspace
Monitor 126.7 continuously, en route. Also monitored by FSS.
Last but not least, we researched our activities — where to stay, what to do, in each spot. How to get around, etc. The stuff you’d do for any normal vacation. We did this for several spots, knowing that weather might prevent us from doing all of them. Hotel reservations get tricky when you can’t know exactly what day you might get there or how long you’ll stay (due to weather delays). Car reservations or ground transportation also gets tricky when flying around small, remote airports.
Co-Travelers
Choose carefully who to invite on a trip like this! You may have to make a forced landing and camp out. Or spend days holed up in remote locations with few or no services, waiting for weather to improve. Or fly through turbulent or marginal conditions, or severe terrain, that can make nervous passengers cringe. In situations like this, day after day, the social veneer wears thin revealing what people are really like. And on a trip like this, flying a small plane is not just a way to get there, it’s a big part of the trip and reason for coming. My good friend Bernd whom I’ve known for over 25 years, my father Dave, and myself constituted a perfect trio for such a trip. Everyone maintained a good natured optimism making the best of the situations and people that fate threw at us. Sharing the trip this way made it even more enjoyable.
While thinking about escape velocity recently, I wondered why orbital velocity wasn’t the same as escape velocity. The intuition was: consider an object in a circular orbit around the Earth at speed v. If the object speeds up just a smidge, then its centrifugal force increases, which pulls it slightly further away from Earth, where gravity is weaker, so it goes even further away, etc. It seems like a positive feedback chain reaction, the object getting progressively further away from E. That would imply that orbital velocity equals escape velocity, because if you go even a smidge faster, you’ll eventually escape orbit.
However, I worked out the equations and escape velocity is not equal to orbital velocity, but it’s about 41% faster (actually, square root of 2 faster). Upon further thought, I realized my earlier intuition missed a key point: as the object moving slightly faster goes further from Earth, its trajectory flattens out. When its trajectory is a circle, the force of Earth’s gravity is perpendicular to its motion, so it does not affect the object’s speed. But when the object’s trajectory flattens out, it’s no longer a circle, so Earth’s gravitational pull is no longer perpendicular to its motion. Some small portion of Earth’s gravitational pull is slowing it down! Then, of course, pulls it forward speeding it up as it comes around the other side of the ellipse.
So when the object speeds up a smidge, its orbit becomes elliptical. It has to go significantly faster than that to escape from Earth. In fact, about 41% faster since the difference is the square root of 2.
This also means orbits are stable: if the velocity changes a bit the shape of the orbit changes, but it stays in orbit. If escape velocity equaled orbital velocity, orbits would be unstable: the slightest bump would send it out into space or spiraling inward.
When the math contradicts intuition, it leads to re-thinking which can deepen one’s intuitive understanding.
Escape Velocity is commonly described as the minimum speed an object must reach to escape the Earth (or other celestial body) into space. But this definition is ambiguous and can be misleading.
You can escape the Earth at walking speed, if you could walk straight up; you don’t need anywhere near escape velocity. Imagine a rocket launch; in the first few seconds just as it starts to move, it’s going up at walking speed. Theoretically, it could throttle back the engines to maintain that slight upward speed all the way into space, so long as it didn’t run out of fuel or become unstable. A space elevator could also leave Earth at mundane speeds.
The key to this ambiguity is escape velocity applies to a free body, an object that is passively moving according to the laws of physics, having no thrust of its own. In other words, if a rocket achieves escape velocity, it could at that point turn off its engines and it would still escape the Earth. Intuitively it seems the higher the altitude, the slower the escape velocity. This turns out to be correct.
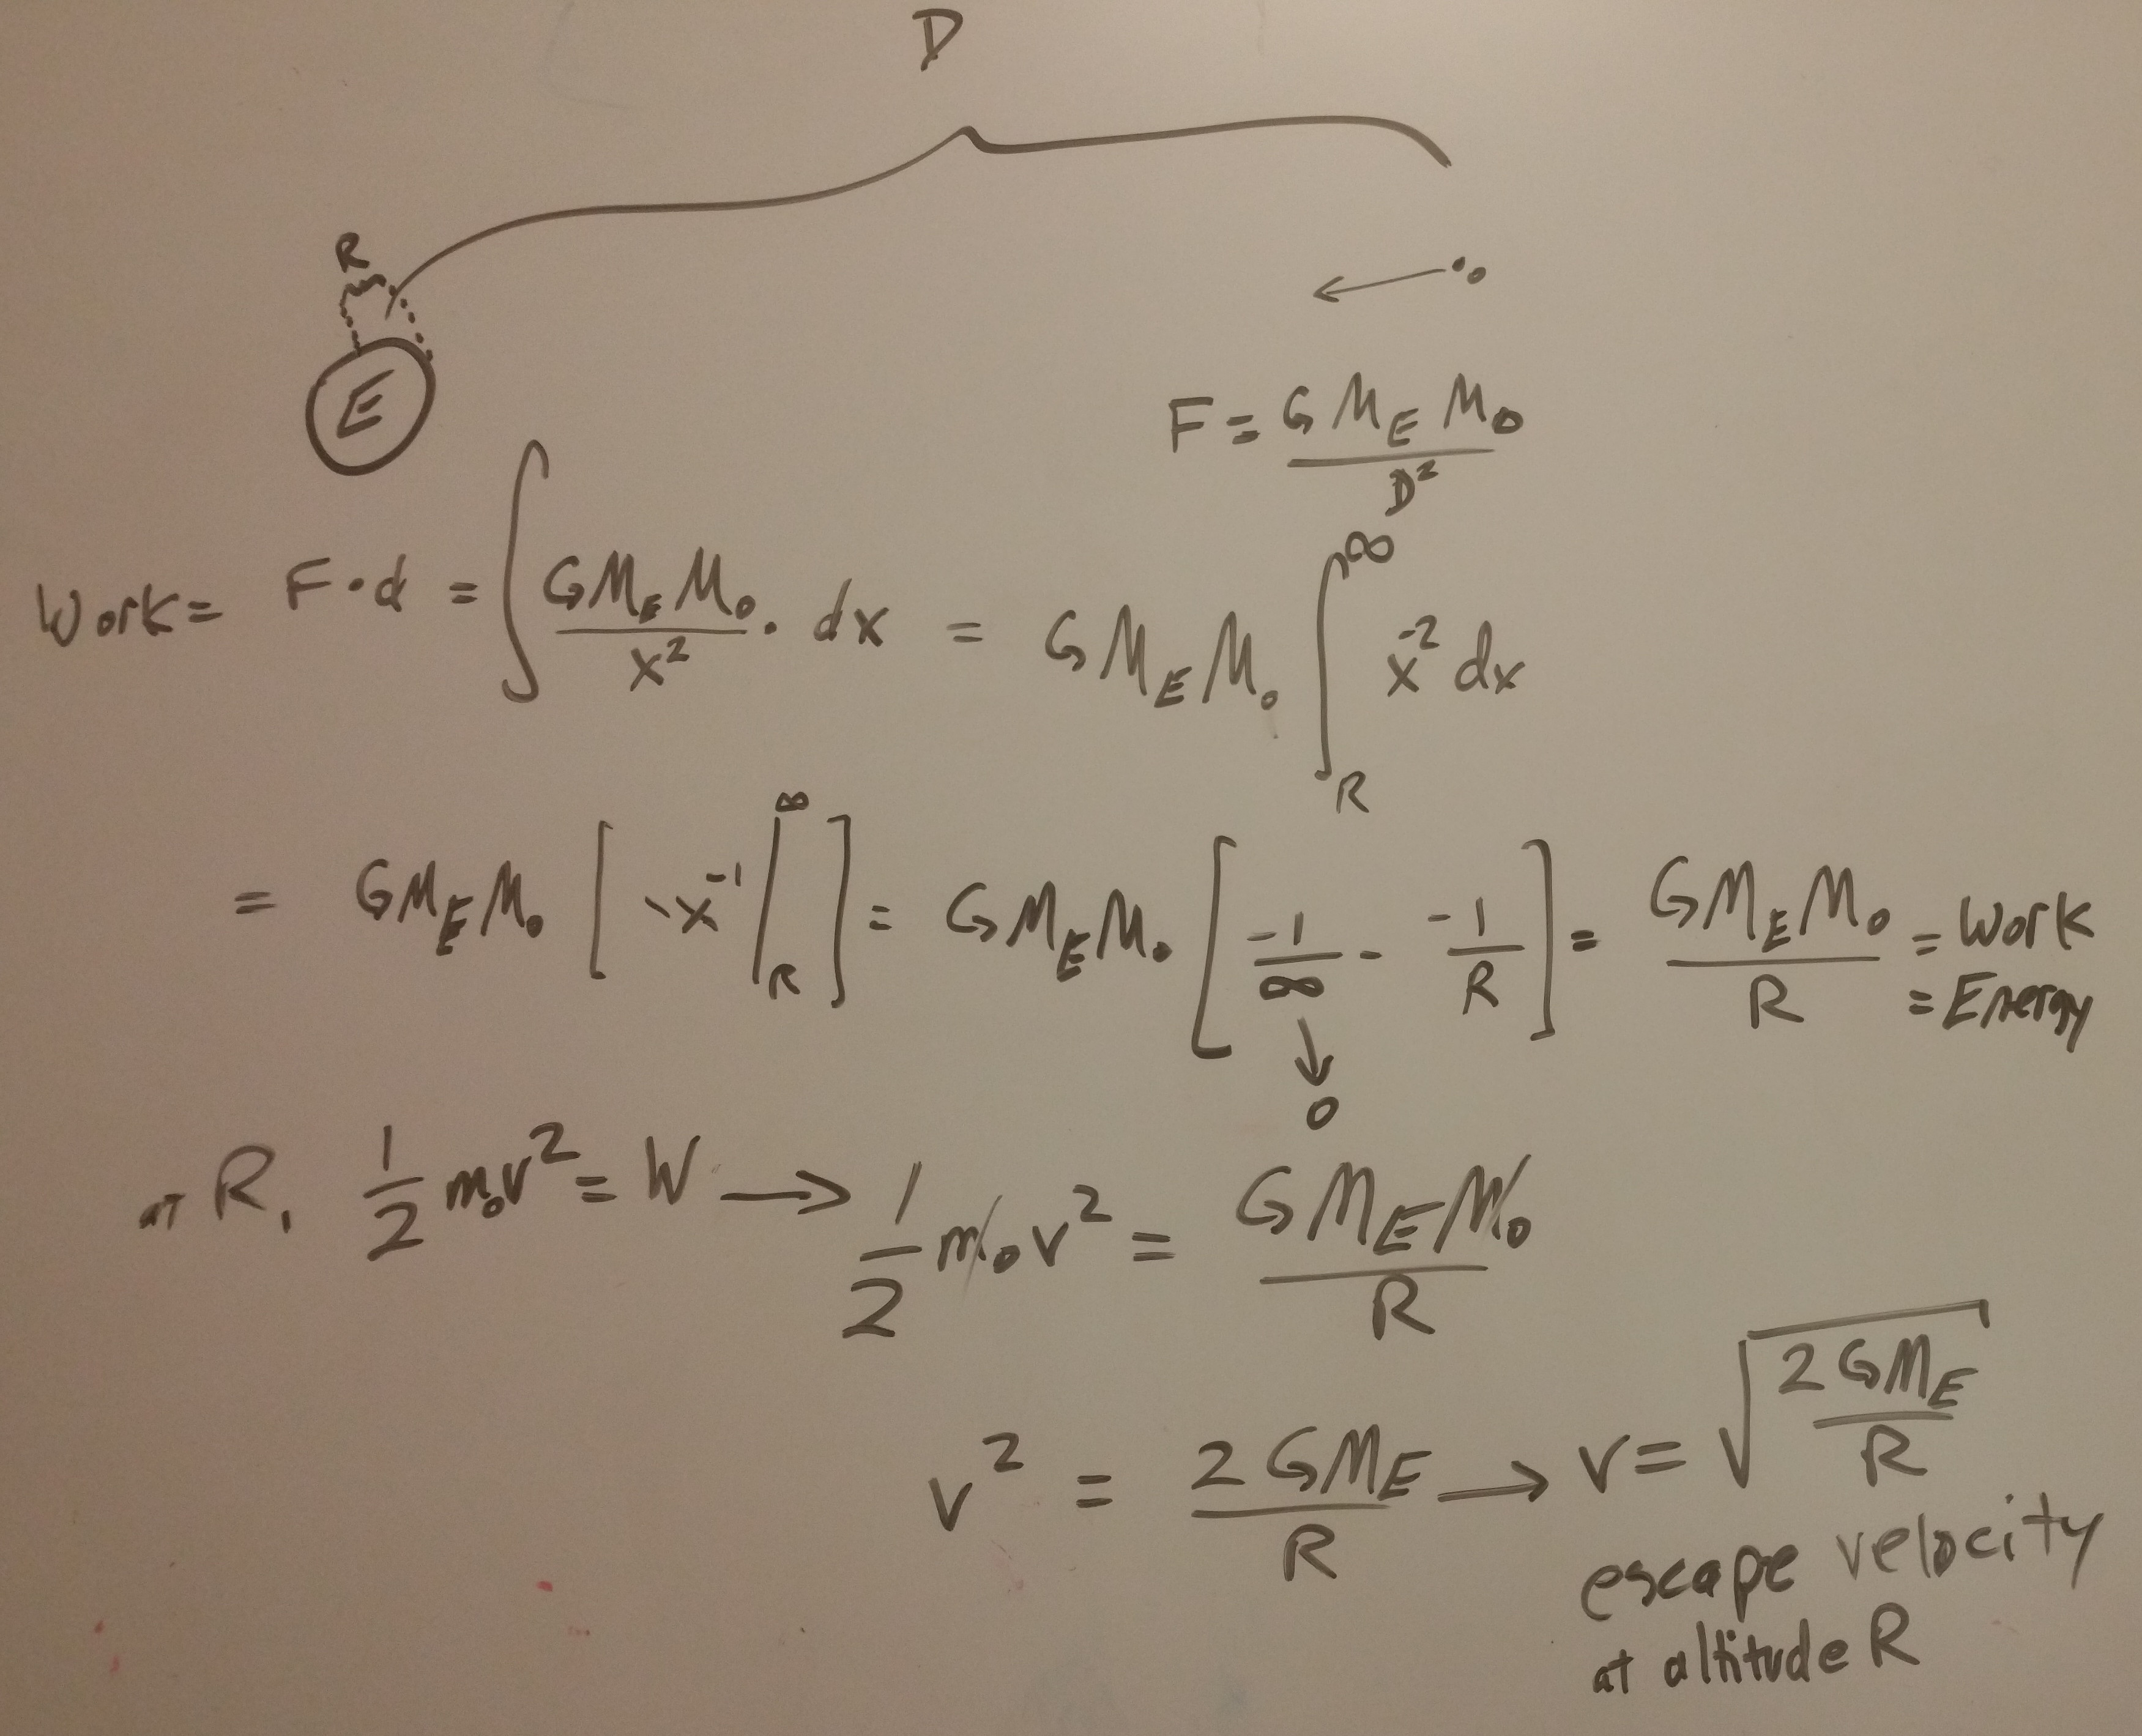
Escape velocity is easy to understand and derive mathematically with some creative thinking. Imagine 2 objects in space (a big one and a much smaller one, like the Earth and a stone) surrounded by vacuum, no other objects. So there is no friction and no other bodies exerting gravitational pull. Suppose the stone is at rest relative to the Earth and almost infinitely far away. The gravitational pull is effectively zero. Imagine the stone precariously balanced just on the outer rim of Earth’s gravity well. Then you nudge the stone just a smidge toward the Earth, so it crosses that rim and the Earth starts pulling on it (and vice versa). It starts out slow, but accelerates toward the Earth incrementally faster and faster.
Eventually, when the stone reaches the Earth it will be moving very fast. Escape velocity is the speed it is going just before it smashes into the Earth. Or if it misses the Earth, it’s the speed at its point of closest approach. More correctly and completely, the stone is always traveling at escape velocity at every moment along its path. The escape velocity for that distance from the Earth, is the speed at which the stone is moving when it’s that far away.
Note: the bold face statement above is the nut of this explanation. When you grok its fullness, you grok the fullness of escape velocity.
That’s because of conservation of energy. When the stone was at the rim of Earth’s gravity well, it had a lot of potential energy. At the point of closest approach, all that potential energy has been converted into kinetic energy. Assuming no atmosphere, no losses, the two energies are equal. So as the stone speeds past the Earth, slowing down due to the same gravitational pull that sucked it in, that kinetic energy is converted back into potential energy. So it must reach the exact same distance away when it peters out and eventually stops.
The direction of motion is irrelevant to escape velocity. Normally this seems counterintuitive, but understanding escape velocity with our theoretical example, you can easily see why direction doesn’t matter. At that point of closest approach, it doesn’t matter what direction the stone is moving relative to the Earth. It could be nearly straight up (can’t be exactly straight up, or it wouldn’t have missed), or nearly horizontal. If it’s going horizontal, it has to travel further to escape, but being horizontal, gravity isn’t pulling it as hard. These conflicting factors are equal and cancel each other. All that matters is the altitude (distance of closest approach), because the speed depends only how much energy it’s gained from Earth’s gravity field.
If, at that point of closest approach, the stone were moving any slower, then it would have less kinetic energy, and it will not go as far away. That means it won’t make it to the rim of Earth’s gravity well, so it will still be inside the well, reverse direction and eventually come back to Earth. So escape velocity is the minimum speed a free body can have, and escape the Earth.
Of course, in the real world direction does matter. The Earth has an atmosphere that creates a lot of friction and energy loss at high speeds. If you go straight up, you’re in the atmosphere for a shorter time, less energy loss. If you go horizontal, you’re in the atmosphere longer and will lose more energy.
Mountain flying in small single engine airplanes adds potential risks. But there are things pilots can do to minimize these risks and do it safely.
Night: don’t do it. Night adds risk, mountains add risk. Either alone can be safe if you take precautions. But don’t combine them.
Fuel: use a bigger fuel reserve because there is greater chance to be delayed – either having to take an alternate route, or due to strong wind. But don’t simply top off the tanks if you don’t need to because that can add unnecessary weight, impairing performance. Flying in mountains at high DA, you need all the performance you can get. Normally, I plan to land with at least 1 hour of fuel in the tanks. When flying in mountains I increase this to 90 minutes.
Water: you’ll be at high altitude which is dehydrating. Bring plenty of water for everyone on board.
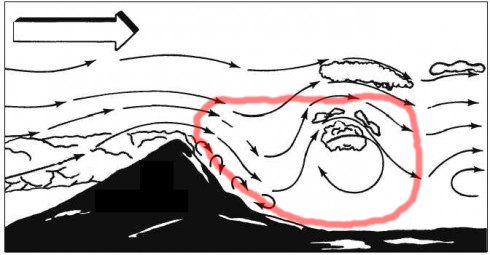
Wind: understand how wind flows around mountains and plan accordingly. Here’s a great picture I got by Googling:
I’ve circled in red the areas you should never fly. Here be dragons: down-drafts and turbulence.
Nasty wind effects begin at around 20 kts. If the UA forecast shows winds this strong over the mountains you’re crossing, consider an alternate route or be at least 50% higher than the highest ridge (see below).
Crossing mountains against the wind is super nasty:
First, you have the obvious: a headwind which slows down your ground speed and kills efficiency – and you’re at high altitude where winds are generally stronger.
Second, the downwind side of the mountain has strong down-drafts, so you need to climb just to maintain level altitude, which saps speed and efficiency even further.
Third, the downwind side also has a lot of turbulence. The last time you need turbulence is when your ground speed is slow and you are fighting down-drafts.
Fourth, you are at high altitude, where your engine has less power and your prop & wing are less efficient. Just when you need power and efficiency the most, you don’t have them.
Nasty wind effects exist from the surface to about 50% higher than the height of the ridge. For example if you’re crossing an 8,000′ mountain on a windy day, you need to be at least 12,000′ high to avoid the worst down-drafts and turbulence, though you will still feel some mountain wind wave effects.
Climb early. Know how high you need to be and get there well before you reach the mountains. If you get too close before climbing, you may get stuck in down-drafts making it impossible to climb to the altitude you need.
To summarize, if you’re flying over mountains here are ways to minimize the risk:
Do it during the day.
Have more fuel than you need, but not so much you’re unnecessarily heavy.
Climb to 50% higher than the highest ridge at least 50 miles before you reach it.
This is not necessary with calm or very light winds.
If you’re going against the wind, use full power properly leaned. At 10,000′ your engine only makes about 70% of its rated power. You need it all, and in the high altitude cool thin air you can’t hurt the engine.
If you get into mountain waves, ride them instead of fight them.
If they’re smooth and gentle, let them push you up or down at least 500′ before counteracting them.
If they’re pushing you too far up, maintain power, nose down & gain some airspeed.
If they’re pushing you too far down, maintain power, nose up to Vy if necessary to minimize the altitude loss.
Remember at sea level Vx is always slower than Vy. As you climb Vx gets faster, Vy gets slower, until they meet, which is your airplane’s absolute ceiling.
If you’re going against the wind, after you reach the top of the highest ridge you’ll be in an up-draft with a lot of altitude you no longer need. Nose down and convert all this energy into airspeed. You’ll regain some of the lost time and efficiency.
On July 4, 2016, I flew in the P-51C. Got a little instruction and stick time, and a 0.7 hour log book entry I will treasure for the rest of my life. It was every bit as amazing and cool as I expected.
After a few mins getting the feel of the P-51, this conundrum hit me. Sure it has enough fire-breathing power and performance to kill you in a blink, and there’s this foreboding sense of responsibility not wanting to screw up and destroy a magnificent 70-year-old piece of history despite having the CFI on board doing the real flying. Yet at the same time I expected the P-51 to be this beasty monster and instead found it so smooth and responsive and natural feeling, not just fast but also quick despite its weight, sensitive but not twitchy, just a really sweet flying airplane. I don’t mean to imply it’s easy to fly, at 0.7 hours I’m no judge of that, I don’t even have the skill to fly it on my own – the CFI up front did all the hard work. Even so, it seemed much more well behaved than I expected which left me in even greater awe of the men who designed it, and admiration for the men who mastered this airplane and flew it into battle.
From what I’ve read, more than half the pilots and planes lost during WW-II were in training or other non-combat activities. That goes to show that flying warbirds like the P-51 and AT-6 is like holding a tiger by the tail. I expected the tiger to be evident in every aspect of the plane: noise, control, handling, vibration, twitchiness, etc. What I didn’t expect was such a smooth responsive sweet flying airplane. Yet this actually makes it even more scary and dangerous because the tiger hides and whispers “you can do it”, until it suddenly strikes.
Normal: all standard private and commercial flight maneuvers up to 60* bank angle. Must withstand 3.8 G or more.
Utility: additional flight maneuvers like spins and > 60* bank angles. Must withstand 4.4 G or more.
Acrobatic: any maneuver or bank angle not prohibited by the POH. Must withstand 6.0 G or more.
All certified GA airplanes meet the Normal category, many (like the Cessna 172) meet the Utility category, and some meet Acrobatic. With 3.8 G as the minimum, this means airplanes are built very strong.
You don’t really know how strong the airframe is because the G rating is a minimum. It can handle that G load under normal operation. Certainly it can handle more, but how much more is unknown. If you exceed it, you’re the test pilot – that’s bad, don’t do that.
Being certified Utility doesn’t necessarily mean the airplane can perform any maneuver exceeding 60* of bank. For example many aircraft certified Utility are not approved for spins. Prohibitions like this are listed in the POH.
Airplanes certified for multiple categories may not always satisfy all categories. For example the Cessna 172 is certified Utility only when gross weight is under 2,100 lbs. and CG is forward of a certain point. Otherwise, it’s certified Normal.
In the past 100 years nobody has created a new way to destroy an airplane. Here are the most common ways, roughly in order of most common first:
Weather: pilot didn’t respect Mother Nature (she doesn’t have to respect you – she was here first).
Fuel: pilot ran out of fuel (airplane engines run better with fuel).
Planning: or lack thereof – over gross weight, out of CG limits, density altitude, VFR into IMC, etc.
Maintenance: pilot departed with known aircraft deficiency (airplanes work best when properly maintained).
Pilot was cognitively impaired (fatigue, drugs, etc.).
Stupidity: pilot intentionally did something stupid (buzzing, “watch this”, etc.).
Every aviation accident I know of falls into at least one of these categories – sometimes more than one. The good news is, improving safety is simple common sense. Don’t do these things! Safety improves one pilot at a time. If you don’t do these things, you’ve improved your safety roughly 10-fold and you’re making GA safer than driving or bicycling.
Actually it’s thrust that moves the airplane, but power determines how much thrust you can get any any given airspeed.
Thrust is what pushes (or pulls) an airplane. Thrust is related to power by a simple equation. Removing constant factors, Power = Thrust * Speed. An engine with a constant power output – like any piston engine – gives max thrust (thus max acceleration) at low speeds, with less and less thrust (thus diminishing acceleration) as speed increases, until you reach top speed, where thrust = drag and acceleration is zero.
Put differently: if someone says, “My engine produces 250 lbs. of thrust” you really know nothing. Why? No engine produces the same thrust at all speeds, and he hasn’t told you at what speed it produces that thrust. But if he says, “My engine produces 250 horsepower” you know everything you need to know. From this you can compute how much thrust it produces at any speed, so given the airplane’s mass and drag coefficient, you can compute its acceleration, climb rate and top speed. In this sense, power is what moves the airplane – it determines how much thrust you can get at any speed.
Another way to think about this: forces move objects. But force alone doesn’t tell us much. Any object that actually moves in the real world, moves a certain distance in a given amount of time. Force * distance is work, and work over time is power.
Example
Consider this from the perspective of the airplane’s propeller. It’s spinning at a certain rate, with a certain amount of torque. Suppose that’s 2,000 RPM and 1,500 ft.lbs. of torque.
That propeller might be powered by an R-1340 piston engine spinning at 2,000 RPM making 1,500 ft.lbs. of torque. Here, the engine is spinning at the same speed as the prop so they can be directly connected, no gearing needed.
Alternatively, that propeller might be powered by a PT6 turbine spinning at 30,000 RPM with 100 ft.lbs. of torque, through a 15:1 reduction gear. The 15:1 reduction gear cuts the RPM by 1/15 and boosts the torque by 15:1, which means 30,000 / 15 = 2,000 RPM and 100 * 15 = 1,500 ft.lbs.
Either way, the propeller can’t tell the difference. Because in fact there is no difference. Either way the propellor spins at 2,000 RPM with 1,500 ft.lbs. of torque, which is about 570 horsepower. The PT6 only has 100 ft. lbs. of torque, which is only 1/15 of the torque of the R-1340. But the PT6 spins 15 times faster, so torque * RPM is the same. In discussing Torque and RPM, neither alone tells you what the engine can do. It is their product, power, that moves the airplane.
Another Example
Suppose someone tells you, “My truck has 500 ft. lbs. of torque”. From this it’s impossible to know how fast it can tow a load up a hill. Towing the load up the hill takes a certain amount of work. You can do that work quickly or slowly. Power is how quickly you do the work. The little electric motor that rolls the truck’s windows up and down can also tow any load up a hill – given enough time, it can do any amount of work. As Archimedes said, “Give me a lever long enough and I’ll move the world”. But if you want to tow a real load up a real hill in the real world, you care how long it takes. Power tells you that.
If that truck makes its 500 ft.lbs. at 3,000 RPM, it has 3 times as much power as it does if it makes the same torque at 1,000 RPM. That means it can tow the load up the hill 3 times faster. Once you know the engine’s power output, you know what it can do. Torque * RPM = Power, and any combination of Torque and RPM that makes that power will do the job.
Back to the Point
In short: power moves the airplane.
More precisely, Power = Thrust * Speed * Efficiency. The reason we must include efficiency will become clear.
First, consider an airplane with a fixed pitch prop. At full throttle standing still it pulls around 2300 RPM – well shy of its 2700 RPM redline. It must be designed this way because otherwise, it wouldn’t be able to fly fast enough. As the airplane starts moving, the prop blades see reduced angle of attack to the oncoming air, which reduces resistance, it would want to spin faster but couldn’t because it would already be at redline. The pilot would have to gradually pull back the throttle during the takeoff roll and climb to avoid over-revving.
Now 2300 RPM is about 85% of the 2700 redline, and since Torque * RPM = Power, assuming flat Torque vs. RPM, the engine is making 85% of its rated power. If you have a 160 HP engine then you have about 135 HP during the takeoff roll, with the engine at full throttle pulling 2300 RPM.
Propeller efficiency is a key factor – it determines how much of the power is converted into thrust. The rest of the power is converted into noise, turbulence and heat. A propeller achieves its ideal efficiency only at a certain angle of attack. This amounts to a medium-ish airspeed. At slow speeds, and at fast speeds, the propeller is less efficient. So our airplane in the above example effectively has less than 135 HP because it’s moving slowly and the prop is gaining efficiency as it speeds up. To be clear, the engine is making 135 HP but some of that power is being converted into turbulence and noise instead of thrust.
Theoretically, since Power = Thrust * Speed, the speed of maximum thrust is zero. But in reality, the speed of maximum thrust is higher. In reality, as you start the takeoff roll, both power and thrust are increasing because the prop is gaining efficiency as you gain speed.
Power (Vy) vs. Thrust (Vx)
Now let’s consider 2 key airspeeds: Vx and Vy. Every pilot knows Vx is the airspeed that gives greatest angle of climb. If you need to clear trees on the takeoff roll, fly at Vx. Vy is the airspeed that gives the greatest rate of climb. If you want to climb to 10,000 feet as quickly as possible, fly at Vy. The difference between Vx and Vy is thrust vs. power. That is, Vx is the speed of maximum excess thrust, and Vy is the speed of maximum excess power. Here, excess means, above the amount needed to sustain level flight. Some facts about Vx and Vy:
At sea level, Vx is slower than Vy.
As you climb, Vx increases and Vy decreases (as indicated airspeed).
Vx and Vy are equal (as indicated airspeed) at the airplane’s ceiling.
One way to think about this: every climb has an angle and a rate of altitude gain. The angle is determined by excess thrust beyond what is needed for level flight. The rate of altitude gain is determined by excess power beyond what is needed for level flight. So, max excess thrust gives the biggest angle and max excess power gives the highest rate.
Recall the drag vs speed curve of an airplane in flight. Induced drag is high at low speeds, low at high speeds. Parasitic drag is the opposite. The speed having least total drag is the point where they are equal. This is usually much slower than you would normally fly. In my 172, it’s about 60 knots. This is also the speed at which you can glide the longest distance: called Vldmax. Now, knowing that Vx is the speed at which you have the most excess thrust, and drag is what saps your thrust, you might expect Vx to equal the speed of minimum drag. It’s close to that, but always slower. Why? Because your engine makes more thrust at lower speeds, and the relationship is linear. As you slow down just a bit from Vldmax, total drag increases less than linearly, while thrust increases linearly. This means thrust increases more than drag, giving you more excess thrust.
Now consider Vy, the speed where you have the most excess power. This is more complex than Vx because it depends on efficiency. First let’s derive the airspeed of minimum power. It is always slower than the airspeed of minimum drag. Let’s start from that speed – Vldmax – and find out why. Suppose it takes power P to fly at Vldmax. How much power would it take to fly just a bit slower? Flying slower, the drag increases a little – but less than linear – so our speed dropped more than our drag increased. Drag = Thrust and Power is Thrust * Speed, and we just saw that speed decreased more than thrust increased, which means their product, power, is smaller. Thus the airspeed requiring minimum power is slower than the airspeed of minimum drag. However, if we continue slowing down, drag will soon increase rapidly requiring more power – not less!
Here is where propeller efficiency enters the picture. If power output is constant, then the speed of maximum excess power is equal to the speed of minimum power required for flight. That would be slower than Vldmax, yet we know Vy is higher than Vldmax! But in reality, power output is not constant because engine power output and propeller efficiency are not constant. Let’s take these separately.
Engine power output: as you speed up from Vldmax, engine power output increases. That is: higher airspeed reduces the angle of attack of the propeller blades. This enables the engine to rev higher at the same throttle setting, which means the same torque at higher RPM, which is more power.
Prop efficiency: at Vldmax, you have poor propeller efficiency. If you speed up, your propeller becomes more efficient.
As you speed up from Vldmax these two factors combine: engine power and propeller efficiency both increase.